MI
1
VENTED KITCHEN RANGE HOOD
FOR 120 V. OPERATION
KITCHEN
RANGE HOOD
MODEL
RH2300XL-2
SERIES
READ AND SAVE THESE INSTRUCTIONS
Before you begin,
read the following instructions
completely and carefully. If followed, they will simplify
the installation job.
IMPORTANT: OBSERVE ALL GOVERNING CODES
AND ORDINANCES
SAVE THESE INSTRUCTIONS FOR THE LOCAL
ELECTRICAL INSPECTOR’S USE
For most efficient operation, the top of the hood should be
approximately 66 inches (167.6 cm) from the floor. See Figure
5 for examples of two typical ductwork installations. Choose
the best method for your installation.
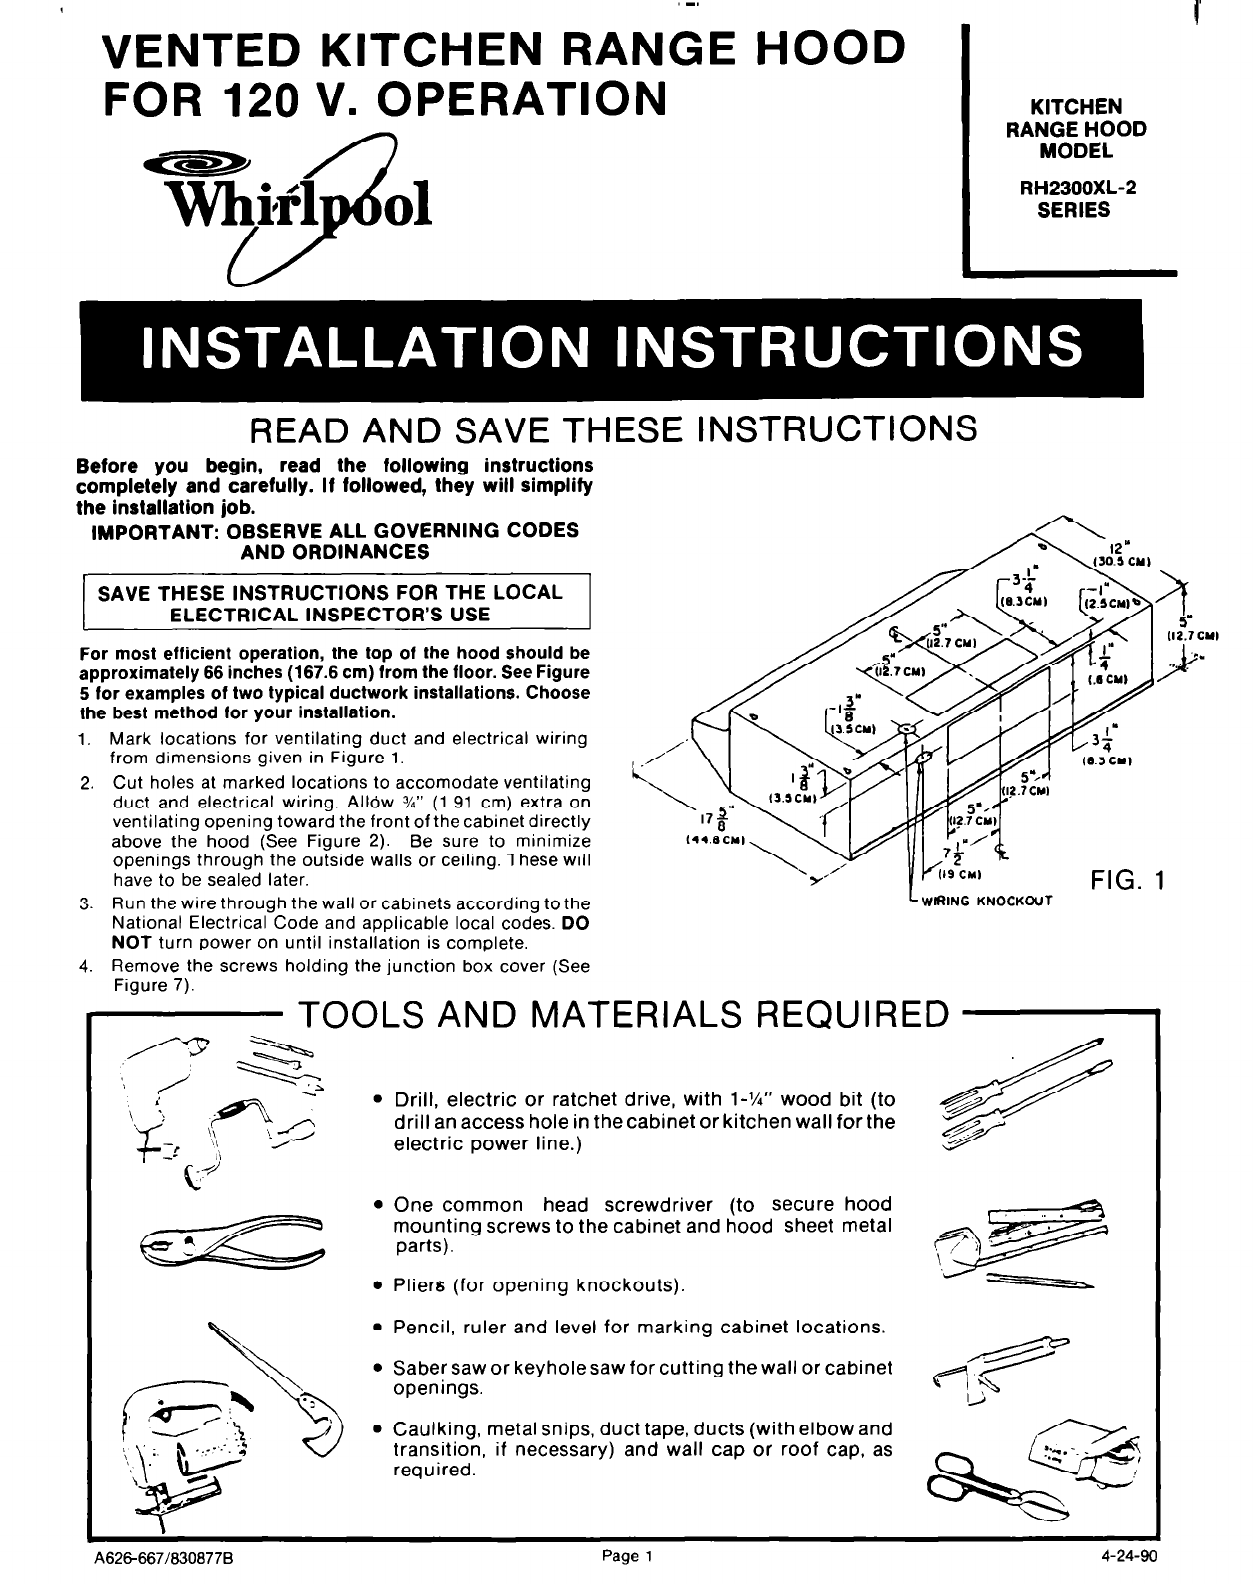
1. Mark locations for ventilating duct and electrical wiring
from dimensions given in Figure 1.
2. Cut holes at marked locations to accomodate ventilating
duct and electrical wiring. Alldw %” (1.91 cm) extra on
ventilating opening toward the front of the cabinet directly
above the hood (See Figure 2). Be sure to minimize
openings through the outside walls or ceiling. These will
have to be sealed later.
3. Run the wire through the wall or cabinets according tothe
National Electrical Code and applicable local codes. DO
NOT turn Power on until installation is complete.
4. Remove the screws holding the junction box cover (See
Figure 7).
TOOLS AND MATERIALS REQUIRED
l
Drill, electric or ratchet drive, with 1-X” wood bit (to
drill an access hole in the cabinet or kitchen wall for the
electric power line.)
l
One common head screwdriver (to secure hood
mounting screws to the cabinet and hood sheet
metal
parts).
l
Pliers (for opening knockouts).
l
Pencil, ruler and level for marking cabinet locations.
l
Saber saw or keyhole saw for cutting the wall or cabinet
openings.
l
Caulking, metal snips, duct tape, ducts (with elbow and
transition, if necessary) and wall cap or roof cap, as
required.
\626-667/6306778
Page
1
4-24-90


