


5. Lift the hood into position and mark the hole locations on
the cabinet for each of the four keyhole mounting slots.
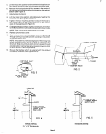
6. Remove the hood and start all four screws in the
Center
of
the narrow neck of the keyhole slot marked on the cabinet
bottom (See Figure 3).
7. Install proper ductwork.
9. Lift the hood into position simultaneously feeding the
electrical wire through the knockout.
9. Tighten the four mounting screws to secure the hood to
the cabinet. Be sure the screw heads are in the narrow
neck of the keyhole slot (Figure 3).
10. Complete electrical wiring in the junction box
according
to the National Electrical Code and applicable local codes.
NOTE: This unit must be permanently grounded,
11. Replace junction box cover.
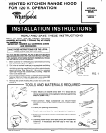
12. Seal holes around ventilating pipe and wiring passing
through ceiling or outside wall with caulking or insulation
to prevent energy loss.
NOTE: It has been found that a large part of the energy loss
of the average home is due to outside air infiltrating the
CABINET CUTOUTS
structure. Seal around duct work where it passes through
outside walls or ceiling. Seal around electrical wiring. And
be sure damper is working properly.
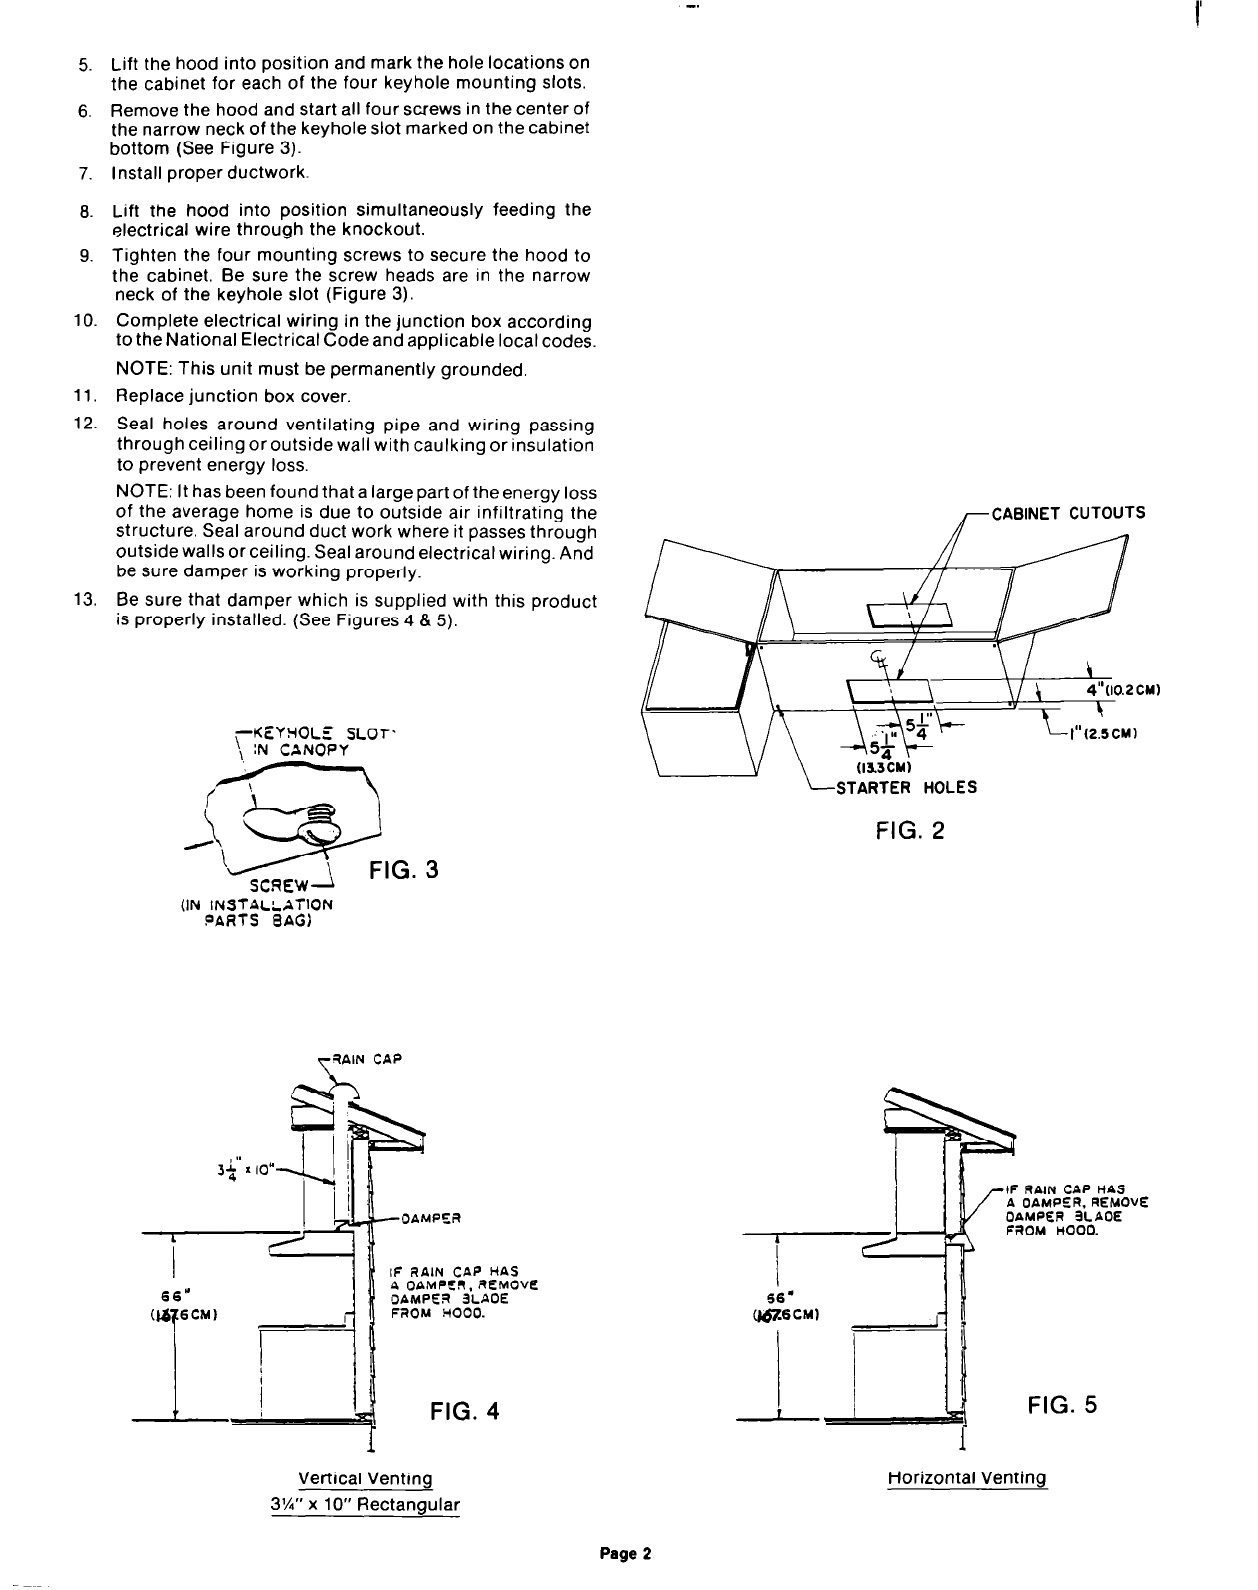
13. Be sure that damper which is supplied with this product
is properly installed. (See Figures 4 8 5).
pEYHOLE SLOT.
\ IN CANOPY
r
ScREWi
FIG. 3
(IN INSTALLiTION
PARTS BAG)
TRAIN CAP
IF RAIN CAP HAS
P OAMPER, 8EMOVE
DAMPER 3LAOE
FROM 3000.
FIG. 2
IF RAIN
CAP
HAS
A OAMPER, REMOVE
OAMPER 3LAOE
FROM HOOO.
Vertical Venting
3%” x 10” Rectangular
Horizontal Venting
Page 2