


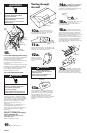

12 .
Remove the screw
holding the terminal
box cover. Remove
cover.
Panel C
OV R30/36" HOOD
Numbers correspond
to steps.
10. 10a.
11. 11a.
13. 13a.
16. 16a.
12. 12a.
17. 17a.
18. 18a.
7. 8. 9.
5.
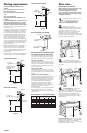
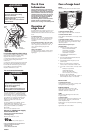
To vent through the roof with
3-1/4" x 10" rectangular vent, mark
a line 1" and 5" from the back wall on the
underside of the cabinet. Mark lines 5-1/4"
to the right and left of the centerline on the
underside of cabinet that connect the lines
just drawn. Use a keyhole saw or saber saw
to cut a rectangular opening for the vent
system. Repeat for the underside of the top
of the cabinet.
To vent through wall with 3-1/4" x 10"
rectangular vent, measure 1/8" and
3-5/8" down from underside of cabinet and
mark on back wall. Measure and mark a
line 5-1/4" to right and left of centerline,
connecting the two lines. Use a keyhole saw
or saber saw to cut a rectangular opening
for the vent system.
To vent through the roof with round vent, a
3-1/4" x 10" to round transition piece must
be used.
6.
Install vent system through the
vent opening in upper cabinet or
wall. Complete venting system according
to method needed. See Venting
requirements. Use caulking to seal exterior
wall or roof opening.
cabinet cutouts
1"
5-1/4"
5-1/4"
5"
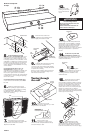
7.
Set range hood on protective
cover. Insert finger into hole in filter
and pull back and down to remove.
Repeat for other filter.
8.
Remove three screws that
hold light cover panel in place.
Remove light panel and set aside.
9.
Carefully disconnect blower wiring
connector from terminal box
connector plug. Snap blower wire retainer
out of blower housing. Carefully set blower
on protective covering.
Note: It is much easier to remove the vent
knockouts and to install the range hood
with the blower removed.
holes
filters
screws
wire
retainer
wire retainer
indents
blower wiring
connector plug
remove
screw
10 .
Remove the roof vent
knockout. Remove top or rear
wiring knockout as needed.
damper blade
(remove if roof cap
has damper blade)
Venting through
the roof
roof vent
knockout
wiring knockout
wiring knockout
11 .
Attach exhaust vent
connection to range hood.
Check that the damper blade rotates up
and down freely, if used.
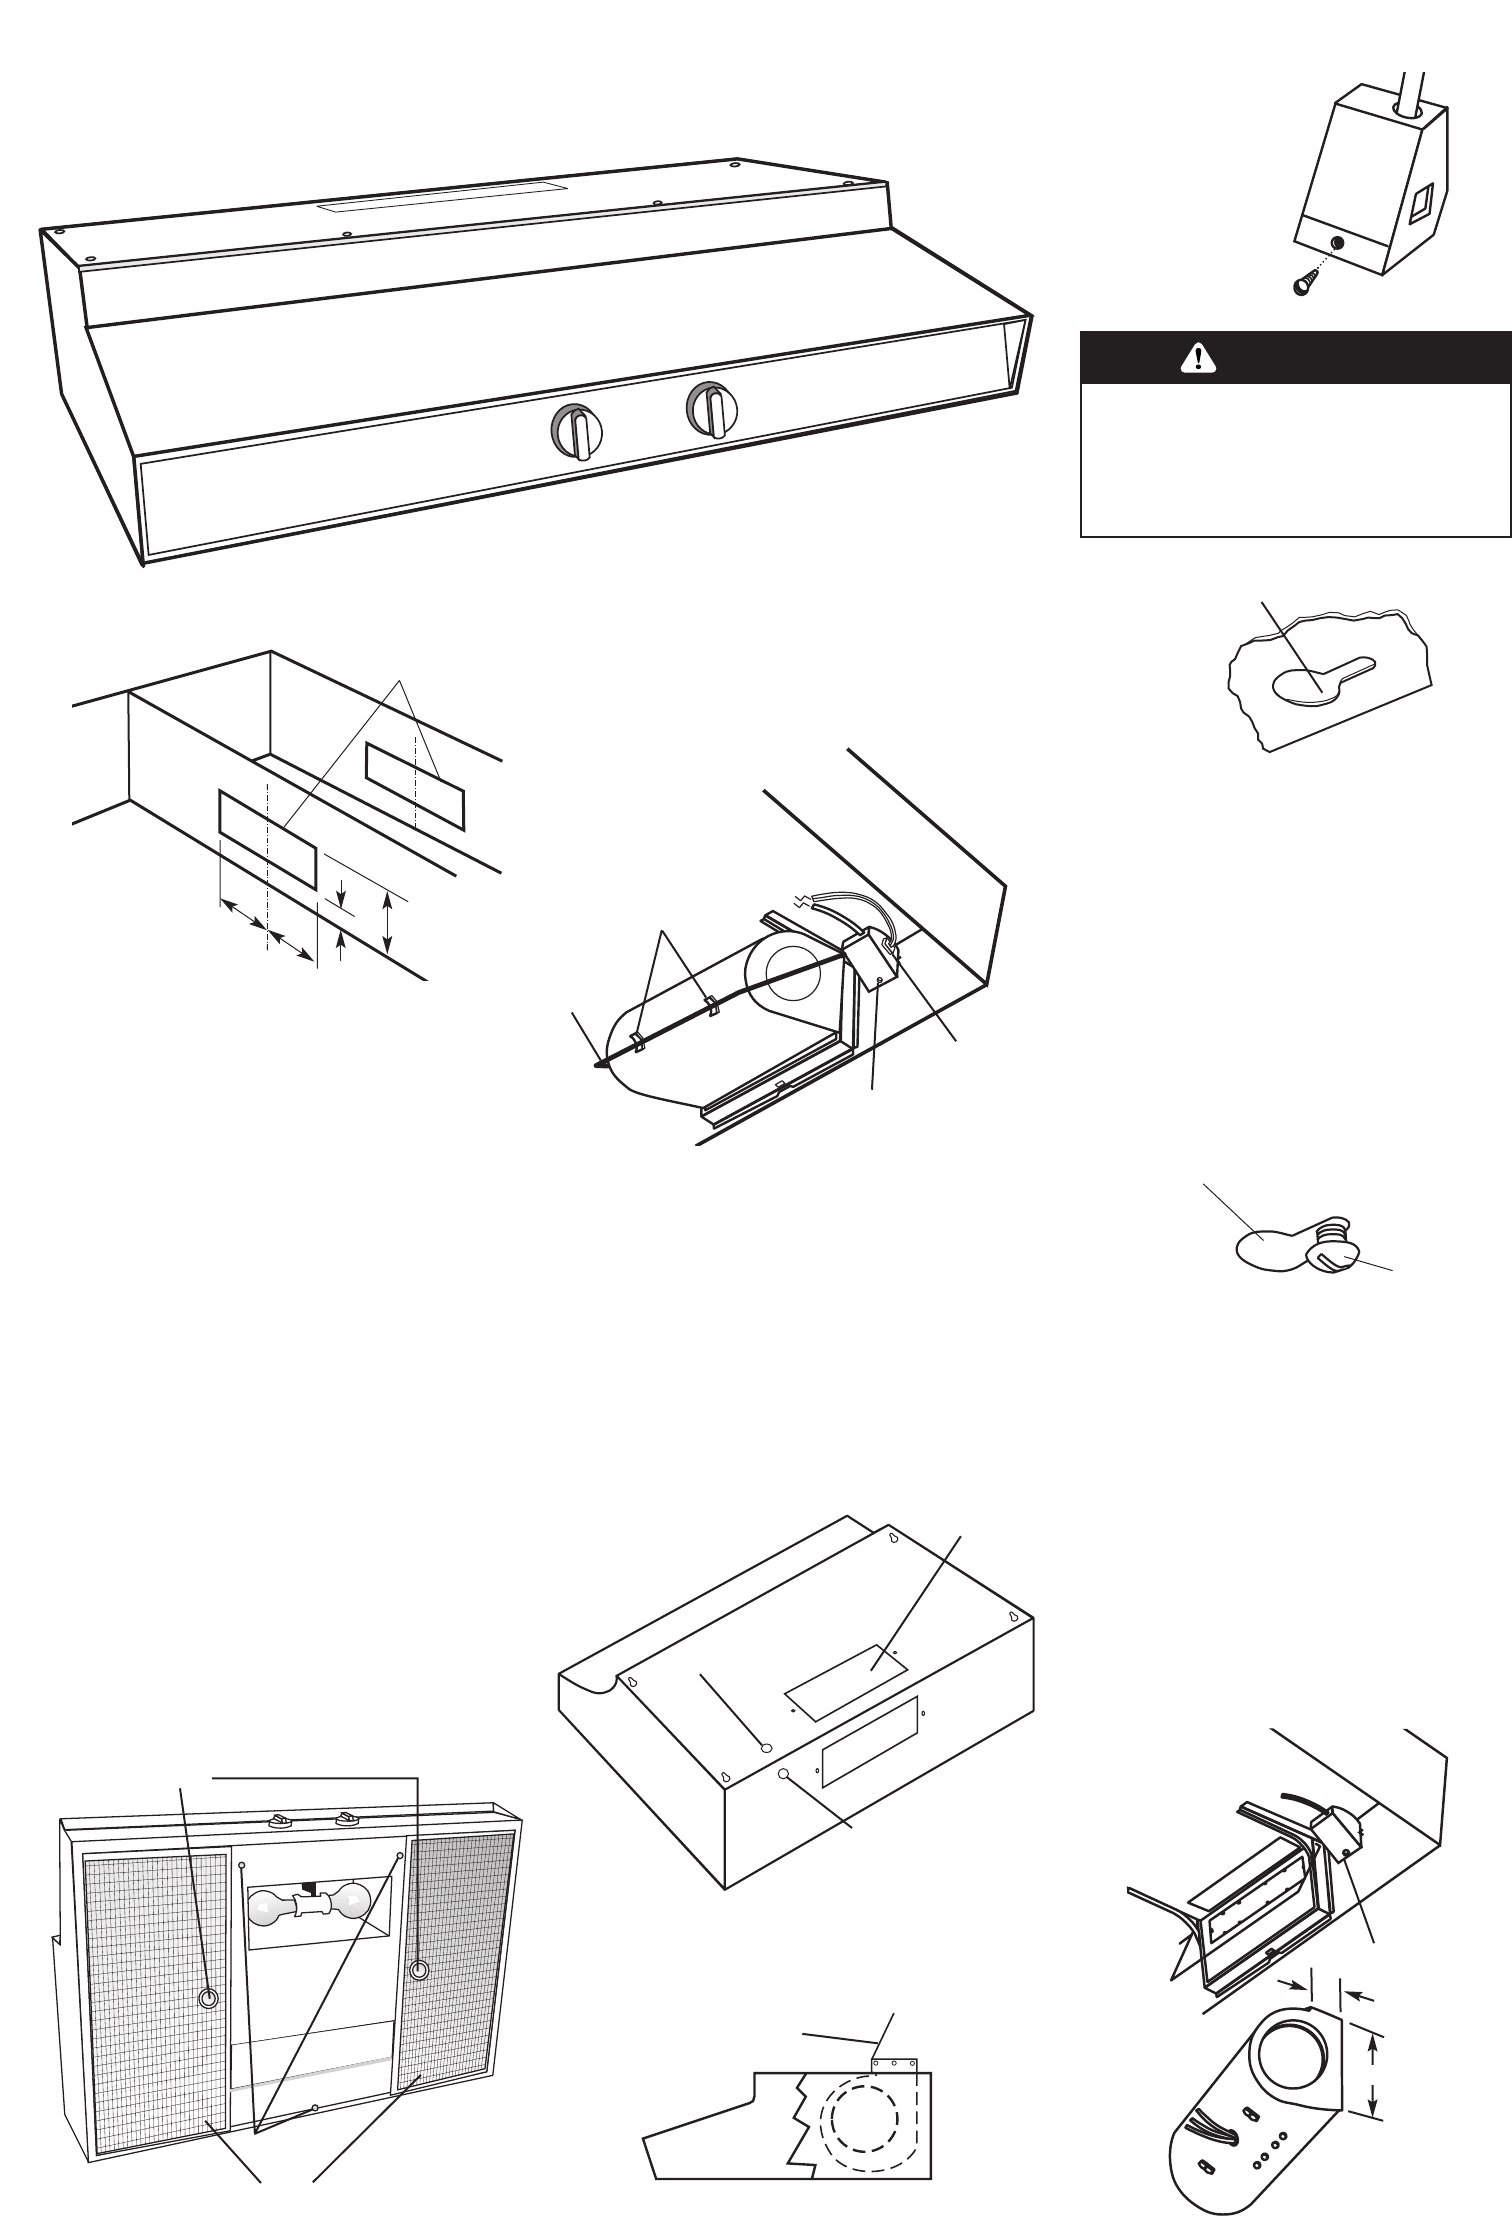
14 .
Do Not turn on power until
installation is complete. Run
wiring through wall or cabinet according to
the National Electrical Code and local
codes and ordinances.
13 .
Lift the range hood into final position and
center. Mark on the underside of cabinet
the location of the four keyhole mounting
slots and the wiring knockout. On some
cabinets, filler blocks may need to be
added for range hood to attach to cabinet.
Set range hood aside on a protected
surface.
keyhole slot
keyhole slot
outline
screw
15 .
Start screws into neck area of
each of the four keyhole
mounting screw slots marked on the
cabinet bottom.
16 .
Lift range hood into position,
and feed electrical wire
through wiring opening. Position the range
hood so that the large end of the keyhole
slots are over the screws. Then push the
range hood toward the wall so that the
screws are in the neck of the keyhole slots.
Tighten mounting screws to cabinet,
making sure mounting screws are in narrow
neck of slots. Make sure that damper blade
rotates up and down freely.
Excessive Weight Hazard
Use two or more people to move and
install range hood.
Failure to follow this instruction can
result in back or other injury.
WARNING
17.
Reinstall blower back into
position. Snap blower wire
retainer back into blower housing indents.
Reconnect the blower wiring connector
back into the terminal box connector plug.
terminal box
3"
5"