INSTALLATION INSTRUCTIONS
1. After removing the shipping carton, be sure to
remove all protective materials such as tape, ship-
ping pads, etc.
NOTE: Waxy residue from protective shipping ma-
terial may be removed from compactor with a mild
solution of liquid household cleaner and water.
2. Open the drawer and remove materials shipped
In the container.
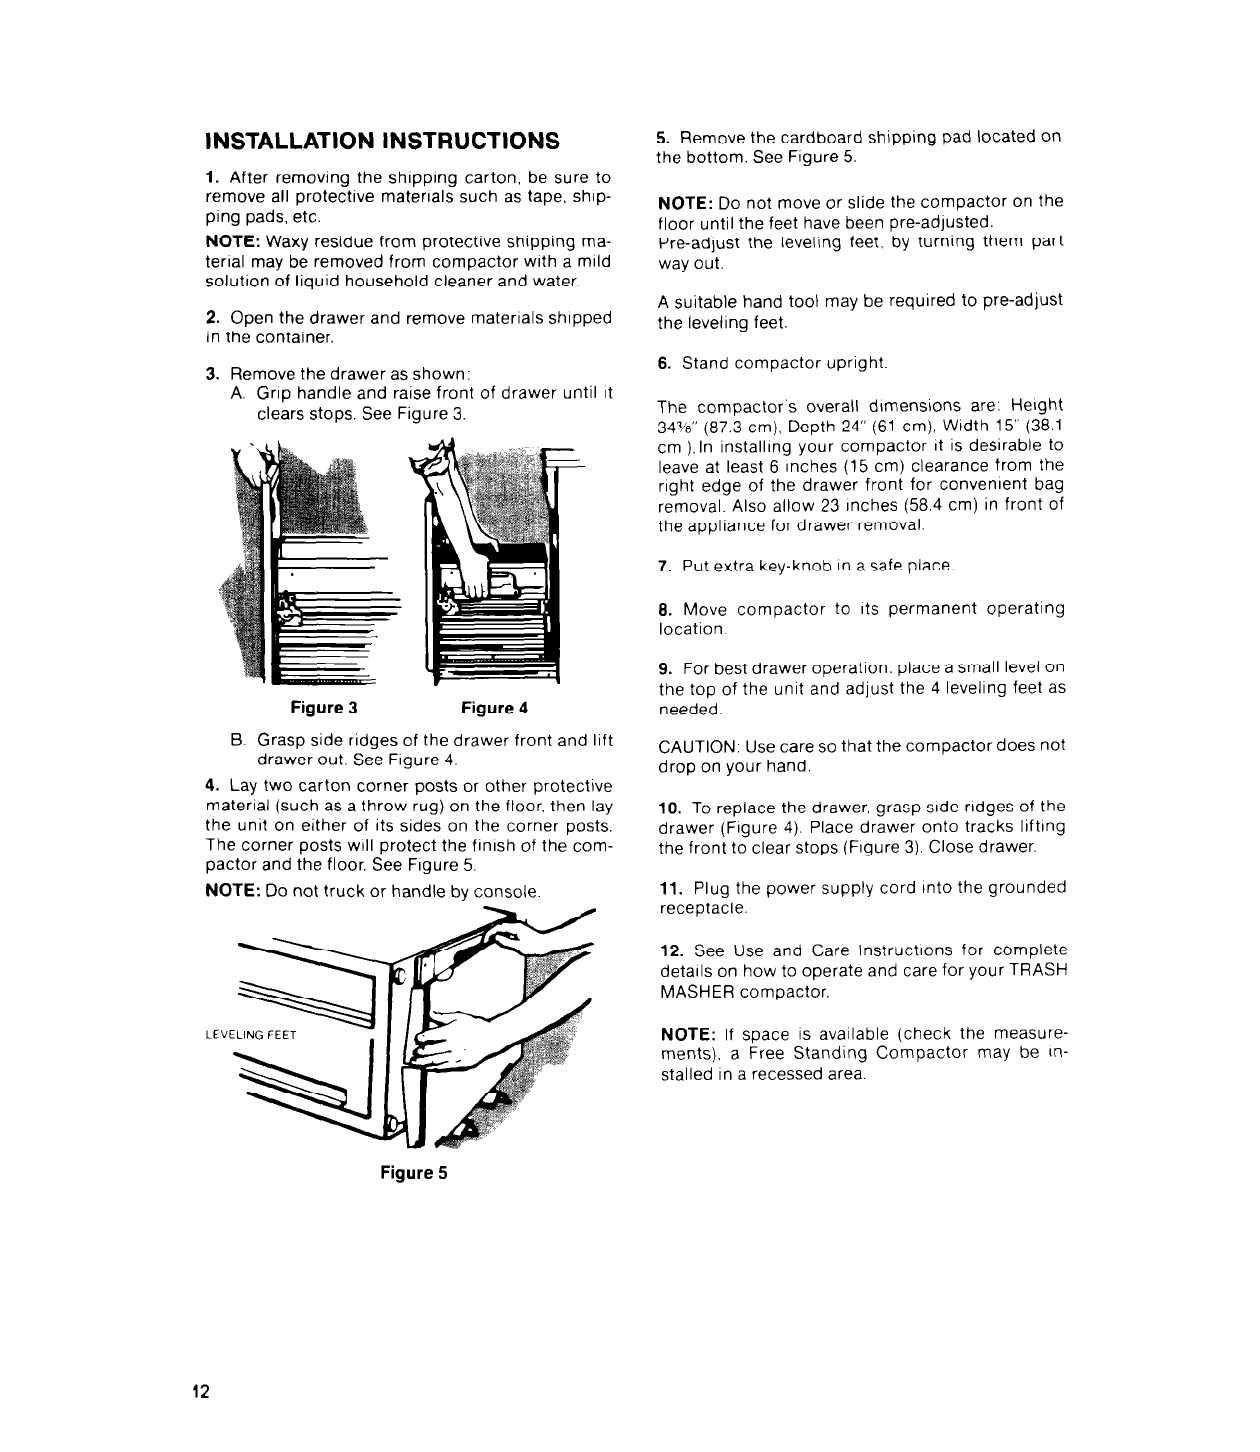
3. Remove the drawer as shown:
A. Grip handle and raise front of drawer until It
clears stops. See Figure 3.
Figure 3
Figure 4
B. Grasp side ridges of the drawer front and lift
drawer out. See Figure 4.
4. Lay two carton corner posts or other protectrve
material (such as a throw rug) on the floor, then lay
the unit on either of its sides on the corner posts.
The corner posts wtll protect the finrsh of the com-
pactor and the floor. See Figure 5.
NOTE: Do not truck or handle by console.
LEVELING FEET
5. Remove the cardboard shipping pad located on
the bottom. See Figure 5.
NOTE: Do not move or slide the compactor on the
floor until the feet have been pre-adjusted.
Pre-adjust the leveling feet, by turning them part
way out.
A suitable hand tool may be required to pre-adjust
the leveling feet.
6. Stand compactor upright
The compactor’s overall dlmensrons are: Herght
34%” (87.3 cm), Depth 24” (61 cm), Wtdth 15” (38.1
cm ).In installrng your compactor It is desirable to
leave at least 6 Inches (15 cm) clearance from the
right edge of the drawer front for convenrent bag
removal. Also allow 23 Inches (58.4 cm) in front of
the appliance for drawer removal.
7. Put extra key-knob
in
a safe place
8. Move compactor to Its permanent operating
location.
9. For best drawer operation. place a small level on
the top of the unit and adjust the 4 leveling feet as
needed
CAUTION: Use care so that the compactor does not
drop on your hand.
10. To replace the drawer, grasp side ridges of the
drawer (Frgure 4). Place drawer onto tracks liftrng
the front to clear stops (Figure 3). Close drawer.
11. Plug the power supply cord Into the grounded
receotacle.
12. See Use and Care lnstructrons for complete
details on how to operate and care for your TRASH
MASHER compactor.
NOTE: If space
IS
available (check the measure-
ments), a Free Standing Compactor may be In-
stalled In a recessed area.
Figure 5
12


