


3
PREPARE THE HOOD - CONT.
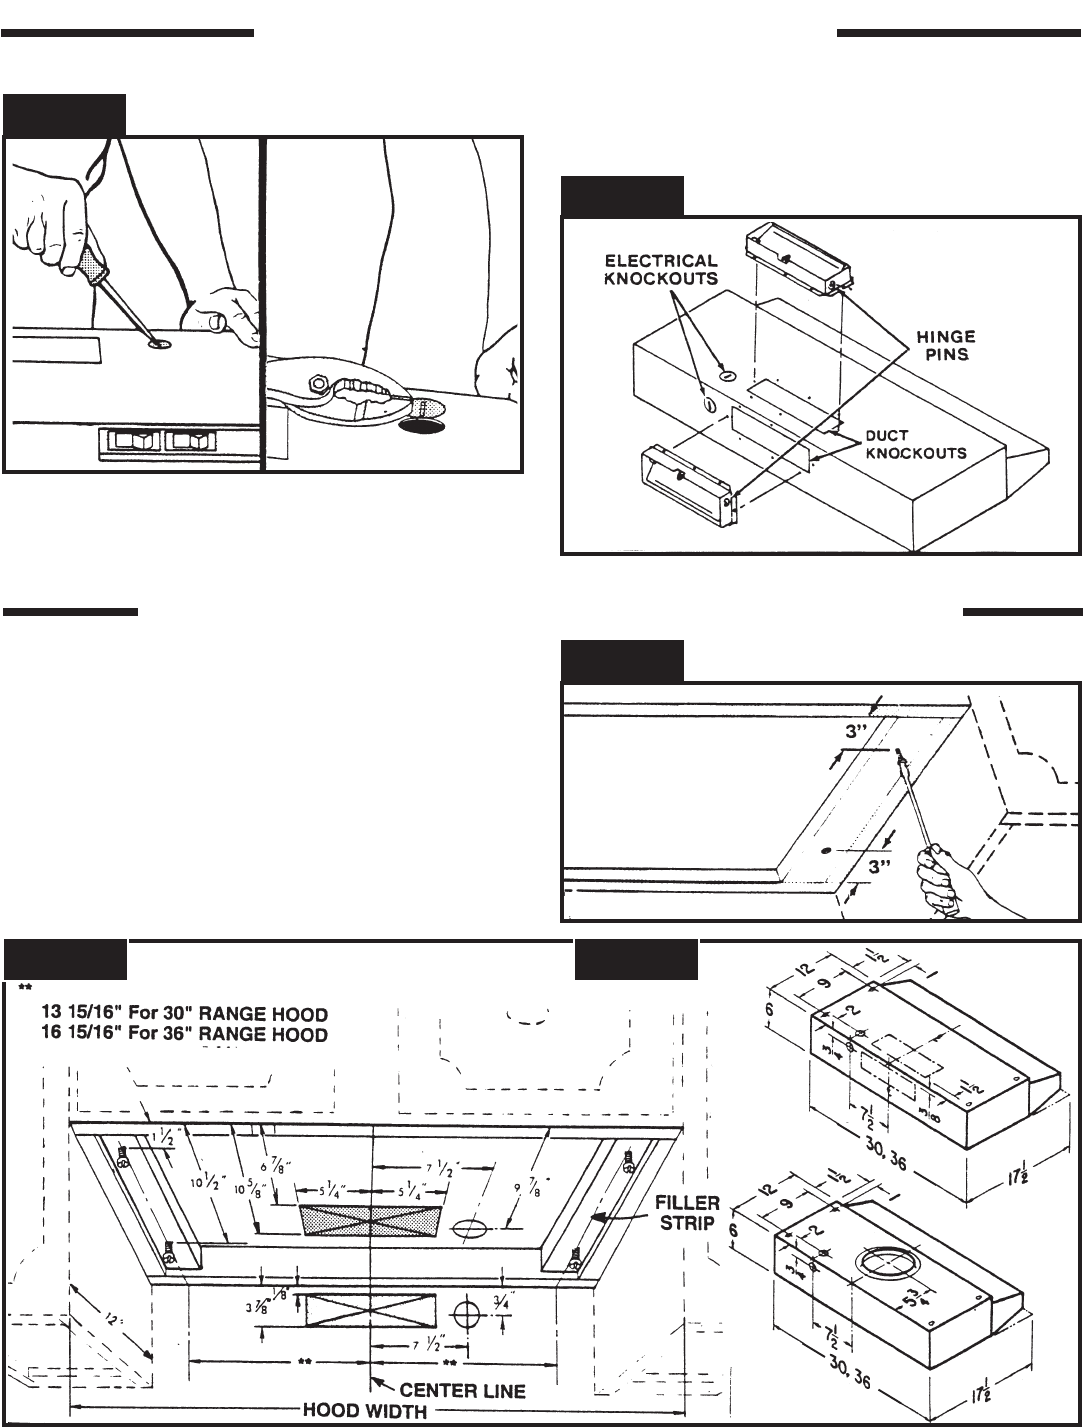
PREPARE THE INSTALLATION LOCATION
FIG. 2
FIG. 3
FIG. 5A FIG. 5B
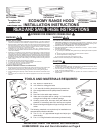
UXT2030AA
UXT2036AA
FIG. 4
UXT3030AA
UXT3036AA
UXT4030AA
UXT4036AA
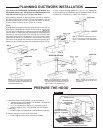
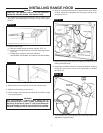
3. Remove top or rear electrical knockout. (FIG. 2)
4. (UXT3030AA and UXT3036AA hoods ONLY) Remove duct
knockout. Insert screwdriver under edge of knockout, break tabs,
and peel knockout back with pliers. (FIG. 3)
5. (UXT3030AA AND UXT3036AA ONLY). Install damper/duct
connector over opening made in STEP 4. Use #8B sheet metal
screws provided. (FIG. 3)
UXT2030AA and UXT2036AA hoods ONLY) Install Model 87
damper (purchase separately) over opening in top of hood.
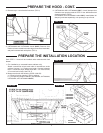
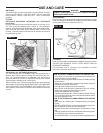
Omit STEP 1 if hood will be installed under cabinets with flush
bottom.
1. (For installation on recessed bottom cabinets only)
Attach a wood filler strip at each side of recessed are under
cabinet. Use two 1" x 2" strips cut to length. If recess is deeper
than 1" use thicker strips. Attach strips with 1-1/4'' wood screws,
3" from end end of strip. See FIG. 4.
2. Measure and mark the following (FIGS. 5A & 5B):
a.) Electrical wiring opening in wall or cabinet.
b.) Duct opening in wall or cabinet. (UXT2030AA, UXT2036AA,
UXT3030AA, and UXT3036AA ONLY)