5
INSTALLING RANGE HOOD
WARNING
TURN OFF THE PROPER CIRCUIT AT THE SERVICE
ENTRANCE BEFORE WIRING THIS RANGE HOOD.
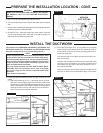
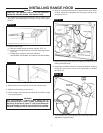
1. Run electric wiring through hole drilled in wall or cabinet. Split
wiring for 6" and install proper connector for type of wire used.
(FIG. 9)
FIG. 9
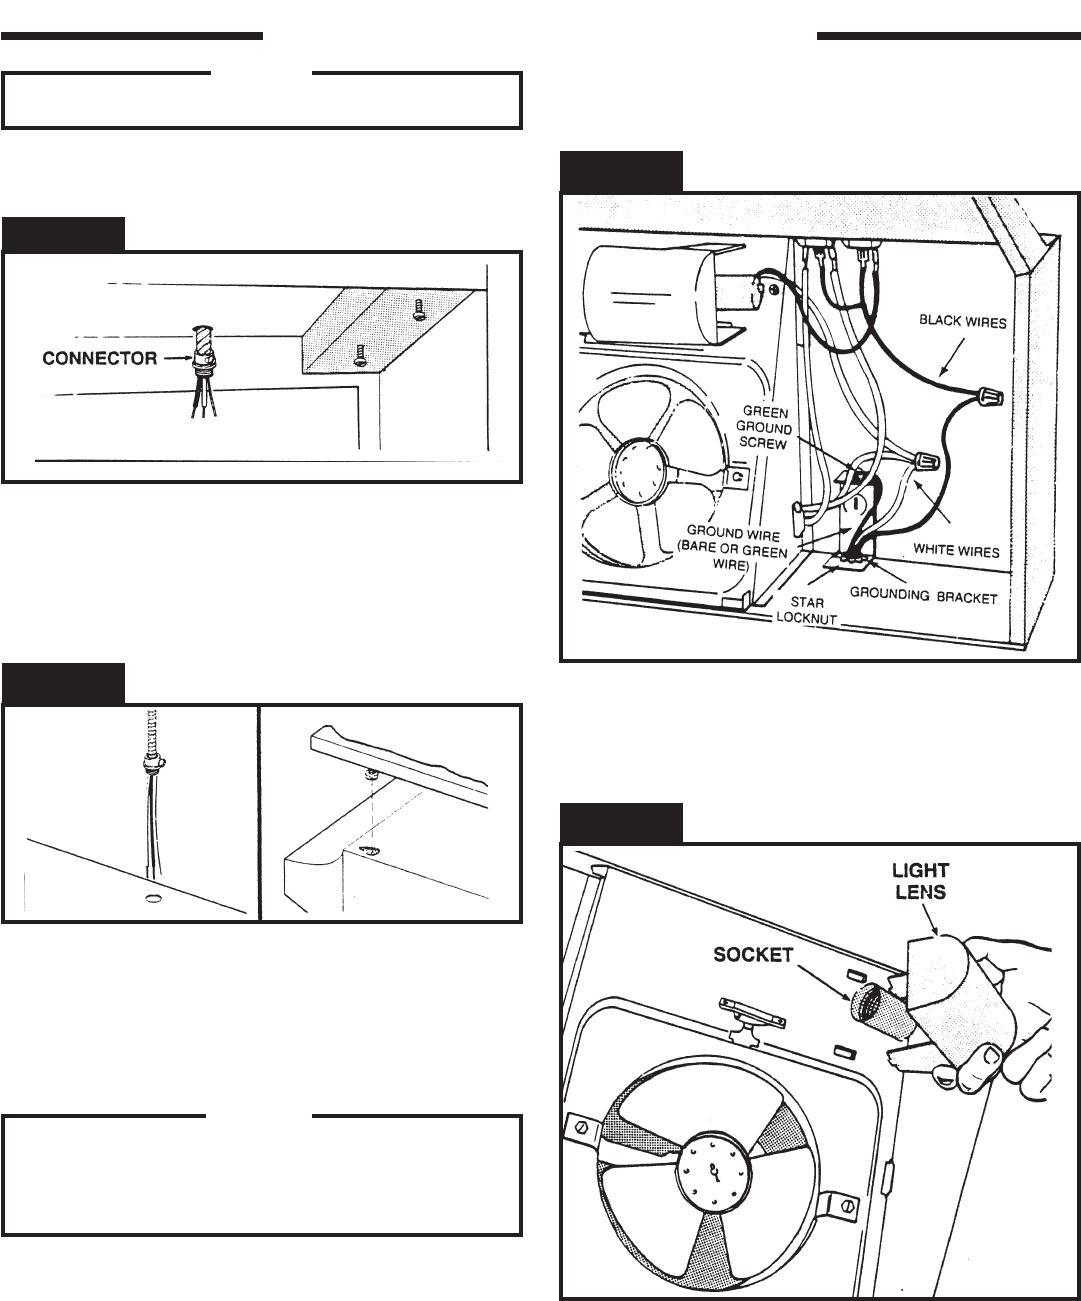
FIG. 11
6. Strip 1/2" of insulation foam wires. Connect white to white, black
to black, and green to prepared hole with green ground screw
provided. (FIG. 11)
2. Position hood so that:
a.) Wiring is routed through knockout opening. (FIG. 10)
b.) Large part of keyhole slots fit over hood mounting screws.
(FIG. 10)
c.) Damper/duct connector slides into ductwork.
(UXT3030AA, UXT3036AA, UXT4030AA, and UXT4036AA.
WARNING
ALL ELECTRICAL CONNECTIONS MUST BE IN
ACCORDANCE WITH LOCAL CODES, ORDINANCES, OR
NATIONAL ELECTRICAL CODE. IF YOU ARE UNFAMILIAR
WITH METHODS OF INSTALLING ELECTRICAL WIRING,
SECURE THE SERVICES OF A QUALIFIED ELECTRICIAN.
FIG. 10
3. Adjust hood so that hood front is flush with cabinet frame.
4. Tighten hood mounting screws firmly.
5. Fasten wiring to hood with proper electrical connector for type
of wiring being used.
7. Replace wiring box cover and screw. Make sure that all wiring is
safely contained inside.
8. Install light (75 Watt maximum) For easier installation, squeeze
plastic lens and remove it from hood. Remember to reinstall
lens (FIG. 12)
FIG. 12
9. Turn on power and check operation of fan and light. Make sure
that damper operates freely.


