15
To Clean Your Refrigerator:
NOTE: Do not use abrasive or harsh cleaners such as window
sprays, scouring cleansers, flammable fluids, muriatic acid,
cleaning waxes, concentrated detergents, bleaches or cleansers
containing petroleum products on exterior surfaces (doors and
cabinet), plastic parts, interior and door liners or gaskets. Do not
use paper towels, scouring pads, or other harsh cleaning tools.
1. Unplug refrigerator or disconnect power.
2. Hand wash, rinse, and dry removable parts and interior
surfaces thoroughly. Use a clean sponge or soft cloth and a
mild detergent in warm water.
3. Clean the exterior surfaces.
Painted metal: Wash painted metal exteriors with a clean,
soft cloth or sponge and a mild detergent in warm water.
Rinse surfaces with clean, warm water and dry immediately to
avoid water spots.
Stainless steel: Wash stainless steel surfaces with a clean,
soft cloth or sponge and a mild detergent in warm water.
Rinse surfaces with clean, warm water and dry immediately to
avoid water spots.
NOTE: When cleaning stainless steel, always wipe in the
direction of the grain to avoid cross-grain scratching.
4. There is no need for routine condenser cleaning in normal
home operating environments. If the environment is
particularly greasy or dusty, or there is significant pet traffic in
the home, the condenser should be cleaned every 2 to
3 months to ensure maximum efficiency.
If you need to clean the condenser:
■ Remove the base grille.
■ Use a vacuum cleaner with a soft brush to clean the grille,
the open areas behind the grille and the front surface area
of the condenser.
■ Replace the base grille when finished.
5. Plug in refrigerator or reconnect power.
Changing the Light Bulb
IMPORTANT: The light bulbs in both the refrigerator and freezer
compartments of your new refrigerator use LED technology. If the
lights do not illuminate when the refrigerator and/or freezer door is
opened, call for assistance or service. In the U.S.A., call
1-800-253-1301. In Canada, call 1-800-807-6777.
1. Unplug the refrigerator or disconnect power.
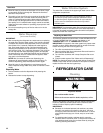
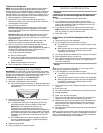
2. Remove the light shield (on some models).
■ Top of the refrigerator compartment - Slide the light shield
toward the back of the compartment to release it from the
light assembly.
3. Replace the burned-out LED bulb(s) with a bulb of the same
size, shape and wattage.
■ To replace the burned-out LED bulb with an LED bulb,
order Whirlpool part number W10565137 (3.6 watts).
NOTE: Some LED replacement bulbs are not
recommended for wet/damp environments. The
refrigerator and freezer compartments are considered to
be wet/damp environments. If using a brand of LED bulb
other than the Whirlpool recommended LED bulb, before
installation, read and follow all instructions on the LED
packaging.
■ If an incandescent bulb is used to replace an LED bulb,
use only incandescent bulbs for household appliances
with a maximum of 40 watts.
4. Replace the light shield.
5. Plug in refrigerator or reconnect power.
Vacation and Moving Care
Vacations
If You Choose to Leave the Refrigerator On While You’re
Away:
1. Use up any perishables and freeze other items.
2. If your refrigerator has an automatic ice maker, and is
connected to the household water supply, turn off the water
supply to the refrigerator. Property damage can occur if the
water supply is not turned off.
3. If you have an automatic ice maker, turn off the ice maker.
NOTE: Depending on your model, raise the wire shutoff arm to
OFF (up) position, or press the switch to OFF.
4. Empty the ice bin.
If You Choose to Turn Off the Refrigerator Before You
Leave:
1. Remove all food from the refrigerator.
2. If your refrigerator has an automatic ice maker:
■ Turn off the water supply to the ice maker at least one day
ahead of time.
■ When the last load of ice drops, raise the wire shutoff arm
to the OFF (up) position or press the switch to OFF,
depending on your model.
3. Turn off the Temperature control(s). See “Using the Control(s).”
4. Clean refrigerator, wipe it, and dry well.
5. Tape rubber or wood blocks to the tops of both doors to prop
them open far enough for air to get in. This stops odor and
mold from building up.
Moving
When you are moving your refrigerator to a new home, follow
these steps to prepare it for the move.
1. If your refrigerator has an automatic ice maker:
■ Turn off the water supply to the ice maker at least one day
ahead of time.
■ Disconnect the water line from the back of the refrigerator.
■ When the last load of ice drops, raise the wire shutoff arm
to the OFF (up) position or press the switch to OFF,
depending on your model.
2. Remove all food from the refrigerator and pack all frozen food
in dry ice.
3. Empty the ice bin.
4. Turn off the Temperature control(s). See “Using the Control(s).”
5. Unplug refrigerator.
6. Clean, wipe, and dry thoroughly.
7. Take out all removable parts, wrap them well, and tape them
together so they don’t shift and rattle during the move.
8. Depending on the model, raise the front of the refrigerator so it
rolls more easily OR raise the leveling screws so they don't
scrape the floor. See “Adjust the Door(s)” or “Door Closing
and Door Alignment.”
9. Tape the doors closed and tape the power cord to the back of
the refrigerator.
When you get to your new home, put everything back and refer to
the “Installation Instructions” section for preparation instructions.
Also, if your refrigerator has an automatic ice maker, remember to
reconnect the water supply to the refrigerator.


