2
INSTALLATION
If the boiler manufacturer recommends a control location, then
follow such recommendations. Otherwise, locate the control as
close to the top of the boiler as possible, but not in the same
section of the boiler that has fittings for domestic hot water.
Never locate the control near a return pipe to the boiler.
PREPARING TO MOUNT CONTROL
This control can be mounted vertically or horizontally.
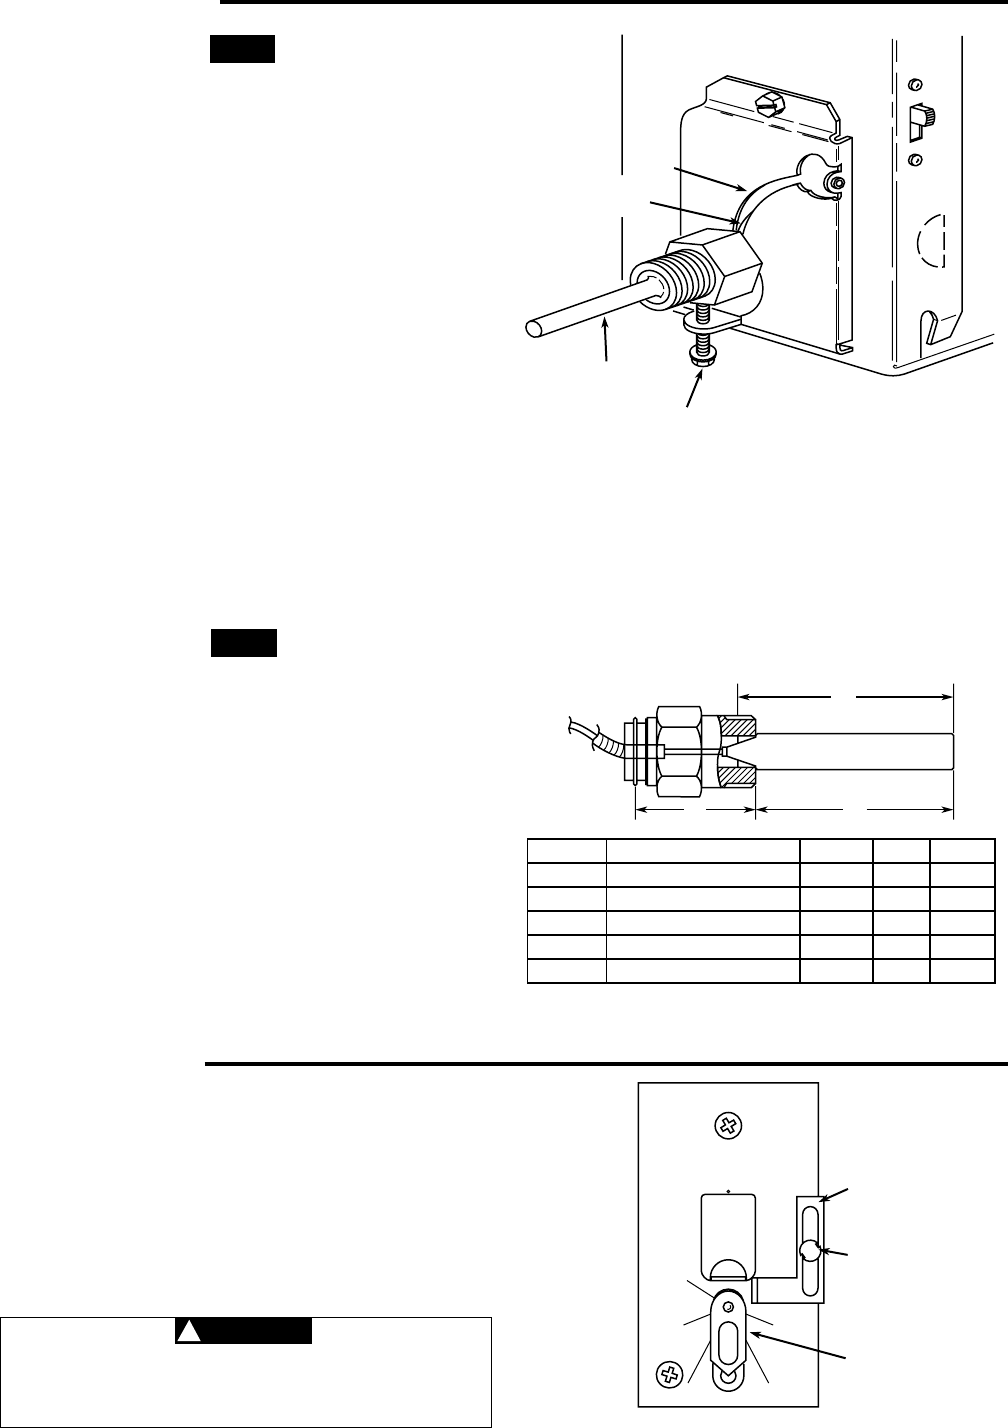
1. Loosen the set-screw holding the well in place (see fig. 1).
2. Push down and out on the well and carefully slide the
capillary tube in slot.
3. Place the well in new notch and tighten the set-screw to
secure the well in the new position.
MOUNTING THE CONTROL
1. Disconnect electrical power to the boiler.
2. Completely drain the boiler.
3. If a well tapping is not provided, prepare one near the top of
the boiler.
4. Sparingly apply pipe joint compound to the well threads and
install well.
Use hex on well for tightening the well. Do not attempt to tighten
by using the case as a handle.
5. Refill the boiler and check for water leaks.
6. Insert the bulb element into the well until it bottoms.
7. Locate and secure the coil of excess tubing so that it cannot
touch electrical components.
8. Fit the back of the case into the well and tighten using the set-
screw on the back panel.
NOTE
NOTE
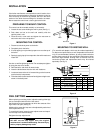
Figure 1
Slot
Well
Set-screw
Capillary
Tube
AB
C
1
⁄
2
” Std. Shank
1
⁄
2
” Std. Ext. Shank
3
⁄
4
” Std. Shank
3
⁄
4
” Std. Ext. Shank
3
⁄
4
” Extra Ext. Shank
1
13
⁄
16
”
3
5
⁄
16
”
1
13
⁄
16
”
3
5
⁄
16
”
4
13
⁄
16
”
3”
3”
3”
3”
3”
3
5
⁄
16
”
3
5
⁄
16
”
3
5
⁄
16
”
3
5
⁄
16
”
3
5
⁄
16
”
89-0211
89-0212
89-0213
89-0214
89-0215
Conductive Grease No. 145-0163
Well No. Description A B C
Figure 2
MOUNTING TO EXISTING WELL
(For use with well adaptor, which may be ordered separately.)
For best control performance, a well comparable to that shown
in fig. 2 is recommended. However, by using a heat conductive
grease, these controls will give satisfactory performance when
used with large-diameter existing wells. If desired, both the
conductive grease and replacement wells may be ordered
separately (see fig. 2).
DIAL SETTING
When replacing an existing control, adjust the setting of the high
limit to correspond with that of the old control.
Set the pointer to the temperature at which the contacts of the
high limit are to open (see fig. 3)
Models with a preset dial stop are to be adjusted by authorized
service personnel only.
To reset the dial stop, loosen the stop adjust screw and reposi-
tion the stop to the desired setting.
Retighten the stop adjust screw.
DO NOT set the stop higher than the original
manufacturer’s recommended setting. Personal injury
and/or property damage may result.
WARNING
!
140
160 220
200180
Stop
Stop
Adjust
Screw
Pointer
Figure 3


