7 8
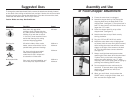
Beat cream, whip egg whites,
puddings, sauces, frostings and other
airy, foamy mixtures. When using, move
blending rod up and down to draw air
in. Use a tall, narrow container for best
results when foaming milk, making
cream and whipping egg whites.
Mix and stir shakes, drinks, omelet
batters, sauces and emulsions. Use for
pancake batter, gravies and dressings.
Cut, chop, and crush raw or cooked
meat and hard vegetables.Grind
cooked meat for use in recipes such
as casseroles or chicken salad.
Chop, crush, and mash vegetables, and
fruit for baby food, soups and sauces.
Assembly and Use
of Food Chopper Attachment
1 Ensure the motor base is unplugged.
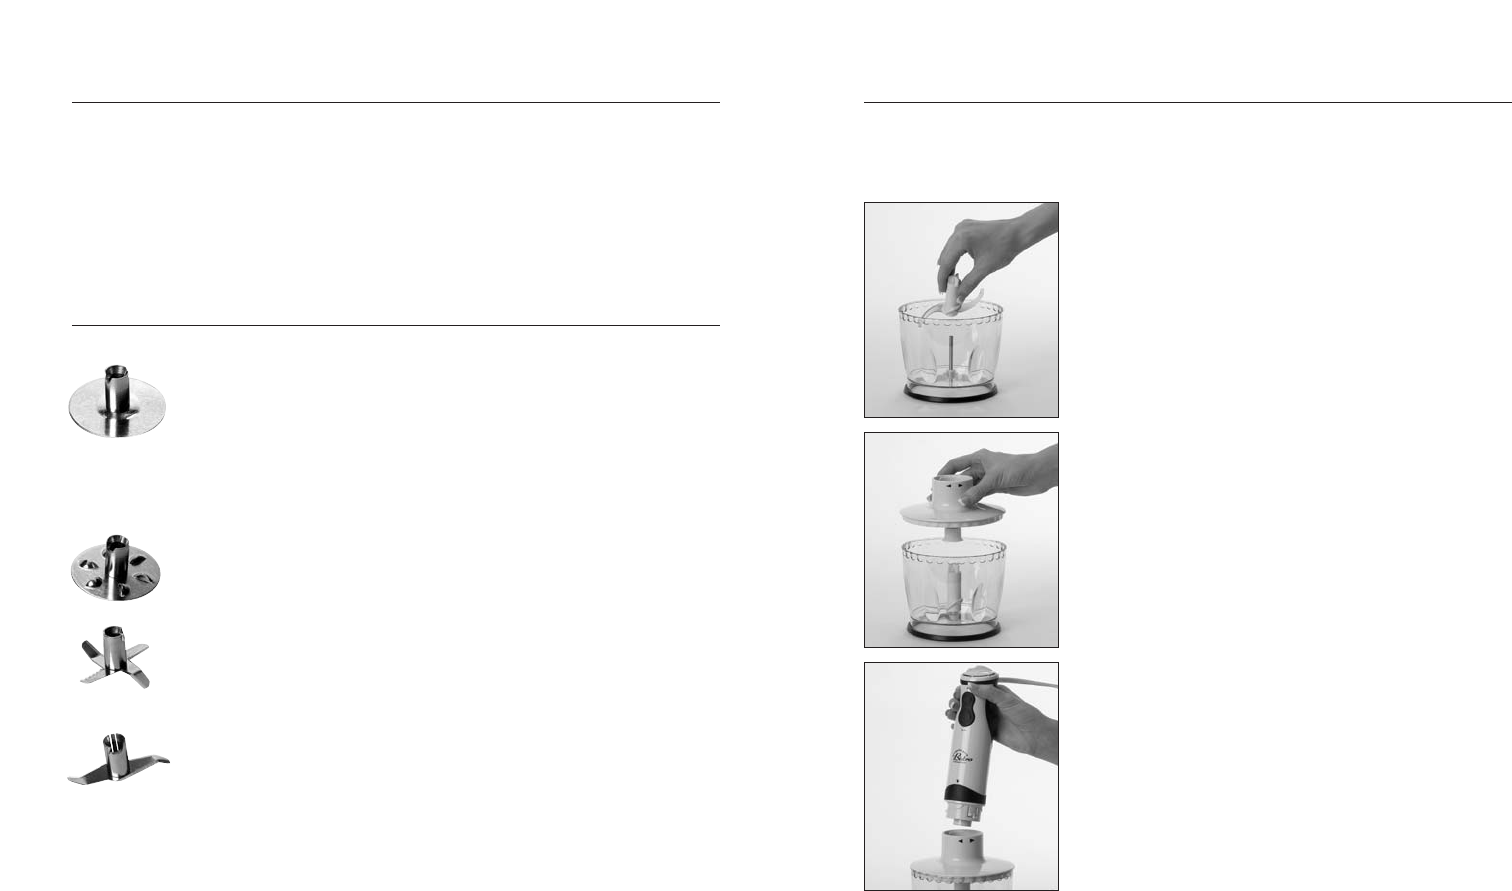
2 Assemble chopper bowl by first placing the
chopping blade onto the blade shaft in the
chopper bowl. (see figure 1) Then place food in
bowl. For best results, solid foods should be no
larger than 1/2" cubes.
3 Place the chopper bowl lid on top of the
chopper bowl. (see figure 2)
4 Attach motor base to top of bowl cover by
turning clockwise.
5 Plug into 120-volt 60 Hz AC only outlet.
6 Attach the motor base to the chopping bowl
as follows: Hold the cover firmly with one hand,
while holding the motor base with the arrows
slightly to the right of the arrows on the bowl
lid. Turn the motor base counter clockwise.
(see figure 3)
7 Always use slight downward pressure when
operating the motor base, while the other hand
is placed firmly on the bowl cover. Always
ensure your speed selector is on “5” when
chopping. Use a pulse action when chopping by
pressing and releasing ON/OFF switch.
8 Do not operate the motor continuously for
more than 15 seconds when using chopper
attachment, otherwise food will be too
finely chopped.
9 When you are finished, simply release the
ON/OFF switch, unplug the motor base, and
then unscrew the chopper bowl.
figure 1
figure 2
figure 3
Suggested Uses
To change the metal attachment blade, remove the attachment already inserted
on the shaft of the mixing rod with the tool provided. Use the side of the tool with
the semi-circular slot to remove the attachment. Place the slot around the shaft,
underneath the attachment, and lift up to remove.
Caution: Blades are sharp. Handle with care.
Attachment Functions Speed
Aerator disc Minimum
Blending disc Medium to
Maximum
Grinding blade Maximum
Multipurpose blade Medium to
Maximum


