


5
OPERATION
Before using
Remove all securing tapes. Wash inside the
appliance with lukewarm water and bicarbonate of
soda (5 ml to 0.5 litre of water).
Do not use soap or detergent as the smell may
linger. Dry thoroughly.
Setting the temperature
The temperature inside the refrigerator is regulated
by a thermostat with 6 temperature positions and
one «OFF» (O) position.
Position 1 = minimum coldness
Position 6 = maximum coldness
Turn the thermostat dial to the required position.
The intermediate position is usually the most
suitable (3-4).
The thermostat setting can vary as the temperature
inside the refrigeration compartment depends on the
following factors:
– room temperature
– how often the door is opened
– how much food is stored
– position of the appliance
Important
During prolonged periods of abnormally hot weather,
if the thermostat is set on too high a number, the
cooling system may operate continuously and the
fridge cooling plate may not defrost. Turning the knob
to a lower number will cause the automatic
defrosting to resume.
Storage of frozen food
When first starting-up or after a period of use, before
putting the products in the freezer compartment let
the appliance run for at least two hours on the
coldest setting, then turn the thermostat knob to the
normal opertion position.
Do not exceed the storage period indicated by the
manufacturer.
Finally, do not open the door frequently or leave it
open longer than is absolutely necessary.
Important
Do not put carbonated liquids, (fizzy drinks etc.), in
the freezer compartment.
Ice Iollies, if consumed immediately after removal
from the freezer, can cause low temperature skin
burns.
Do not remove items from the freezer if your hands
are damp/wet, as this could cause skin abrasions or
“frost/freezer burns”.
The freezer compartment
The four-star freezer compartment is suitable for
storage of commercially frozen food and for freezing
fresh foods.
Freezing fresh food
To freeze fresh foods it is necessary to change the
setting of the thermostat knob.
However, for a quicker freezing operation, turn the
thermostat knob to the coldest setting; but remember
that, in this condition the refrigerator compartment
temperature might drop below 0° C.
If this occurs reset thermostat knob to a warmer
setting.
In any 24 hours you can freeze up to 3 kg. of fresh
food.
Place the food to be frozen on the shelf of the
freezer as this is the coldest part.
Important
In the event of a power cut do not open the door. The
food in the freezer will not be affected if the power
cut is short and if the freezer is full. Should the food
begin to thaw, it must be consumed quickly and must
not be re-frozen.
16
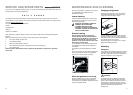
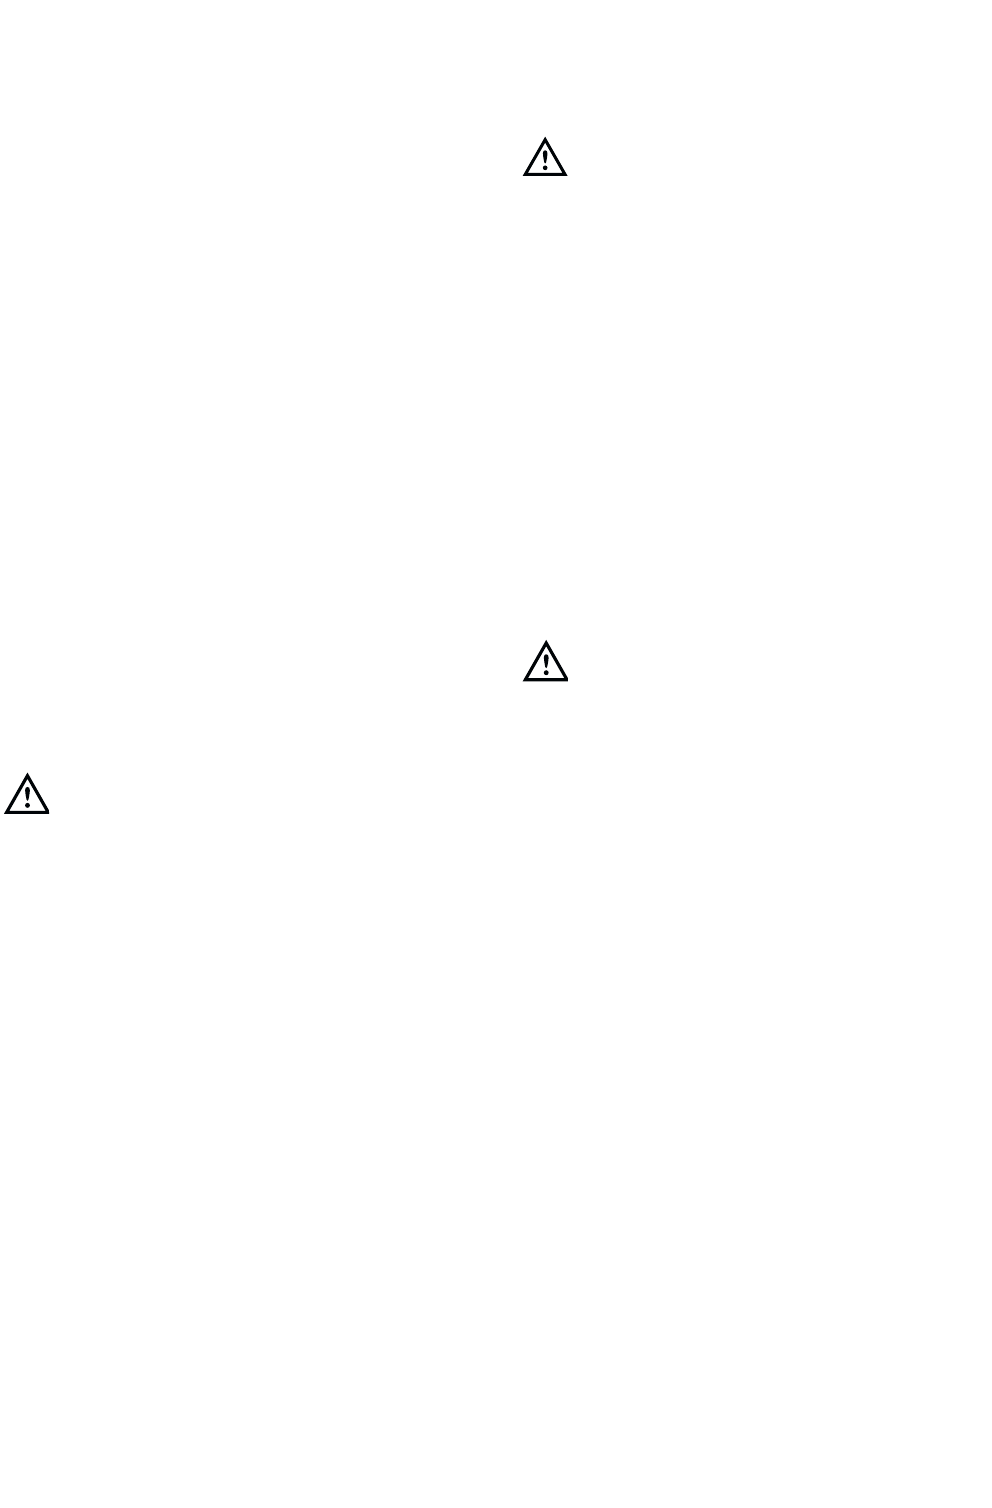
Door reversal
1. Disconnect from the electricity supply;
2. Remove all loose items, including food, store food
in a cool place;
3. Gently lay the fridge/freezer on its back with the
top held away from the floor by 5-8 cm (2-3
inches) of packing;
4. Remove the feet (2-3).
5. Remove bottom hinge (1).
6. Slide out the fridge door from middle hinge (H)
and remove the latter.
7. Slide out the freezer door from pin (G), unscrew
the latter and then screw it down into the hinge
provided on the opposite side, after having
removed the small plugs which should then be
fitted on the opposite side.
8. Refit the freezer door and the middle hinge on the
opposite side.
9. Refit the fridge door and bottom hinge (1) on the
opposite side.
10.Refit the feet (2-3).
11.Unscrew the handles. Refit them on the opposite
side after having pierced the plugs with a punch.
Cover the holes left open with the plugs contained
in the documentation pack.
Attention
After completion of the door reversing operation,
check that the door gasket adheres to the cabinet. If
the ambient temperature is cold (i.e. in Winter), the
gasket may not fit perfectly to the cabinet. In that
case, wait for the natural fitting of the gasket or
accelerate this process by heating up the part
involved with a normal hairdryer.
H
G
D419
D715 PIED/M
1
2
3
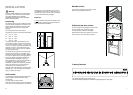
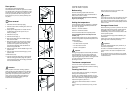
Rear spacers
The plastic bag containing all relevant
documentation also contains two spacers to be fitted
into special holes in the back of the appliance. Fit the
spacers into the holes, taking care to ensure that the
arrow (A) is positioned as shown in Fig. Then turn
them through 45° (arrow (A) vertical) until they lock
into place.
PR60
A
45°