13
B
A08_10
O
S07_09
O
O
INSTALLATION INSTRUCTIONS
100
100
ø 8
48
20
*
1 1
5
O
1
6
A08_08
K
B
7
8
9
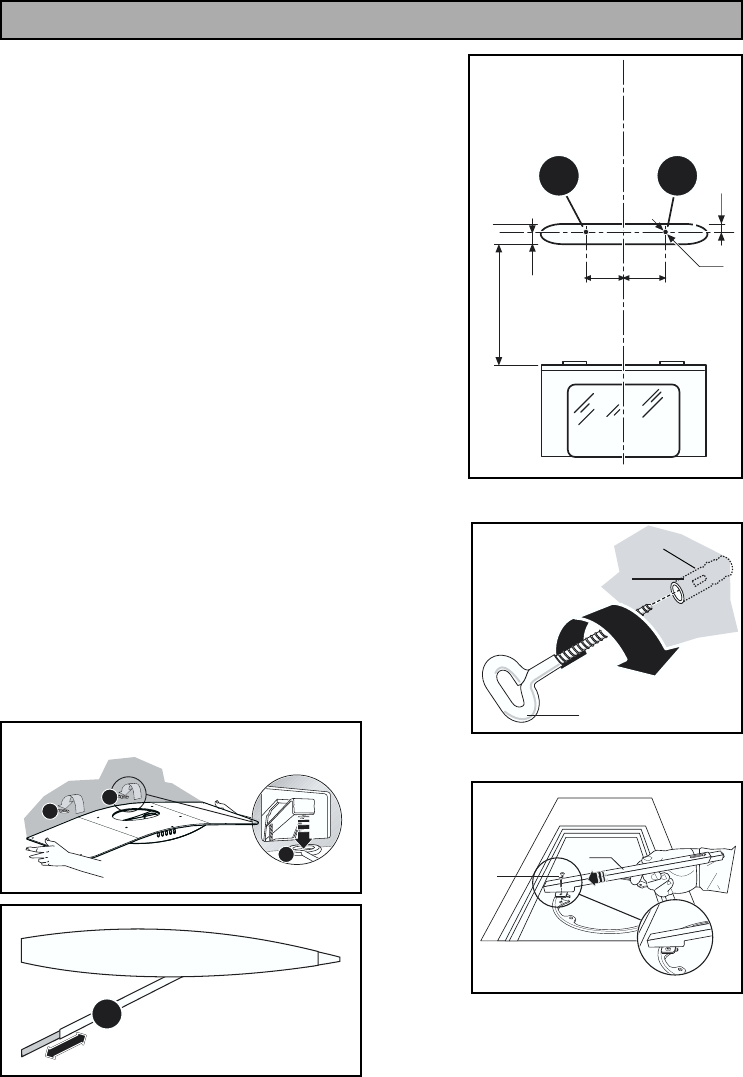
Draw a vertical line on the wall from the centre of the
cooking appliance, using a spirit level and marking pen.
This is to ensure the correct level of alignment of the
appliance (5).
Mark the hole position (1) on the wall 100mm either side
of the vertical line ensuring that they are level and that
the distance between the lowest point of the hood and
the cooking appliance beneath meet the clearance
requirements quoted in the paragraph titled ‘Clearance
Heights’ (* - Page 12).
Using an 8mm masonry bit, drill the holes for the canopy
and insert a suitable wall fixing plug ready for the fixing
screws.
Fix the round eyelet screws provided tightly into the holes
(Fig.6).
Fitting the hood canopy
Remove the metal grease filter and the activated
charcoal filter, if there are any (see Maintenance &
Cleaning).
Fit the support rod B using the two screws K (3.5 x 9.5)
provided.
Hook the hood canopy C to the eyebolts O fixed in hole
(1). Adjust the support rod B so that it pushes against
the wall, keeping the canopy horizontal.
The support rod must be correctly fixed and adjusted.
It must not be removed until the installation has been
completed and checked.
Failure to ensure correct fixing could cause the canopy
fixing hooks and eyelet bolts to be damaged or distorted.
This may compromise the safety of the installation.
Not supplied


