


5
Normal Operating Sounds
• You may hear faint gurgling or bubbling sounds
when the refrigerant is pumped through the coils
or tubing at the rear, to the cooling
plate/evaporator or to the fixed freezer shelves.
• When the compressor is on, the refrigerant is
being pumped round, and you will hear a whirring
sound or pulsating noise from the compressor.
• A thermostat controls the compressor, and you
will hear a faint ’click’ when the thermostat cuts in
and out.
Thawing
Food can be thawed in a number of ways, depending
on the type of food and the size of the packs.
Meat, fish and fruit should be thawed in the
refrigerator compartment and small pieces of meat
can even be cooked while still frozen, but you must
ensure that it is thoroughly cooked through.
Vegetables should be directly immersed in boiling
water; ready-cooked dishes can be placed directly in
the oven in their aluminium wrapping.
A microwave oven is particularly suitable for thawing
any type of frozen or deep-frozen food: follow the
oven instructions, particularly regarding the
placement of aluminium wrapping or containers in
the oven.
Fresh food refrigeration
To obtain the best performance, do not store warm
food or evaporating liquids in the refrigerator; do
cover or wrap the food, particularly if it has a strong
flavour.
Do not cover the shelves with any protective
material, such as paper, cardboard or plastic, which
may obstruct the air circulation through them.
To help you use your refrigerator correctly, here are
some more useful hints:
Raw meat (beef, pork, lamb & poultry or chicken):
wrap in polythene bags and place on top of the salad
crispers.
Meat can only be stored safely in this way for
one or two days at the most.
Fruit & vegetables: these should be thoroughly
cleaned and placed in the bottom salad crispers.
Butter & cheese: these should be placed in special
airtight containers or wrapped in aluminium foil or
polythene bags to exclude as much air as possible.
Warning
Do not put carbonated liquids, (fizzy drinks etc.), in
the freezer compartment.
Ice lollies, if consumed immediately after removal
from the freezer, can cause low temperature skin
burns.
Do not remove items from the freezer if your hands
are damp/wet, as this could cause skin abrasions or
“frost/freezer burns”.
Important
In the event of a power cut the food in the freezer will
not be affected if the power cut is short and if the
freezer is full. Do not open the door. Should the food
begin to thaw, it must be consumed quickly and must
not be re-frozen .
Milk bottles: these should have a cap and should be
stored in the bottle rack on the door.
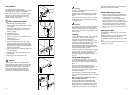
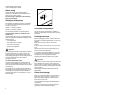
Making ice cubes
The appliance is provided with one or more trays for
ice-cubes trays.
Fill the tray(s) 3/4 full to give the ice space to expand
and place them in the freezer compartment.
To release the ice cubes simply give the tray a slight
twist.
Do not use sharp or metallic instruments to remove
the trays from the freezer.
16
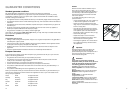
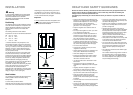
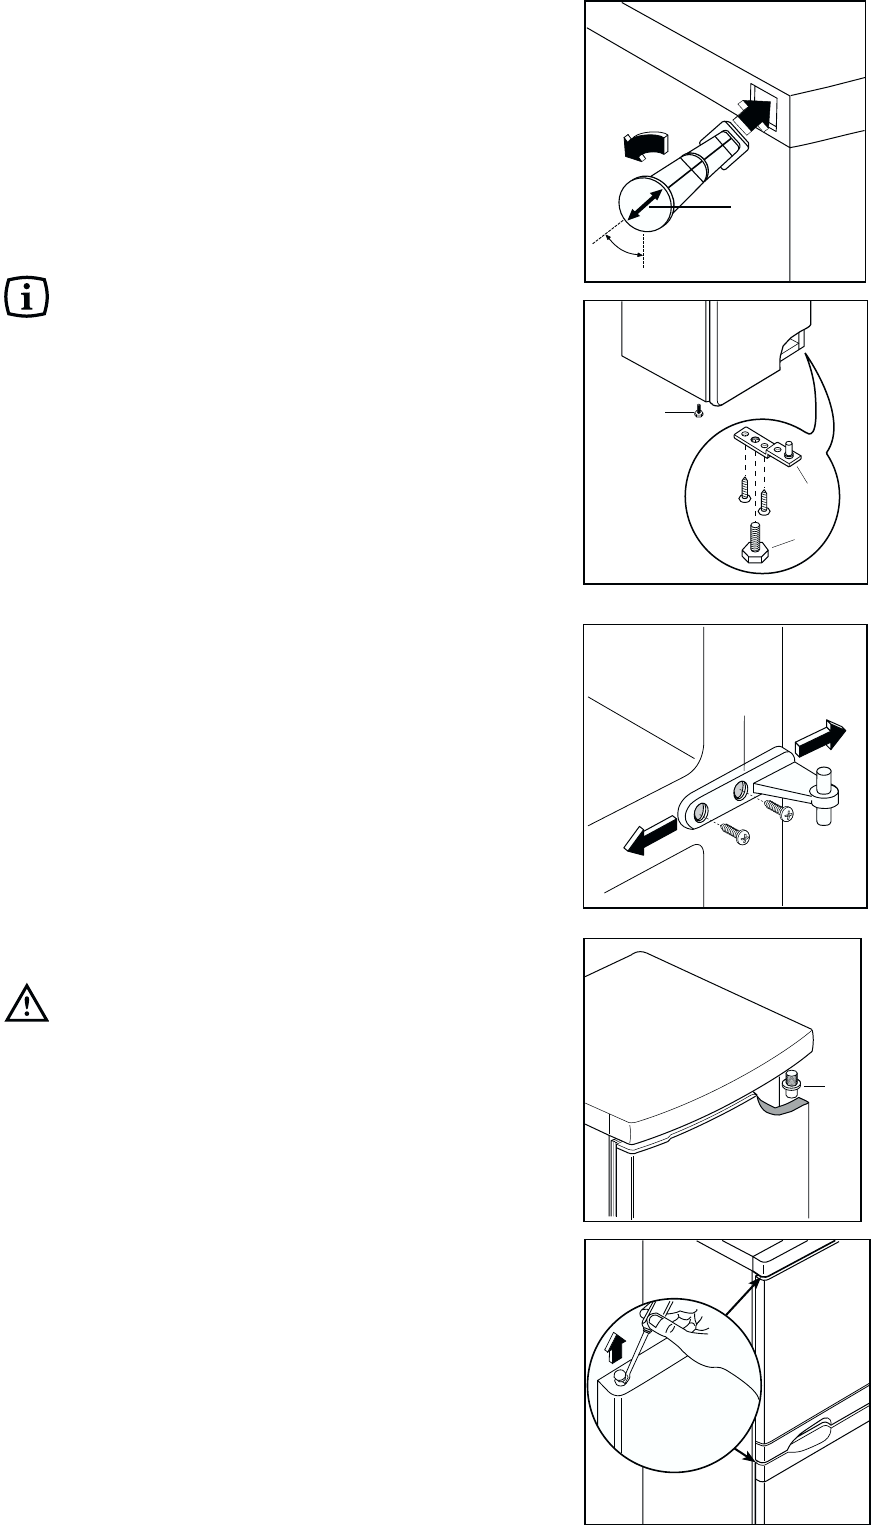
Door reversal directions
1. Disconnect from the electricity supply.
2. Remove all loose items, including food, store food
in a cool place.
3. Gently lay the fridge/freezer on its back with the
top held away from the floor by 5-8 cm (2-3
inches) of packing;
4. Remove the feet (2-3)
5. Remove bottom hinge (1).
6. Remove the freezer door by releasing it from the
middle hinge (H).
7. Unscrew the middle hinge.
8. Slide out the fridge door from pin (G), unscrew
the latter and then screw it down into the hinge-
blade provided on the opposite side, after having
removed the small plugs (I) which should then be
fitted on the opposite side.
9. Refit the fridge door and replace the middle hinge
to the left hand side.
10.Replace the door and bottom hinge (1) on the
opposite side.
11.Refit the feet (2-3) on the opposite side.
Attention
After completion of the door reversing operation,
check that the door gasket adheres to the cabinet. If
the ambient temperature is cold (i.e. in Winter), the
gasket may not fit perfectly to the cabinet. In that
case, wait for the natural fitting of the gasket or
accelerate this process by heating up the part
involved with a normal hairdryer on a low setting.
G
H
D419
D715 PIED/M
1
2
3
PR60
A
45°
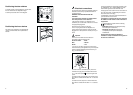
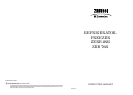
Rear spacers
The plastic bag containing all relevant
documentation also contains two spacers to be fitted
into special holes in the back of the appliance.
Fit the spacers into the holes, taking care to ensure
that the arrow (A) is positioned as shown in the
diagram. Then turn them through 45° (arrow (A)
vertical) until they lock into place.