Defrosting
Your appliance is frost free, which means there is
no need to manually defrost your appliance, as this
will be carried out automatically.
Changing the light bulb
1. Switch off the appliance by pressing the
ON/OFF button, and then unplug the appliance.
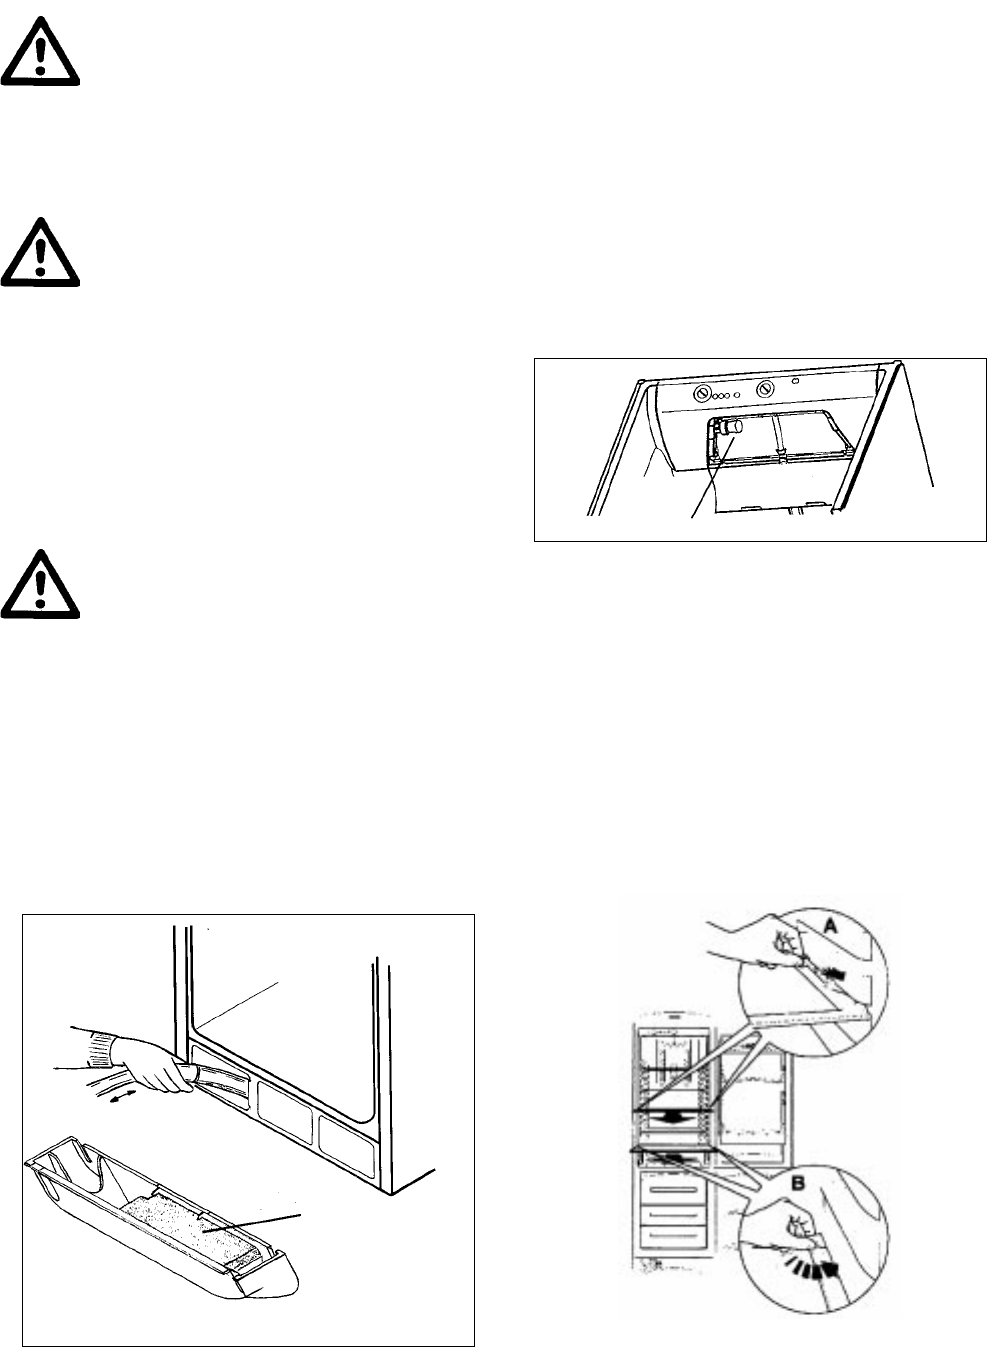
3. Open the plastic light cover, by pushing
upwards on the centre clip. The cover will then
swing down.
4. Unscrew the light bulb and replace with a bulb
with the following specifications:
Clear Halogen
E14 screw thread
220-240 Volts
25 watts (max)
When the appliance is not in use
When the appliance is not in use for long periods,
disconnect from the electricity supply, empty all of
the food and clean the inside of the appliance.
Switch off the appliance and leave the door ajar to
prevent unpleasant smells.
Glass Shelves
The shelf on the vegetable drawer is secured by
two tabs. To release and remove the vegetable
drawer and glass shelf, it is necessary to rotate the
tabs as shown in detail B (Tabs A are previously
removed transit packaging).
7
1 halogen bulb 25W
Maintenance and
Cleaning
Before any maintenance or cleaning work
is carried out DISCONNECT the applian-
ce from the ELECTRICITY supply.
External Cleaning
Wash the outer cabinet with warm soapy water.
Do not use abrasive products.
There may be sharp edges on the under-
side of the product so care should be
taken when cleaning.
Ensure the vents at the back of the appliance are clear
of dust and debris etc.
Internal Cleaning
Clean the inside and accessories with warm water and
bicarbonate of soda (5ml to 0.5 litre of water).
Rinse and dry thoroughly.
Do not use detergents, abrasive powders,
highly perfumed cleaning products, wax
polishes or cleaning products containing
bleach or alcohol.
Regularly check the door seals and wipe clean to ensu-
re they are clean and free from debris.
Cleaning the Condenser
The Condenser at the bottom of your appliance needs
to be cleaned periodically. Remove the plinth, and
clean with a vacuum cleaner. Ensure the plinth is repla-
ced after cleaning.
NOISE REDUCTION PAD
(DONT REMOVE)


