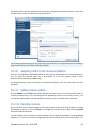
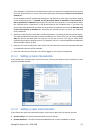
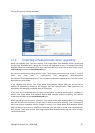
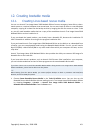
5. The first optional step offers to schedule the backup task. Scheduling together with a backup
method and automatic consolidation rules allows implementing a desired backup strategy. For
more information see Examples of backup scheduling scenarios (p. 98).
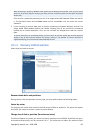
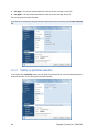
6. Choose a backup method. For a more detailed explanation of the methods see Full, incremental
and differential backups (p. 17). Let's reiterate that selection of the backup method may depend
on the desired backup strategy.
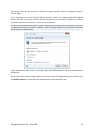
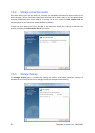
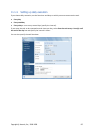
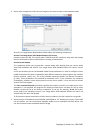
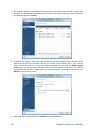
7. At the next step you may exclude certain files and folders from backup. For example, you
transferred some movies from your DVDs to the data disk. They occupy quite a lot of space and it
doesn't make sense to back them up because you have the DVDs.
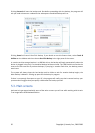
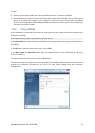
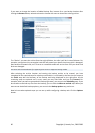
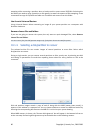
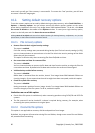
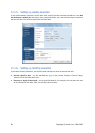
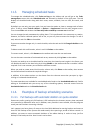
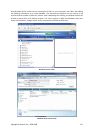
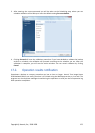
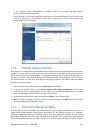
8. Set the options for the backup task being created. For example, when your data disk contains
sensitive information, you may want to protect the information by encryption. You can also
choose to validate the backup right immediately after its creation (under "Additional settings"),
though it can be done later.
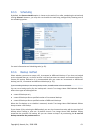
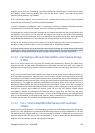
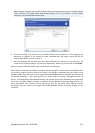
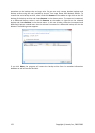
9. Set the automatic consolidation rules when required by the chosen automatic backup archive
management strategy. For more information see Setting automatic consolidation (p. 64).
10. If you wish, provide comments to the backup. You will also be able to add comments later.
11. Click Proceed when you are satisfied with the backup task settings.
If you have not included validation into the backup task settings, it is strongly recommended to
validate the backup later – by performing the validation task either manually or on schedule. You
should get into the habit of validating your backups.
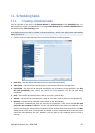
6.3.4. Backing up files/folders
Though image backups of a data disk/partition contain all files and folders, there may be cases when
backing up an entire partition isn't efficient. Suppose you are working on an urgent project and make
changes only in the related files. Backing up the entire data partition with the project files will require
much more time and disk space, so backing up just the project files will be a more efficient solution.
For such situations Acronis True Image Home 2010 Netbook Edition provides the My Data backup
type.
Attach the external drive if it is to be used as the backup destination and make sure that the drive is powered on.
This must be done before starting Acronis True Image Home 2010 Netbook Edition.
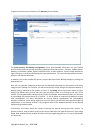
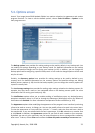
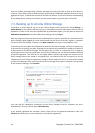
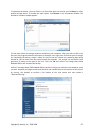
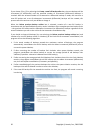
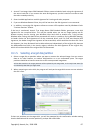
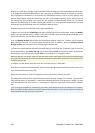
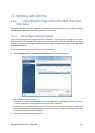
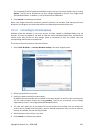
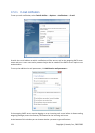
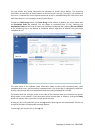
1. Start Acronis True Image Home 2010 Netbook Edition and click the Files & Folders link under
Back Up on the Welcome screen.
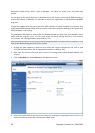
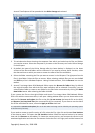
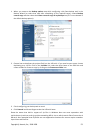
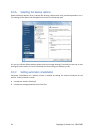
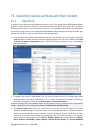
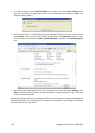
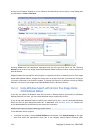
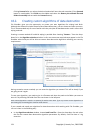
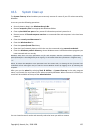
2. Set a checkmark in the box of your project files folder (e.g. Myproject) on the What to back up
screen. The right side of the Files to back up pane will show the folder contents with all the
selected files and subfolders. There you can unselect the files you do not need to back up, if any.
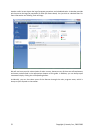
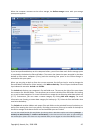
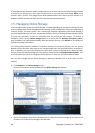
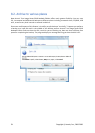
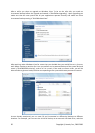
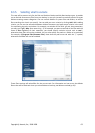
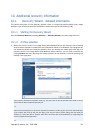
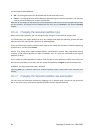
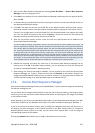
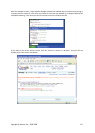
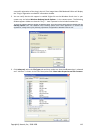
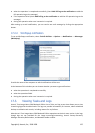
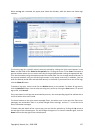
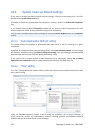
3. Choose a target archive for the backup task being configured – in this case create a new one.
Choose the backup archive location and assign a name to the backup to be created. It is better to
use meaningful names, e.g. Project.tib. When you store different backup archives in the same
location, e.g. on an external drive, you may want to create a new folder when creating a new
backup archive. To do this, click Create new folder on the toolbar, then assign a meaningful name
to the folder.
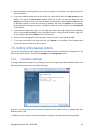
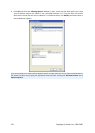
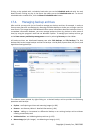
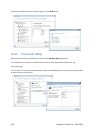
4. As your project will take several days, it is reasonable to back up the project files at least once a
day by setting an appropriate schedule, so click Options at the Summary step to be able to create
a schedule.
40 Copyright © Acronis, Inc., 2000-2009