4
TOOLS REQUIRED FOR ASSEMBLY
(2) 7/16" Wrenches
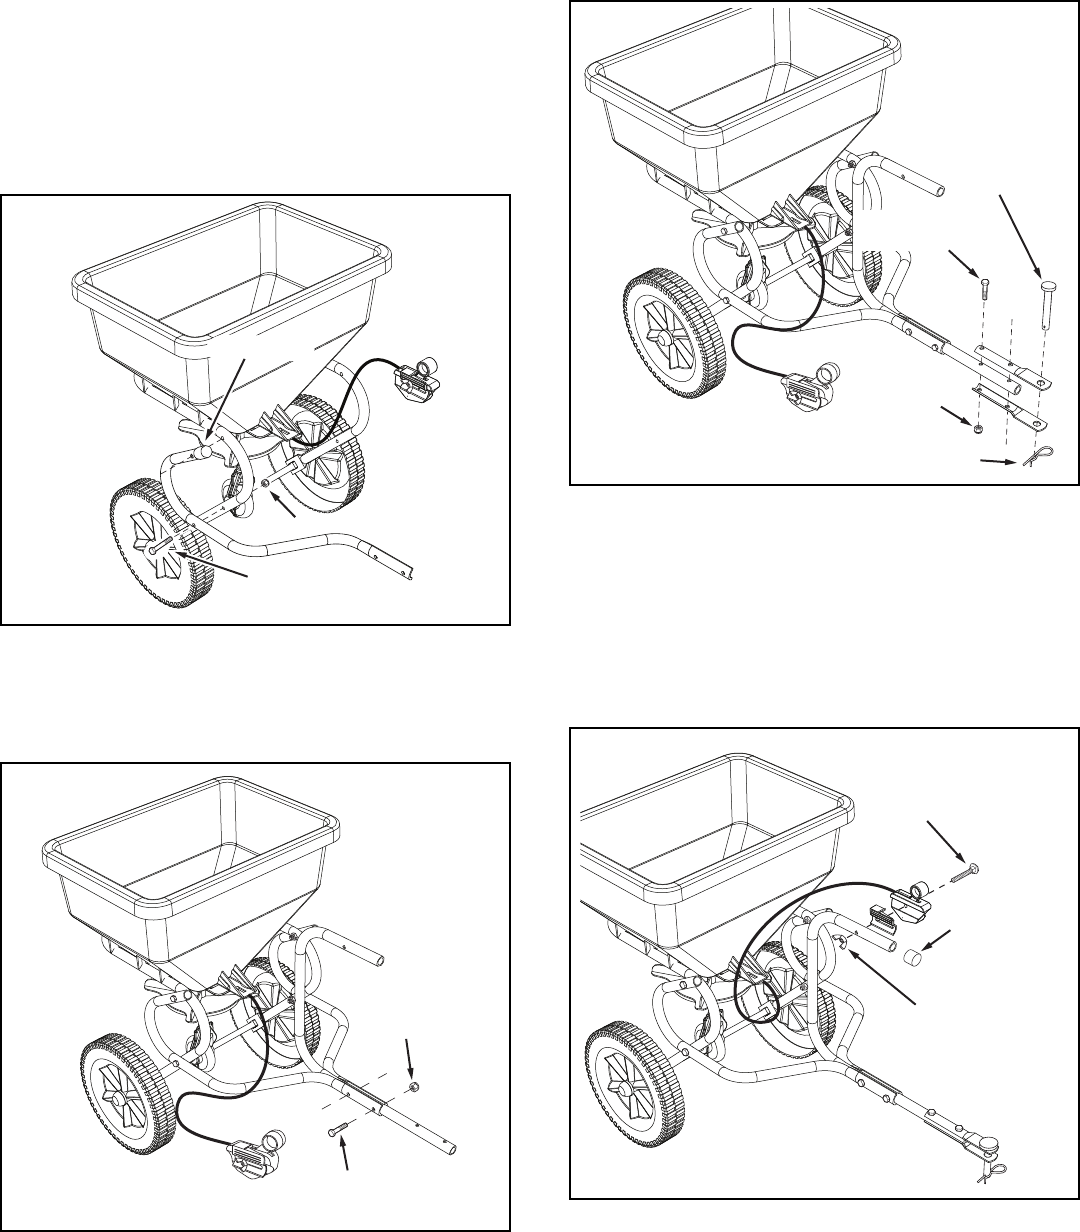
1. Assemble vinyl caps onto the ends of the R.H. and L.H.
HitchTubes.Seegure1.
2. Assemble the R.H. Hitch Tube to the spreader frame
tube using two 1/4" x 1-3/4" hex bolts and 1/4" nuts. Do
not tighten yet.RepeatforL.H.HitchTube.Seegure
1.
FIGURE 1
3. Assemble the Hitch Control Tube between the Hitch
Tubes using two 1/4" x 1-1/4" hex bolts and 1/4" nuts.
Tighten allboltsandnuts.Seegure2.
FIGURE 2
4. Assemble the Hitch Brackets to the Hitch Control Tube
using two 1/4" x 1-1/4" hex bolts and 1/4" nuts. Tighten.
Seegure3.
5. Assemble the hitch pin through the hitch brackets and
securewiththe1/8"haircotterpin.Seegure3.
6. Assemble the vinyl cap onto the Hitch Control Tube. See
gure4.
7. Assemble the Control Cable to the Hitch Control Tube
usingthecarriageboltandnylonwingnut.Seegure
4.
FIGURE 4
FIGURE 3
ASSEMBLY INSTRUCTIONS
REMOVAL OF PARTS FROM CARTON
Remove all parts and hardware packages from the carton.
Lay out all parts and hardware and identify using the
illustrations on page 3.
1/4" x 1-3/4"
HEX BOLT
1/4" NUT
VINYL CAP
1/4" NUT
1/4" x 1-1/4"
HEX BOLT
1/4" NUT
1/4" x 1-1/4"
HEX BOLT
HAIR COTTER PIN
HITCH PIN
CARRIAGE BOLT
NYLON
WING NUT
VINYL CAP
