8 310894
Service
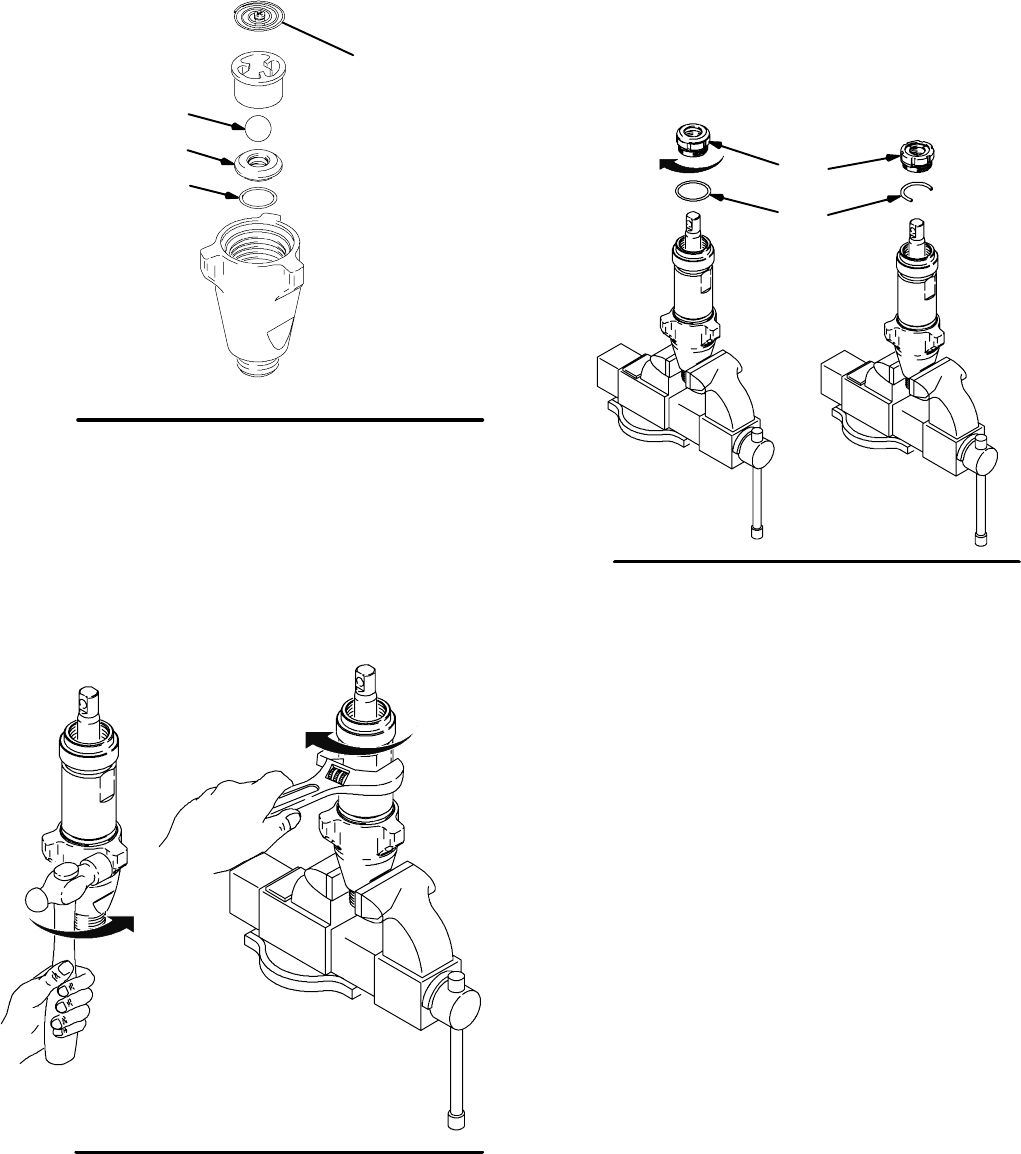
Fig. 16. Reassemble intake valve with new o-ring
(227), seat ( 212) and ball (214). Seat may be flipped
over and used on other side. Clean seat thoroughly.
ti6197a
Fig. 16
227
212
214
211
used on
249122,
289590
Fig. 17. Install intake valve on cylinder. If a wrench is
used torque as follows:
70 +/--5 ft-lb ( 94.91 +/-- 6.77 N•m) (Model 287512)
80 +/--5 ft--lb (108.5 +/-- 6.77 N•m)
(Model 287513, 287579 )
200 +/--15 ft--lb ( 271.2 +/-- 20.34 N•m)
(Model 249122, 289590 )
If a wrench i s not used, be s ure intake valve is bot-
tome d out agains t cylinder.
ti6194a
Fig. 17
Fig. 18. Torque pac king nut (202) down onto adjust-
ment spacer (228) 140 +/--10 in- lb (15.82 +/-- 1.13
N•m).
Remove throat adjus tment spacer (228) when pump
packings begin to leak after much use. Then tighten
packing nut down until leakage s tops or lessens. This
allows approximately 100 gallons of additional opera-
tion before a r epacking is required.
Fig. 18
202
228
ti6195a
(228 o--ring
on 249122,
289590)
