25
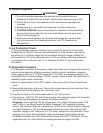
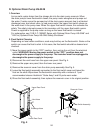
7) Make sure all hose connections are secure, then reinstall the lower rear panel and
upper rear panel in their correct positions. WARNING! Make sure that there are no
wires pinched between the rear covers and icemaker.
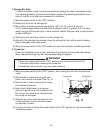
8) Resecure the vent hose to the icemaker. CAUTION! The vent hose must be attached
and secured to the icemaker or water damage may occur. Make certain there
are no kinks in the vent hose. The drain pump will not operate correctly with a
partially blocked vent hose.
9) Plug the icemaker into the electrical outlet.
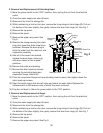
10) Test the drain pump by slowly pouring water into the icemaker's ice storage bin.
Approximately 1 pint (500 ml) of water is required to close the lower oat switch and
activate the drain pump. The drain pump will turn on automatically and pump out the
water.
11) To test the operation of the drain pump internal safety switch, move the power switch to
the "ON" position. Pour another quart (950 ml) of water into the icemaker's ice storage
bin, then completely restrict the discharge hose while the drain pump is operating.
Pour more water into the icemaker's ice storage bin until the upper oat switch closes
and the icemaker turns off. The drain pump will continue to operate. Check for leaks.
Remove the discharge hose restriction and allow the water to be pumped out normally.
Power to the icemaker will be restored when the water in the drain pump returns to a
normal level and the upper oat switch opens.