EN 23
0
0
0
0
0
0
0
0
0
0
0
0
0
0
0
0
0
0
0
0
0
0
0
0
0
0
0
0
0
0
0
0
0
0
0
0
0
0
0
0
0
0
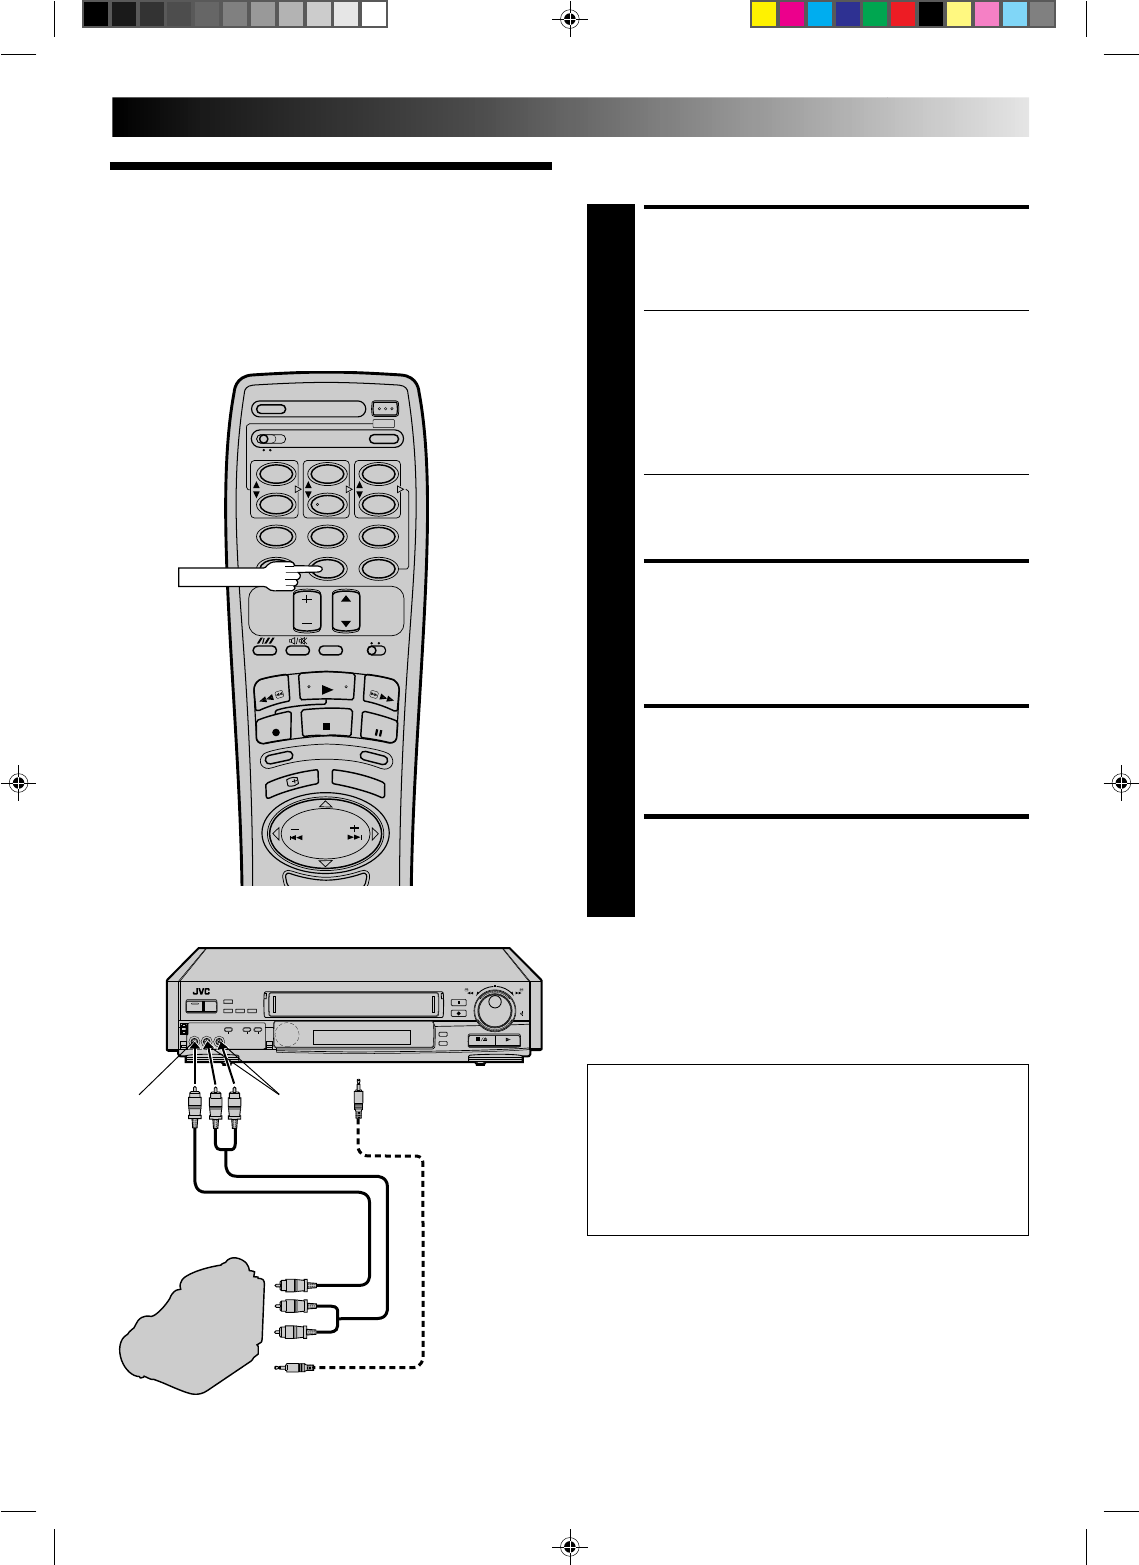
You can use a camcorder as the source player and your video
recorder as the recorder.
Edit From A
Camcorder
MAKE CONNECTIONS
1
Connect the camcorder’s AUDIO/VIDEO OUT
connectors to the recorder’s front panel AUDIO/VIDEO
input connectors.
For HR-E639EE Owners . . .
● When using a monaural camcorder, connect its
AUDIO OUT connector to the AUDIO IN L connec-
tor on your recorder.
For HR-E539EE Owners . . .
● When using a Hi-Fi camcorder, connect the
camcorder’s AUDIO OUT L connector to the AUDIO
IN connector on your recorder.
● When a Master Edit Control-equipped JVC camcorder
is used, the camcorder is capable of controlling the
recorder. Refer to the camcorder’s instruction manual
for operating procedure.
SET RECORDER’S INPUT
MODE
2
Press NUMBER key “0”. “F-AU”* appears in place of a
channel number.
* "AU" will appear with HR-E539EE.
START CAMCORDER
3
Engage its Play mode.
START RECORDER
4
Engage its Record mode.
NOTE:
Connections made to the front panel AUDIO/VIDEO input
connectors automatically override those made to the rear panel
AUDIO/VIDEO input connectors.
12
45
3
6
8
0
7
9
NUMBER "0"
IMPORTANT:
● To edit, both the player and the recorder must be of the
same colour system. Press your recorder's COLOUR
SYSTEM button to select the appropriate colour system.
● PAL, SECAM and NTSC camcorders can be used as a
player for editing.
● For more information on multi-system compatibility,
੬ pg. 24.
Recorder Your recorder
AUDIO OUT
VIDEO OUT
Camcorder
VIDEO
IN
AUDIO
IN
AV Cable (not provided)
Editing Cable
(not provided)
Player
EDIT
To the rear panel PAUSE
connector
