15
6
Maintaining
Your Snow
Thrower
NOTE: Drain the gasoline from the snow thrower, or
place a piece of plastic under the gas cap.
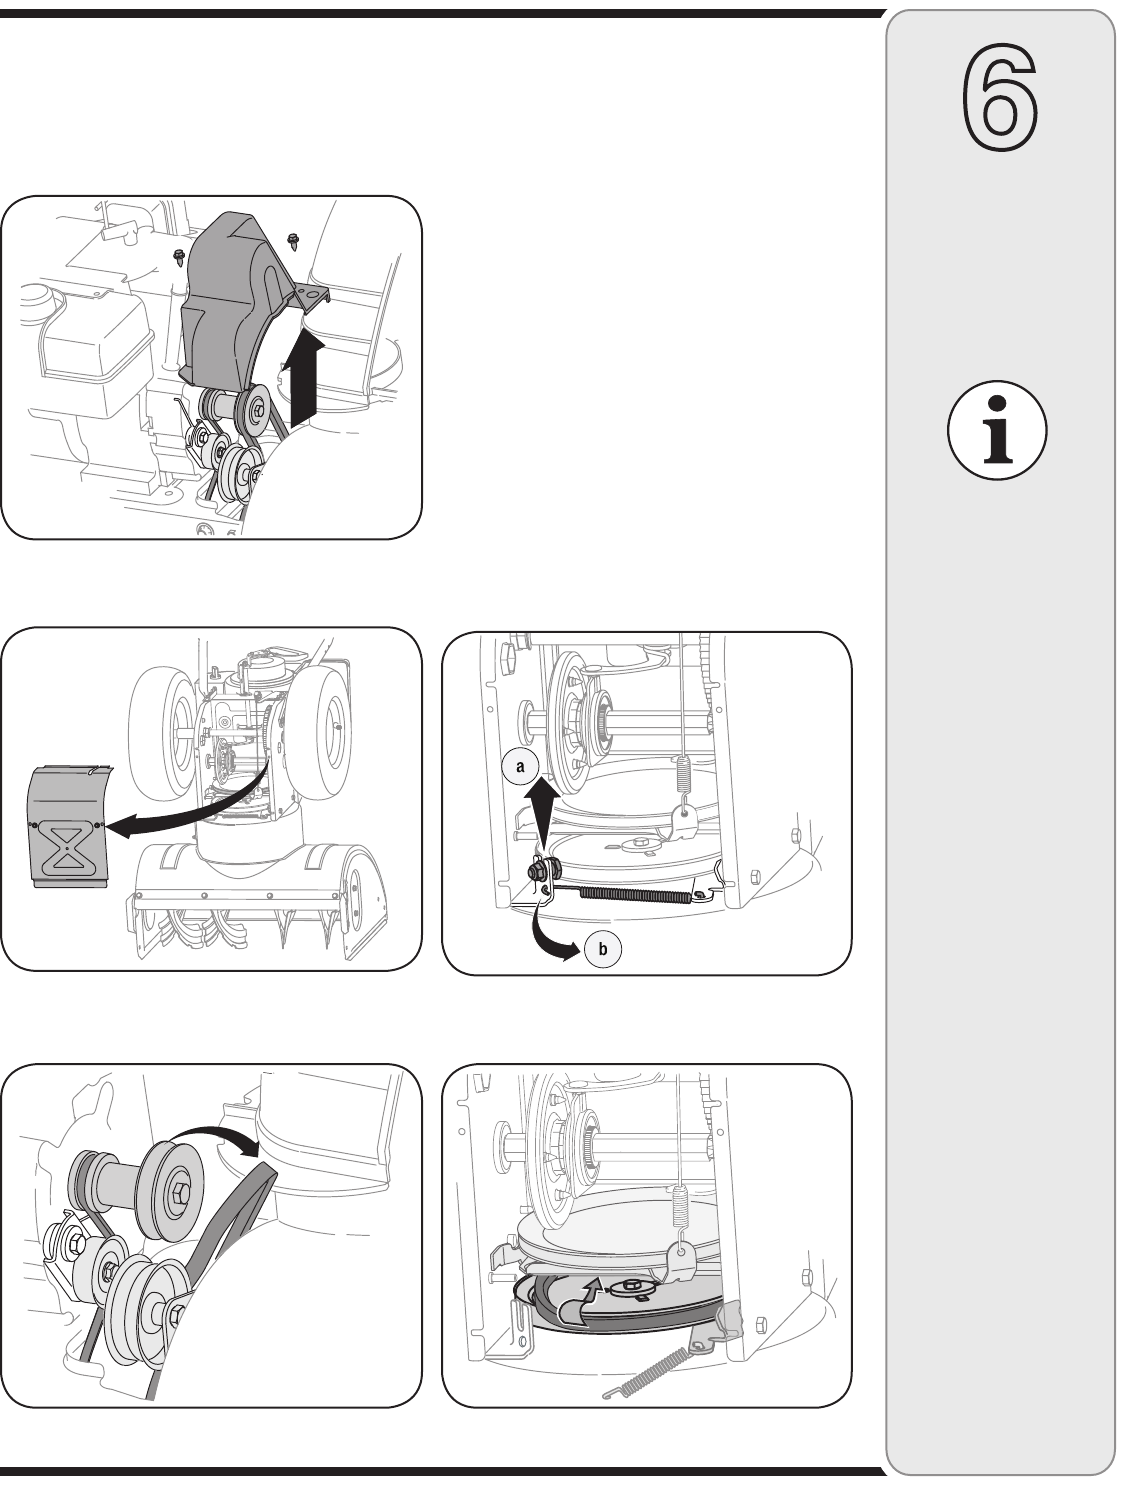
2. Carefully pivot the snow thrower up and forward so
that it rests on the auger housing. Remove the frame
cover from the underside of the snow thrower by
removing four self-tapping screws which secure it.
See Figure 6-5.
3. Roll the auger belt off the engine pulley. See Figure
6-6.
4. a. Loosen and remove the shoulder screw which
acts as a belt keeper. See Figure 6-7.
b. Unhook the support bracket spring from the
frame.
5. Remove the belt from around the auger pulley, and
slip the belt between the support bracket and the
auger pulley. Reassemble auger belt by following
instructions in reverse order. See Figure 6-8.
NOTE: Do NOT forget to reinstall the shoulder screw
and reconnect the spring to the frame after installing
a replacement auger belt and to remove the piece of
plastic from under the gas cap.
NOTE: Although
multi-viscosity oils
(5W30, 10W30 etc.)
improve starting in cold
weather, these multi-
viscosity oils also result
in higher oil consump-
tion when used above
32ºF (0ºC). Check your
snow thrower’s engine
oil level more frequently
to avoid possible
engine damage from
running low on oil.
IMPORTANT
NEVER replace the
auger shear pins with
standard pins. Any
damage to the auger
gearbox or other com-
ponents, as a result of
doing so, will NOT be
covered by your snow
thrower’s warranty.
NOTE: Do not sand-
blast spark plug. Spark
plug should be cleaned
by scraping or wire
brushing and washing
with a commercial
solvent.
Auger Belt Replacement
To remove and replace your snow thrower’s auger belt,
proceed as follows:
1. Remove the plastic belt cover on the front of the
engine by removing the two self-tapping screws. See
Figure 6-4.
Figure 6-4
Figure 6-7
Figure 6-6
Figure 6-5
Figure 6-8
