4
English
TroubleshootingSetting/AdjustmentPrior to use Installation
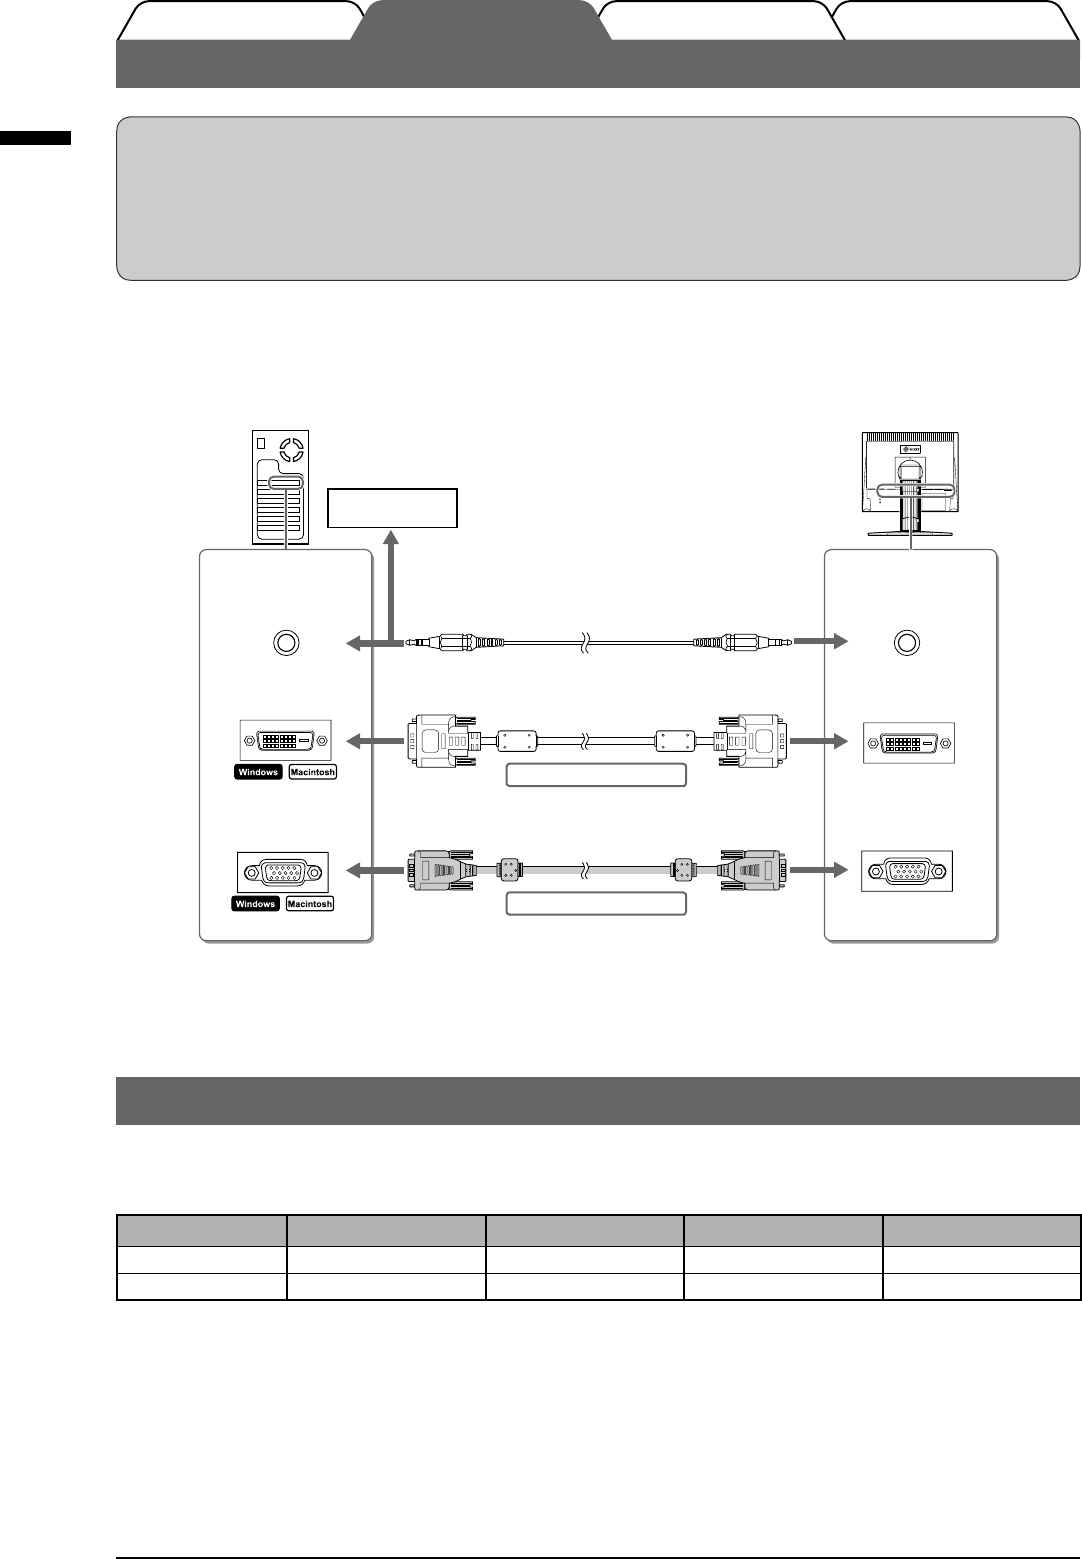
Connecting Cables
Attention
• When replacing the current monitor with an monitor, be sure to change the PC settings for resolution and
vertical frequency to those which are available for the monitor referring to the resolution table
(Specifi cations Sheet on the CD-ROM) before connecting the PC.
NOTE
• When connecting two PCs to the monitor, refer to the User’ s Manual on the CD-ROM.
1
Check that the monitor and the PC are powered off.
2
Connect the monitor to the PC with a signal cable that matches the connectors.
After connecting the cable connectors, tighten the screws of the connectors to secure the coupling.
3
Plug the power cord into a power outlet and the Power connector on the monitor.
Connectors on
the PC
DVI-D connector
D-sub mini 15-pin
connector
Connectors on
the monitor
DVI-D connector
D-sub mini 15-pin
connector
Stereo mini jack cable (supplied)*
1
Signal cable MD-C87 (supplied)
Digital connection
Analog connection
CD player, etc
Signal cable FD-C39 (supplied)
Audio output
connector
Audio input
connector*
1
*
1
Speaker applied model
Compatible Resolutions/Frequencies
Use the monitor with the recommended resolution shown below.
Signal Resolution Frequency Dot Clock Remarks
Analog 1280 × 1024 ~ 75 Hz 135 MHz (Max.) VESA
Digital 1280 × 1024 60 Hz 108 MHz (Max.) VESA


