147146
Playback Menus—continued
Playback Mode ˘
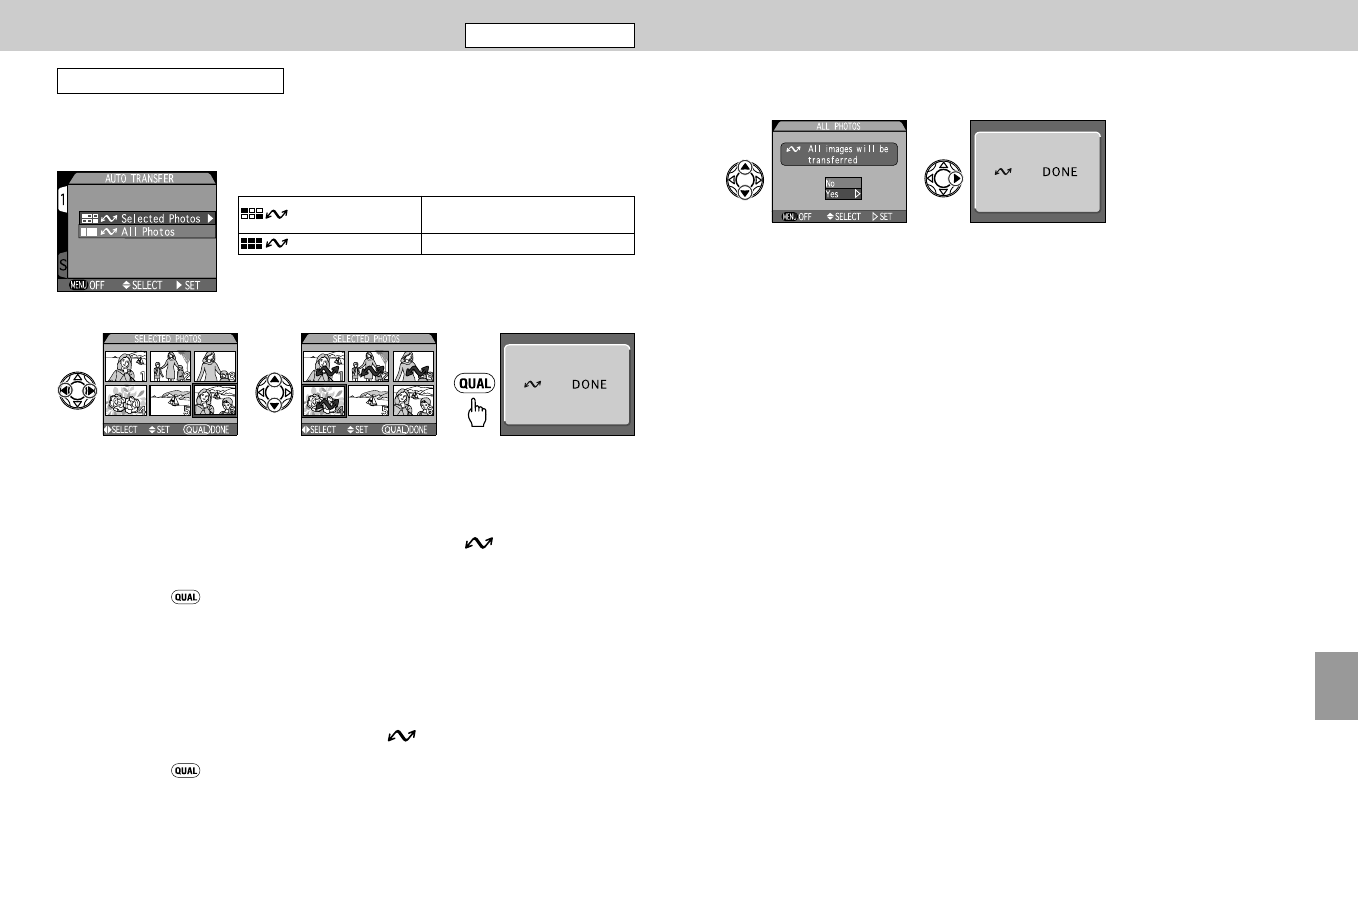
Auto Transfer
The Auto Transfer setting controls whether or not the Nikon View 4
software will automatically copy selected images to a computer when
the camera is connected by the USB cable.
— Setting Auto Transfer —
1
Press </> on the Multi selector to highlight the desired images.
2
Press ≤/≥ to select the images to be transferred.
• Selected images are marked with the Auto Transfer icon. To deselect,
press ≤/≥ on the Multi selector.
3
Press the button to complete the operation.
— Canceling auto transfer —
1
Press </> on the Multi selector to highlight (with orange frame)
the thumbnail image for which you want to cancel auto transfer.
Press ≤/≥ to cancel the Auto Transfer setting.
• The Auto transfer setting is canceled and disappears.
2
Press the button to complete the operation.
1 2 3
Selected Photos
Only selected images will be
transferred.
All Photos All images will be transferred.
— Transferring all images —
To set all image files to be transferred, select All Photos.
1
In the confirmation dialog for transfer of all images, press ≤/≥
on the Multi selector to highlight “Yes”.
2
Press > to execute.
1 2
Menus
COOLPIX995 (E) 01.5.30 0:44 PM Page 146


