RTM-C
Page 4 Installation Instructions
NOTE: The installation instructions that are contained in this manual refer only to the RTM-C. The
installation instructions for optional configurations (page 7) that are used with the RTM-C will be
included with those products.
NOTE
: Prior to installing the RTM-C, the RTM-C must be attached to the RTM-L or the RTM-S.
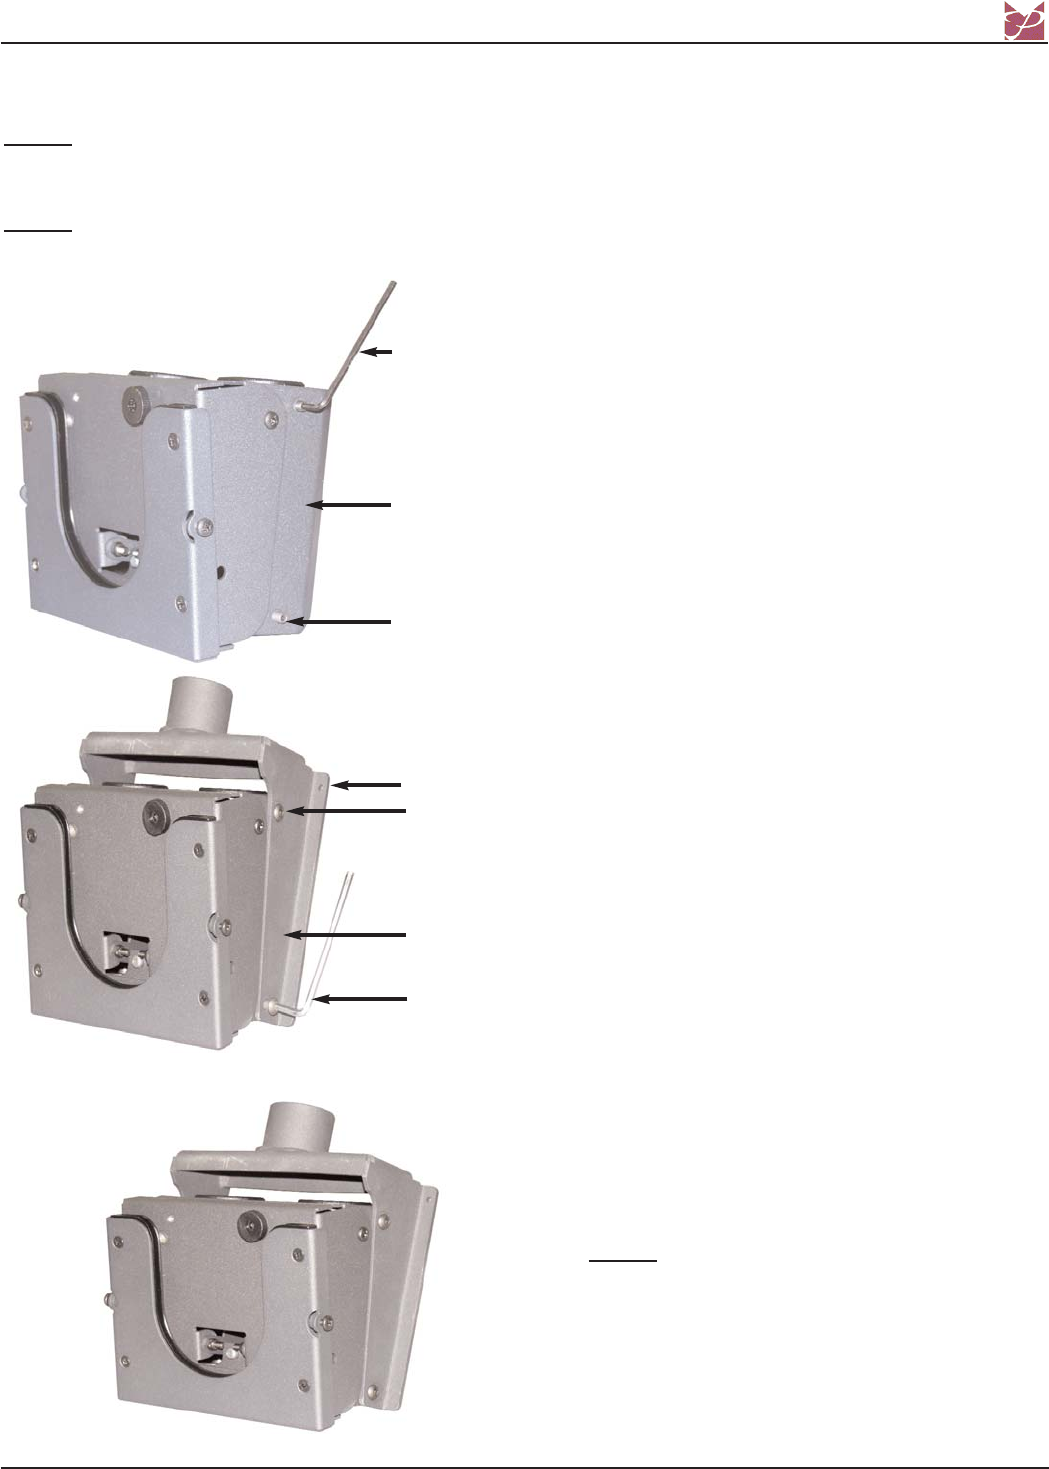
Attaching the RTM-C to the RTM
1. Remove the set screws from the mounting
block on your Rotary Series Mount (two are
located on each side of the mounting block)
using the 5/32” Allen wrench (supplied with
the RTM-S and the RTM-L).
Mounting
Block
Set Screw
5/32” Allen
Wrench
M8 x 20mm
Button Hex
Head Screws
RTM-C
M5 Allen Wrench
2. Place the RTM-C (flat edge facing the rear)
onto the RTM and line up the mounting holes.
3. Insert four (4) M8 x 20mm button hex head
screws into the mounting and tighten
using the M5 Allen wrench (supplied).
4. After tightening the M8 x 20mm button hex
head screws, place the RTM-C to the side and
determine where the suspension pole will be
installed.
NOTE
: Please refer to the installation
instructions that are included in the
packaging of the mount that will be
used for the next steps.
Flat Edge
