U37-1 Regency
®
ULTIMATE Rear Vent Direct Vent Freestanding Gas Stove 19
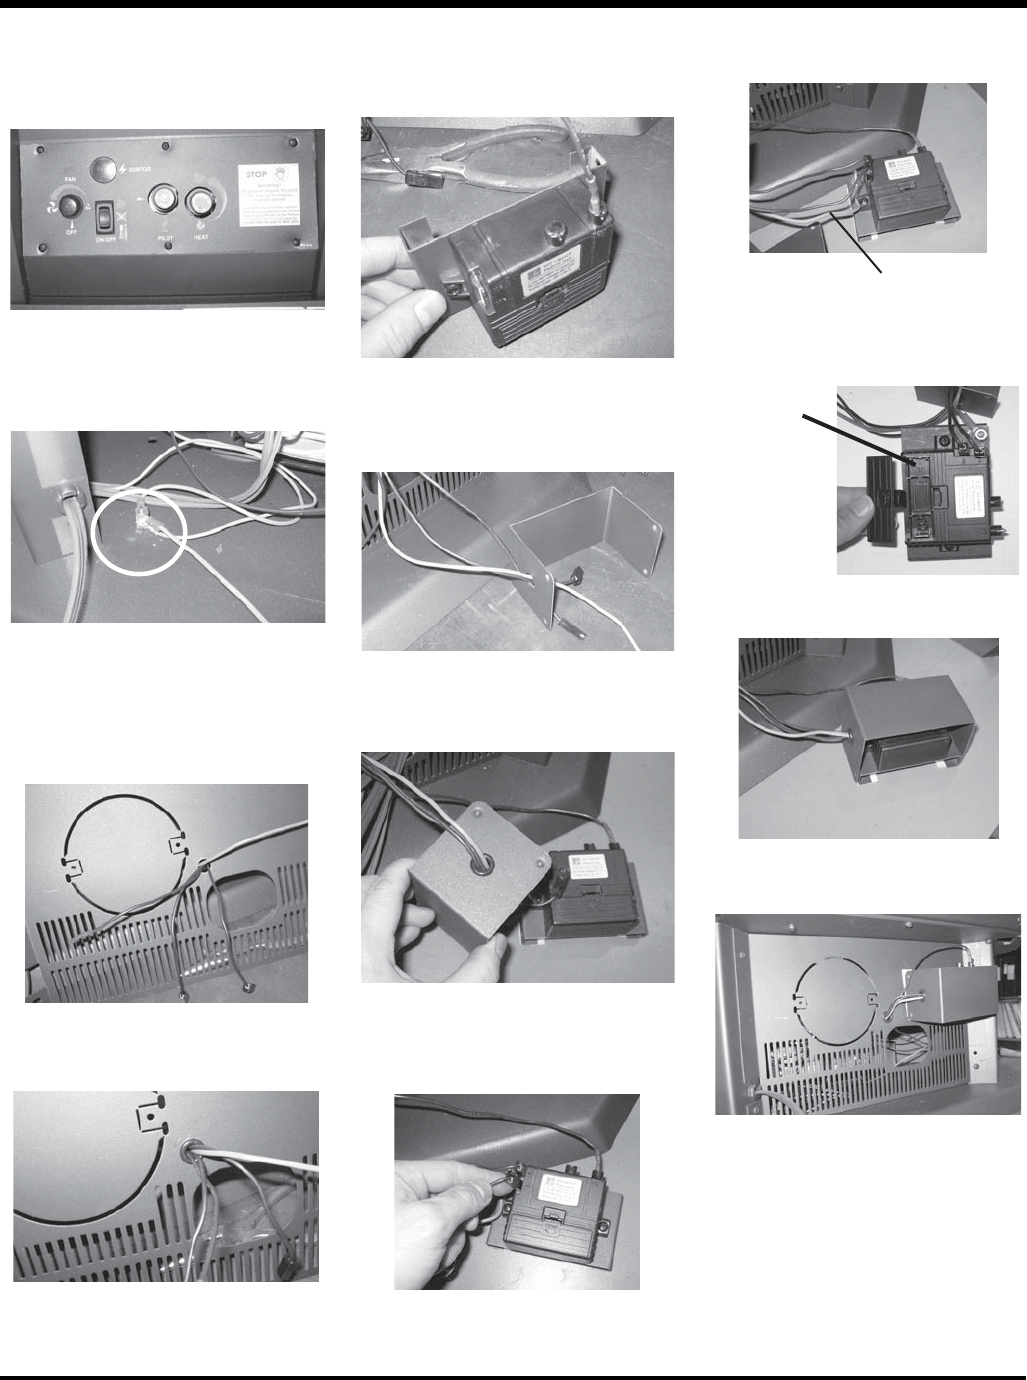
25) Reversing step 20 and secure the con-
trol panel back onto the stove pedestal
with the screws.
27) The Ground Wire, DC Sparker Ignition
Wire and Piezo Spark Wire all go
through the hole located on the pedestal
back cover.
28) Put on the plastic split bushing.
29) Attach the Piezo Ignition Wire to the
back of the DC Sparker box.
32) Connect the DC Sparker Ignition Wire to
the DC Sparker.
30) The ground wire and DC Sparker
ignition go through the hole on the heat
shield.
36) We recommend mounting the DC
Sparker box onto the pedestal back
cover.
37) Check for gas leaks.
38) Check inlet and outlet pressures.
39) Check operation of fl ame control.
40) Check for proper fl ame appearance and
glow on logs.
NOTE: The battery in the DC Sparker
Box will need to be replaced an-
nuall
.
26) Attach one end of the green ground wire
to the grounding stud on the inside of
the pedestal.
31) Apply the plastic bushing to the heat
shield hole.
33) Attach the green ground wire.
35) Place the heat shield over the DC
Sparker.
green ground wire
34) Install the supplied battery into the DC
Sparker Box by opening the battery
compartment.
Battery
Compartment
INSTALLATION


