-
3 -
INSTALLATION, OPERATION AND CARE OF
SALAMANANDER BROILERS
GENERAL
Salamander Broilers are produced with quality workmanship and material. Proper
installation, usage, and maintenance of your broiler will result in many years of
satisfactory performance.
It is suggested that you thoroughly read this entire manual and carefully follow all of the
instructions provided.
INSTALLATION
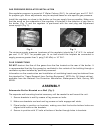
Before installing, verify that the type of gas supply (natural or propane) agrees with the
specifications on the rating plate located underneath the broiler rack drip tray. If the
supply and equipment requirements do not agree, do not proceed with the installation.
Contact your dealer immediately.
UNPACKING
Immediately after unpacking, check for possible shipping damage. If the broiler is found
to be damaged, save the packaging material and contact the carrier within 15 days of
delivery.
Before installing, verify that the type of gas (natural or propane) and the clearance
dimensions (see below) agree with the specifications on the rating plate which is located
under the crumb tray on the right side.
LOCATION
The equipment area must be kept free and clear of combustible substances.
Minimum Clearance Combustible Construction Non-Combustible Construction
Rear 0” 0”
Sides (Infrared) IRB34 & 36 2” 0”
Sides (Radiant) RB34 & 36 6” 0”
Bottom 10” 4”
The installation location must allow adequate clearances for servicing and proper
operation. A minimum front clearance of 24" is required.
Do not obstruct the flow of combustion and ventilation air. Adequate clearance for air
openings into the combustion chamber must be provided. Make sure there is an adequate
supply of air in the room to replace air taken out by the ventilating system. Do not permit
fans to blow directly at the broiler. Avoid wall-type fans which create air cross currents
within the room. Avoid open windows next to the broiler. Maintain an 18" (46 cm)
clearance from the top of the broiler flue vent to the filters of the hood venting system.