English - 27
You can select the picture size which best corresponds to your
viewing requirements.
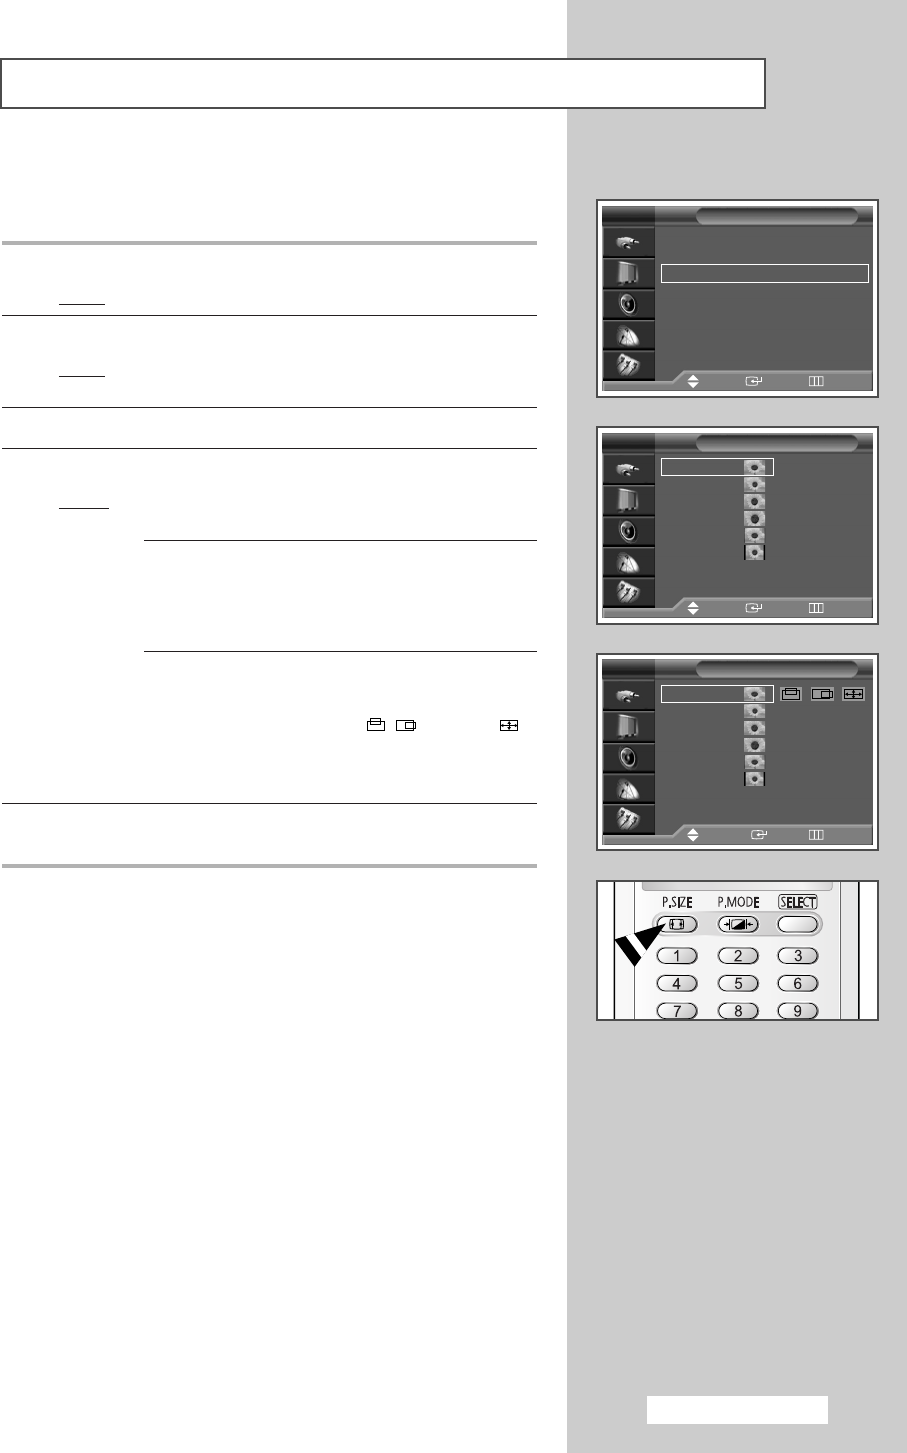
1 Press the MENU button.
Result
: The main menu is displayed.
2 Press the ▲ or ▼ button to select Picture.
Result
: The options available in the Picture group are
displayed.
3 Press the ENTER button.
4 Press the ▲ or ▼ button to select Size. Press the ENTER button.
Result
: The following modes are available depending on the
model.
◆ 16:9 - Panorama - Zoom1 - Zoom2 - 14:9 -
4:3
➢
Lifting is available in the Zoom1, Zoom2 or
14:9 mode by pressing the ▲ or ▼ button.
◆ 16:9 - 4:3
(PC, HDMI or DVI Mode)
.
➢
The picture position ( , ) and size ( )
adjustment are available in these mode by
pressing the
▲ or ▼ button. (Not available
for DTV signals - 480p, 576p, 720p, 1080i.)
5 Select the required mode by pressing the ▲ or ▼ button.
Press the
ENTER button.
➢
◆ You can select these option by simply pressing the
P.SIZE button on the remote control.
◆ You can not select Panorama screen size in the
Component mode.
◆ You can select only 16:9, 4:3 screen size in the PC or
HDMI mode.
◆ With PIP On, the screen automatically becomes 16:9
screen size.
◆ PIP will disappear automatically when you change
screen size with PIP on.
Selecting the Picture Size
o
Picture
Mode : Standard
√√
Color Tone : Cool1
√√
Size : 16 : 9
√√
Digital NR : Off
√√
DNIe : On
√√
My Color Control
√√
Film Mode : Off
√√
PIP
√√
TV
Move Enter Return
TV Size
Move Enter Return
16:9
Panorama
Zoom1
Zoom2
14:9
4:3
TV Size
√√
Move Enter Return
16:9
Panorama
Zoom1
Zoom2
14:9
4:3
BP68-00478E-00Eng_0826 8/26/05 6:04 PM Page 27
