ProSpray 3.23 15
Repairs at the unit
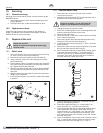
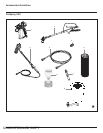
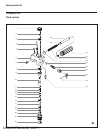
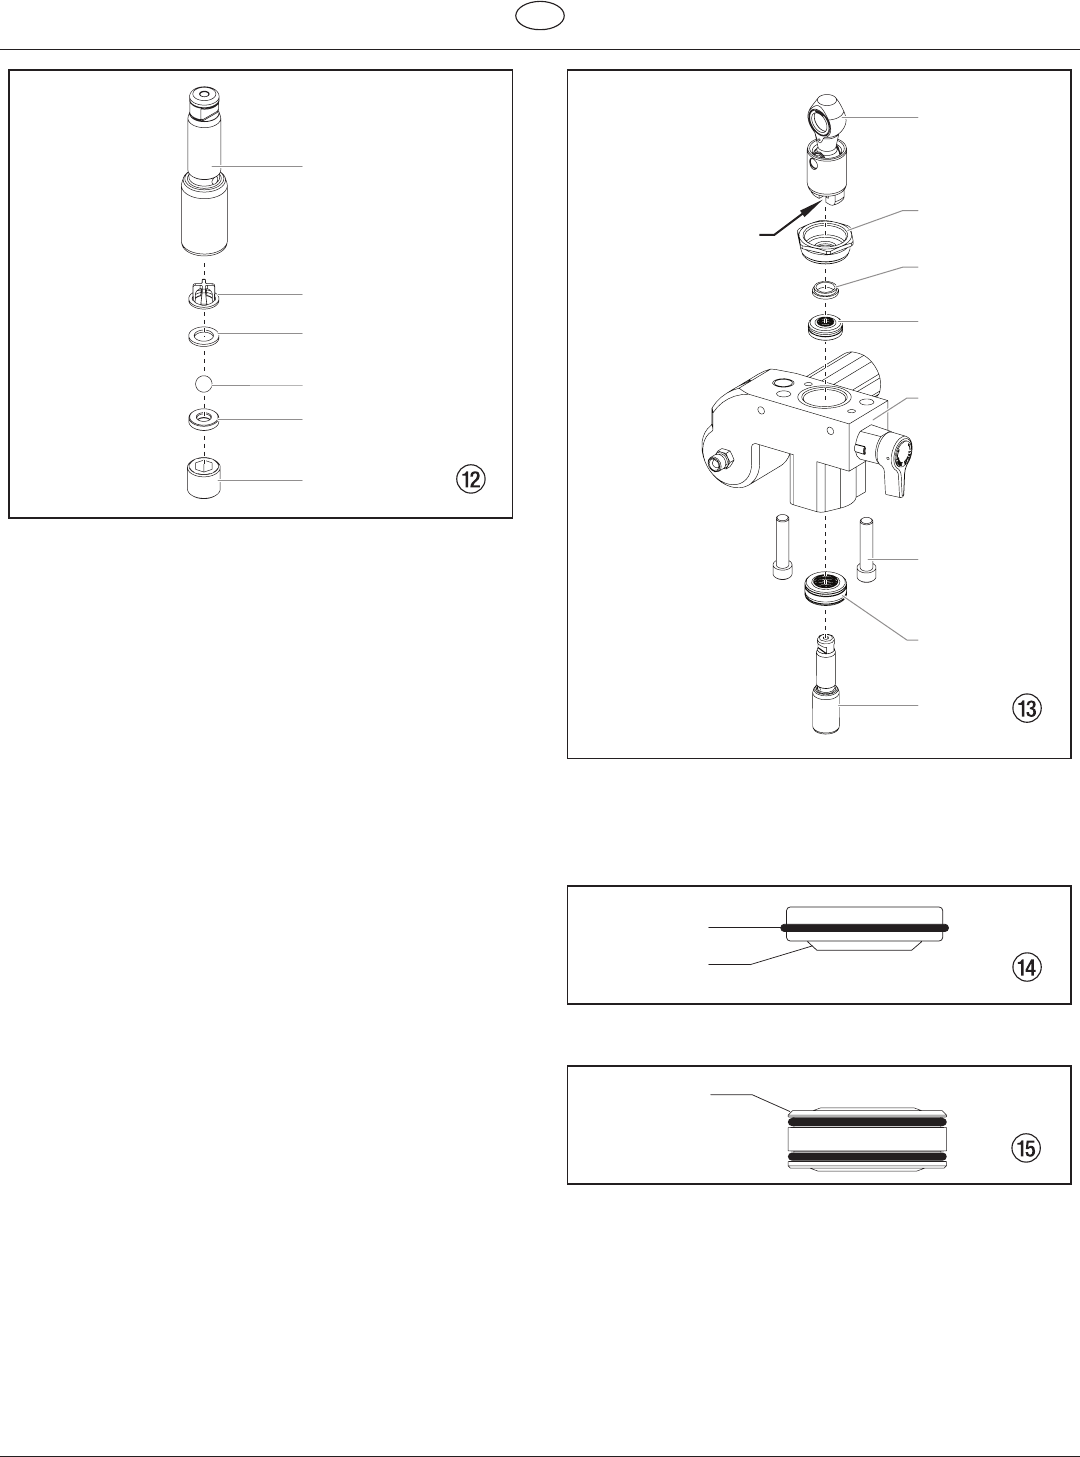
11.3 Packings
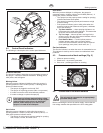
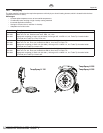
1. Remove inlet valve housing in accordance with the steps
in Chapter 11.2, Page 14.
2. It is not necessary to remove the outlet valve.
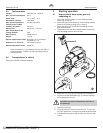
3. Unscrewbothcylinderheadscrews(Fig.13,Item1)from
thepumpmanifold(2)witha3/8inchhexagonsocket
head wrench.
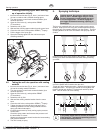
4. Slide the pumpmanifold(2)andpiston(3)forwarduntil
thepistonisoutoftheT-slot(9)onthesliderassembly
(4).
5. Pushpiston(3)downwardoutofthepumpmanifold(2).
6. Unscrewretainernut(5)fromthepumpmanifold(2)and
removepistonguide(6).
7. Removeupperpacking(7)andlowerpacking(8)fromthe
pumpmanifold(2).
8. Cleanpumpmanifold(2).
9. Lubricateupperpacking(7)andlowerpacking(8)with
machine grease.
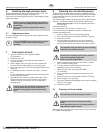
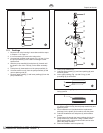
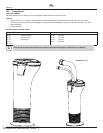
10. Insertupperpacking(Fig.14)withO-ring(1)and
protrudinglip(2)downward.
11. Insertlowerpacking(Fig.15)withthebevelededge(1)
facing upward.
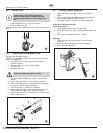
12. Insertpistonguide(Fig.13,Item6)intotheretainernut
(5).Screwretainernut(5)intothepumpmanifold(2)and
tighten by hand.
13. Pushinstallationtool(includedwiththereplacement
packings)forthepiston(3)fromaboveontothepiston.
14. Lubricateinstallationtoolandpiston(3)withmachine
grease.
15. Guidepiston(3)throughthelowerpackings(8)intothe
pumpmanifold(2)frombelow.Usingarubbermallet,
lightlytapthepiston(3)frombelowuntilitcanbeseen
above the pump manifold.
16. Removeinstallationtoolfrompiston(3).
Uncontrolled Copy