


www.airkinglimited.com
5S7635037 New 10-06 3 of 16
NOTE: If drywall or ceiling material will be thicker than 5/8" the
height of the housing will need to be adjusted to compensate and
the locator tabs will need to be bent even with the housing to
allow the grill collar to be flush with the finished ceiling material.
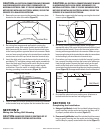
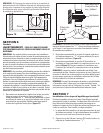
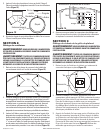
2a. Keyhole Installation: Using a straight bladed screw drive,
punch out the two keyhole slot knockouts on the side of the
housing that will be attached to the joist (Figure 5).
2b. Using the locator tabs on the grill housing, line up housing so
that it will be flush with the finished ceiling. Position the housing
so that the tabs rest flat against the joist and secure with the
included 1" screws through the two keyhole slots (Figure 6).
NOTE: If drywall or ceiling material will be thicker than 5/8" the
height of the housing will need to be adjusted to compensate and
the locator tabs will need to be bent even with the housing to
allow the grill collar to be flush with the finished ceiling material.
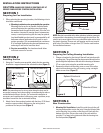
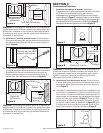
SECTION 5
Existing Construction
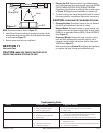
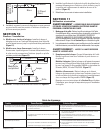
1. Mounting Rail Installation: Determine where the grill will be
mounted and cut a 6" round opening, being careful not to cut
or damage any electrical or other hidden utilities (Figure 7).
Install the rails on the housing and position the housing grill
collar in the previously cut hole so that it is flush with the
finished ceiling (Figure 8). Secure the ends of the rails to the
joists (Figure 4).
NOTE: If drywall or ceiling material will be thicker than 5/8" the
height of the housing will need to be adjusted to compensate
and the locator tabs will need to be bent even with the housing
to allow the grill collar to be flush with the finished ceiling material.
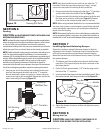
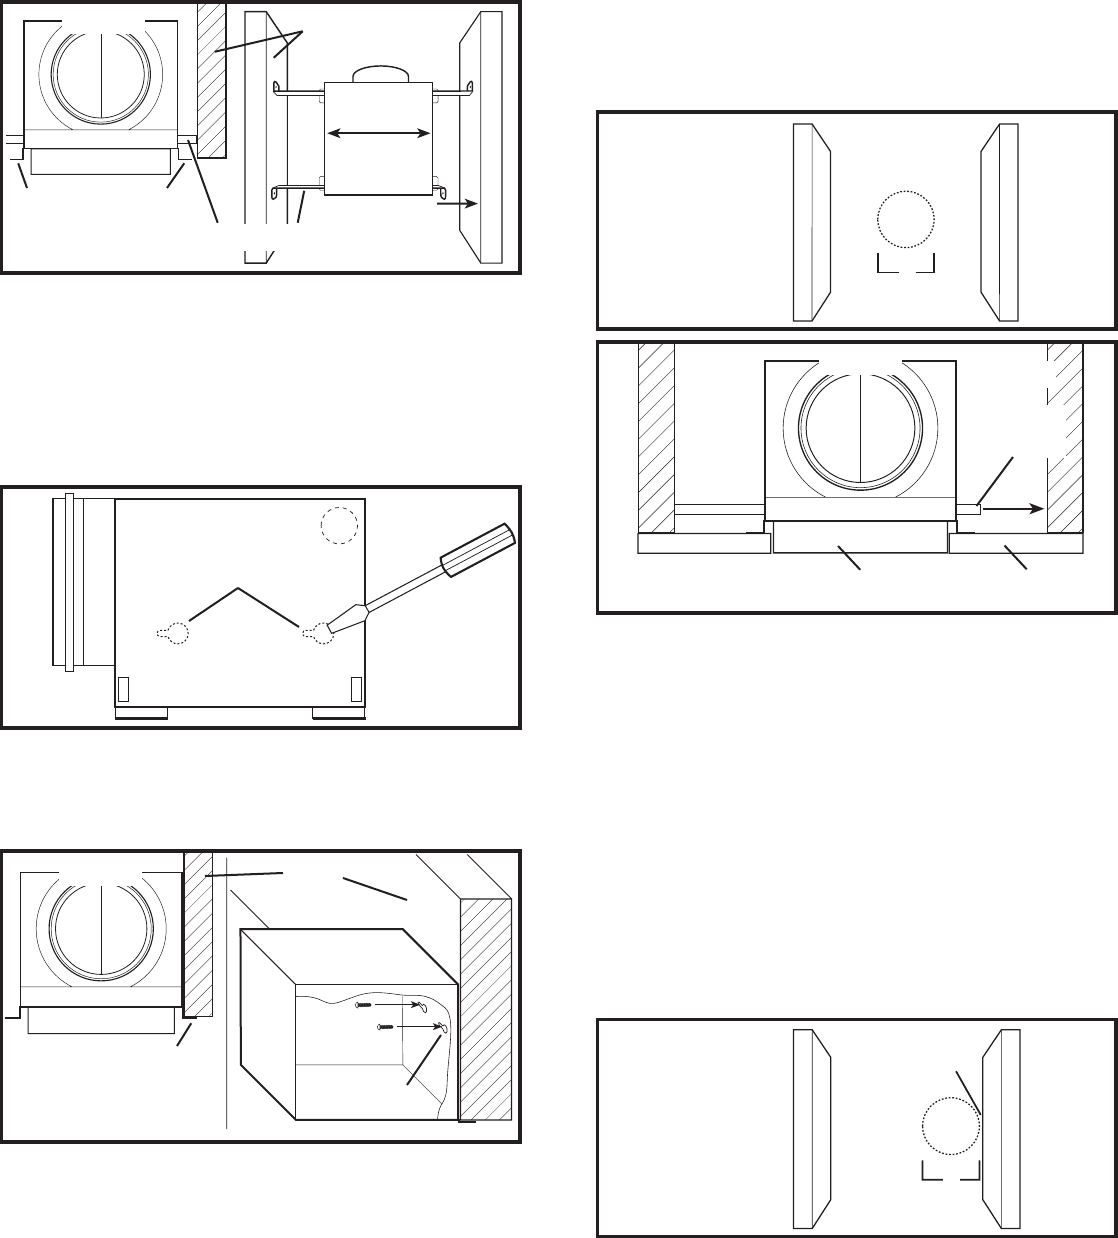
2a. Keyhole Installation: Using a straight bladed screw drive,
punch out the two keyhole slot knockouts on the side of the
housing that will be attached to the joist (Figure 5).
2b. Determine where along the joist the grill will be mounted and
starting 1/8" away from the joist, cut a 6" round opening, being
careful not to cut or damage any electrical or other hidden
utilities (Figure 9). Position the housing grill collar in the
previously cut hole so that it is flush with the finished ceiling
(Figure 10). Secure the grill housing to the joist using the
provided 1" screws through the two keyhole slots (Figure 6).
NOTE: If drywall or ceiling material is thicker than 5/8" the height
of the housing will need to be adjusted to compensate and the
locator tabs will need to be bent even with the housing to allow
the grill collar to be flush with the finished ceiling material.
Figure 4
Joist
Mounting Rails
Locating Tabs
Housing
Housing
Figure 5
Keyhole Knockouts
Figure 6
Joist
Locating Tab
Housing
Housing
Keyholes
Figure 7
6"
Figure 8
Housing
Ceiling
Housing Grill Collar
Joist
Mounting
Rail
Figure 9
1/8"
6"