


10
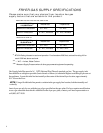
GAS & ELECTRIC CONNECTION INSTRUCTIONSGAS & ELECTRIC CONNECTION INSTRUCTIONS
GAS & ELECTRIC CONNECTION INSTRUCTIONSGAS & ELECTRIC CONNECTION INSTRUCTIONS
GAS & ELECTRIC CONNECTION INSTRUCTIONS
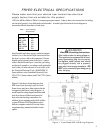
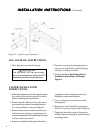
Installing your ANETS Fryer requires the fol-
lowing procedure, after its legs or casters are pro-
perly attached and it is in its desired location.
1. Ensure that the gas control valve knob in the
fryer has its OFF position next to the valve
mark.
2. Ensure that the gas supply inlet line valve is
closed (handle crosswise to the line direction).
3. Ensure that the circuit breaker dedicated to
this fryer is OFF and that all fryer controls are
set to OFF.
4. Connect the ¾” gas supply line to the gas line
adapter on the lower rear of the fryer.
5. Open the gas supply line valve (handle in-line
with line direction); then, confirm that all gas
supply line joints and couplings are free of
leaks using soap suds or a leak-check solu-
tion, after the fryer is in its desired location.
6. Plug the fryer’s electric power cord plug into
the receptacle specified for this fryer. Switch
the circuit breaker to ON.
7. Refer to Fryer Operating Instructions to
begin using your ANETS Fryer.
INSTINST
INSTINST
INST
ALLAALLA
ALLAALLA
ALLA
TION INSTRTION INSTR
TION INSTRTION INSTR
TION INSTR
UCTIONSUCTIONS
UCTIONSUCTIONS
UCTIONS
(Continued)
WARNING
Fryers MUST have a movement-
limiting (restraining cable) device
installed to
prevent tipping that
causes splashing or spilling its HOT
contents.
NOTE: This movement-limiting de-
vice is to be furnished and in-
stalled by the fryer’s installing
contractor before the fryer is con-
nected to the gas line at its desired
location.
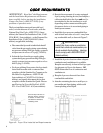
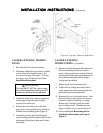
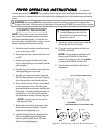
1. Install one restraining device connector into
the structure wall directly behind the fryer’s
desired location, as shown in Figure 2.
2. Install one restraining device connector
on the
rear panel of the fryer very close to the quick-
disconnect device on the end of the fryer’s gas
line.
NOTE: Avoid interfering with the lift
mechanism, on AA models.
3. Attach one end of the restraining cable to the
wall connector. Attach the other end to the
fryer connector.
4. Confirm that the fryer cannot move far enough
away from the wall to cause excessive move-
ment of the flexible gas line or its associated
connectors.
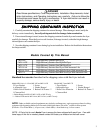
FRYER RESTRAINING DEVICE INSTALLATION INSTRUCTIONS
!
WARNINGWARNING
WARNINGWARNING
WARNING
DO NOT use a flame to check for leaks.
!