


2
GENERAL INSTALLATION
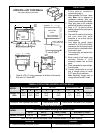
INSTALLATION INSTRUCTIONS FOR EZ WELL SUPPLY LINE
1. Always clean equipment thoroughly before use. (See general cleaning instructions.)
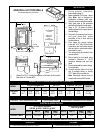
2. Check rating label for your model designation & electrical rating.
3. For best results, use stainless steel counter tops.
4. All dimensions in parenthesis in centimeters unless noted.
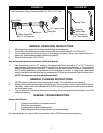
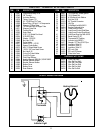
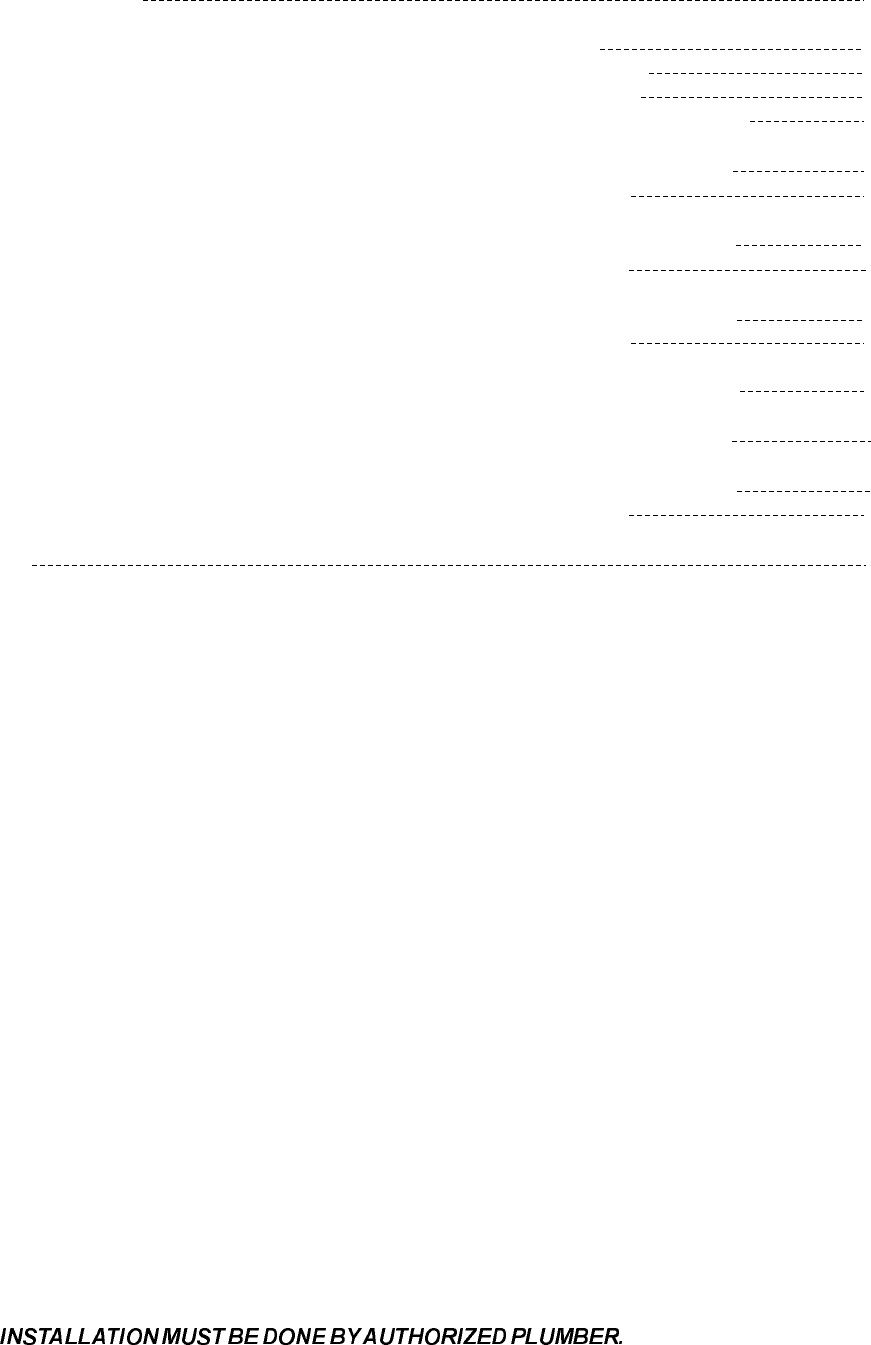
1. Install PIN 54508, brass fitting in each end of the solenoid using Teflon tape (not supplied).
2. Wrap the threads of the fitting as shown in the figure NO.1.
3. Remove the nut from the brass fitting and the sleeve from the inside of the fitting.
4. Place the sleeve and the nut, nut first, over the W copper tubing, PIN 54578, supplied with the
equipment.
5. Install the line into the solenoid and tighten the nut finger tight.
6. Using a wrench, tighten the nut far enough to crush the sleeve and attach the line.
Do not over tighten nut. Just enough pressure is required to stop water leaks.
7. Install the 3/8 x 1/4 adapter to the 3/8 stainless steel tube fitting using Teflon tape as shown in
figure NO.2.
8. Using the other end of the copper tube, install the line, nut, and sleeve to the adapter.
9. Tighten using the same procedure as before.
10. Turn on water supply and look for leaks. If any leaks are found, tighten the nuts until leak is stopped.
With EZ-fill multi-well units, turning on any of the controls will start water to fill all of the wells.
To fill, turn one control to the first position and allow all wells to fill completely. After wells are full, set
controls to desired settings.
NOTE:
NOTE:
TABLE OF CONTENTS
General Installation
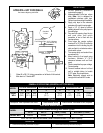
Specifications:
SM50EZ
SHFWEZ-12D
SHFWEZ-1D
SHFWEZ-2, -3, -4, -5, -6
Warranty
2
4
8
10
12
16
22
A SM50EZ
B SM50EZ-12D 5
C SHFWEZ-1D 6
D SHFWEZ-2, -3, -4, -5, -6 7
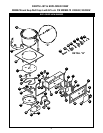
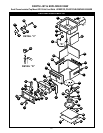
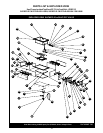
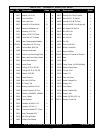
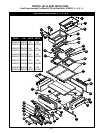
Parts List & Exploded View
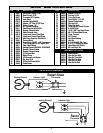
Wiring Diagram 9
Parts List & Exploded View
Wiring Diagram 11
Parts List & Exploded View
Wiring Diagram 13
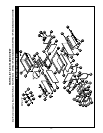
Parts List & Exploded View 14
Parts List & Exploded View
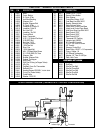
Parts List & Exploded View 18
Wiring Diagram 20
SHFWEZ-1D w/Shut-Off Valve
SHFWEZ-2D, -3D, -4D, -5D, -6D w/Shut-Off Valve