


T
op of
op of
Display
Display
There are two mounting hole configurations:
There are two mounting hole configurations:
• 75 x 75mm
• 75 x 75mm
• 100 x 100mm
• 100 x 100mm
from the Hardware supplied to suit
from the Hardware supplied to suit
your Displa
your Display
.
.
Mounting Screws (x4)
Mounting Screws (x4)
VESA Plate
VESA Plate
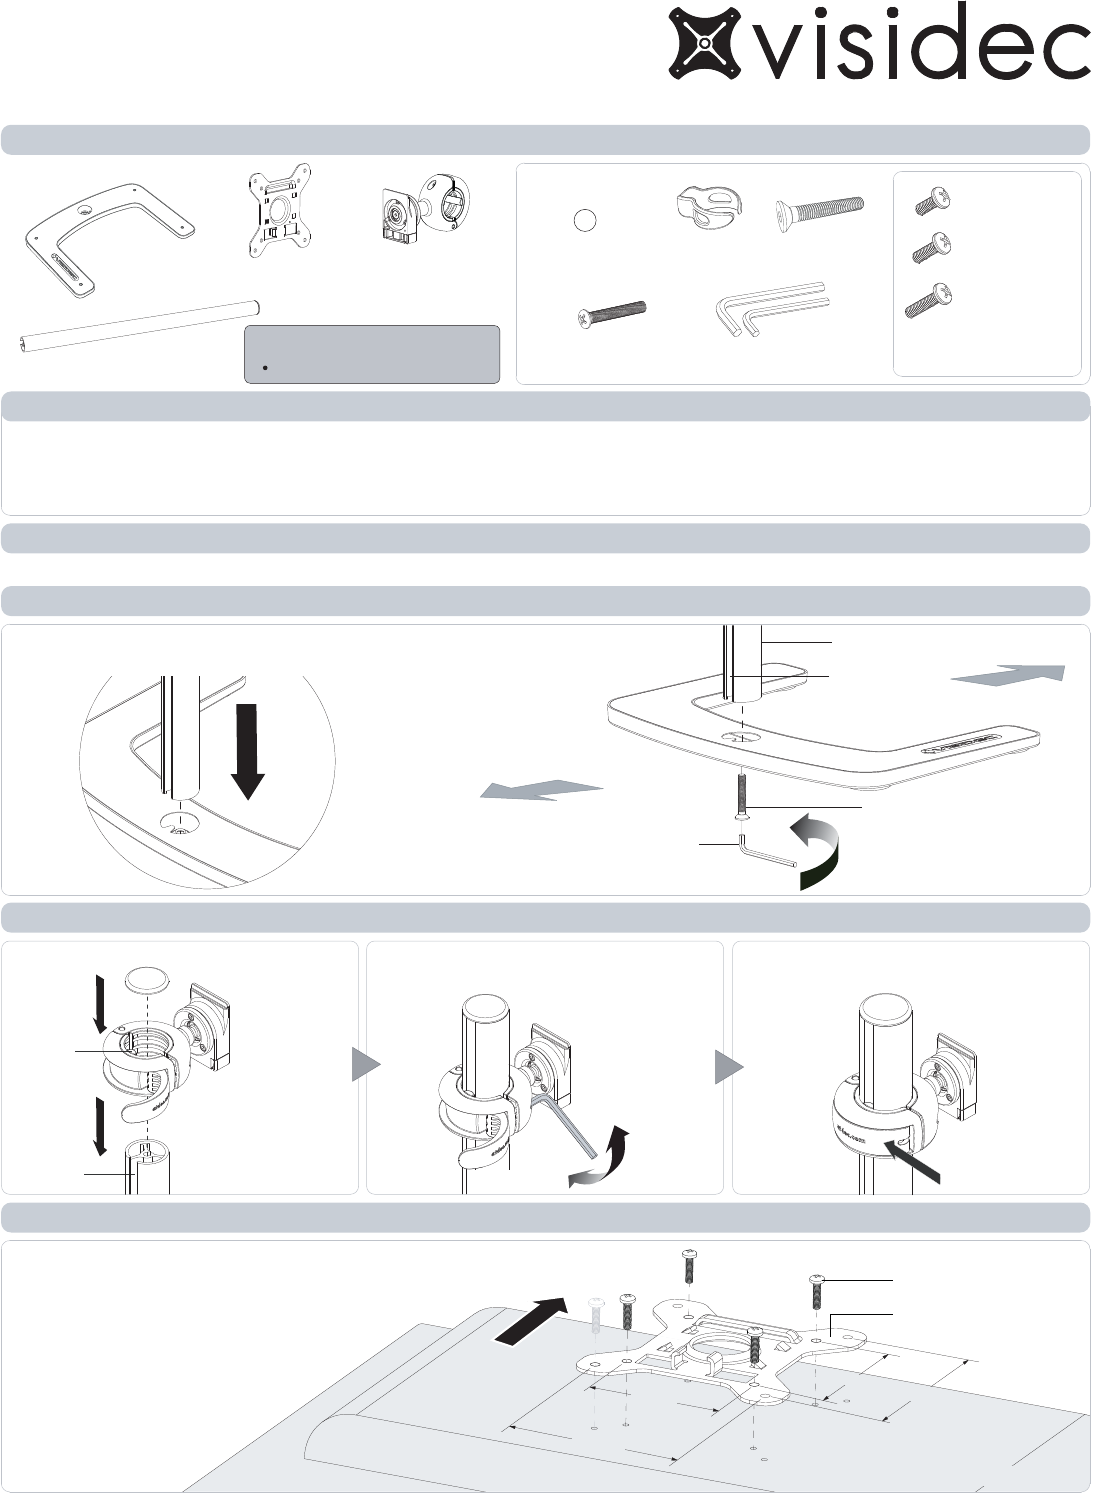
Component Checklist
VFS-DV
IMPORTANT INFORMATION:
Step 1. Check Components
Step 2. Attach Upright Pole to Base
! IMPORTANT - Install Visidec Freestanding/Double Vertical as per Installation Instructions.
!
Each Quickshift Donut supports a maximum weight of 12kg (26.5lbs)
! This product supports VESA mounting hole configurations: 75x75mm and 100x100mm.
! The manufacturer accepts no responsibility for incorrect installation.
Display Mounting
Screws
Hardware
Check you have received all parts against the component checklist and Hardware above.
M4x12mm (x8)
VESA Plate (x2)
M4x10mm (x8)
M4x16mm (x8)
Security Screw (x2)
Cable Ball (x4)
Cable Clip (x3)
5/3mm Allen Key
(x1 each)
Installation Instructions
Freestanding l Double Vertical
Base
Upright Pole
TOOLS REQUIRED:
Phillips Head Screw Driver
M8x50mm
Screw (x1)
Step 3. Attach Quickshift Donuts to the Visidec Pole
(Ensure the cable slot faces towards the rear)
TIGHTEN
If the Quickshift Donut requires further
tightening use the supplied 5mm Allen key.
(Visidec 42mm pole shown)
Slot
Groove
Insert
Close the lever to lock the Quickshift
Donut in place.
Slide the Quickshift Donut onto the Pole.
CLOSE
Cable Slot
USER
BACK
TIGHTEN
FIRMLY
Upright Pole
M8x50mm Screw
5mm Allen Key
Attach the Upright Pole to the Base as shown
below. Ensure the Cable Slot faces towards the rear.
Quickshift
Donuts (x2)
Step 4. Attach the VESA Plate to your Display
100mm
100mm
75mm
75mm
75mm
75mm
100mm
100mm
Back of Display
Back of Display
LOOSEN
(Repeat steps 4 to 7 for each Display)
(Optional)