


12
PRO MIXER DX1000
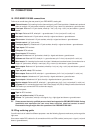
4.3 Equalizer
The channel EQ section comprises three control knobs and two switches. The EQ ON switch activates
the tone controls which enable cut and boost of TREBLE , MID and BASS frequencies
respectively (see below for specs.) EQ can sweeten or effect a track, with the fading out and in of frequency
bands being very popular. When you press the KILL switch the bass EQ is set to maximum attenuation
independent of the setting of the bass EQ control.
EQ Frequency Range Centre
Treble Shelving EQ 10 kHz +/- 12 dB OFF
Mid Peaking EQ 750 Hz +/- 9 dB OFF
Bass Shelving EQ 50 Hz +/- 12 dB OFF
Tab. 4.2: Equalizer of the stereo channels
+ EQ is particularly useful if two or more music tracks are playing together, as frequencies often
clash. Low frequencies in particular can phase and cancel, causing uneven bottom-end
response. The trick is to cut the bass from all but one track playing. You can roll off the bass by
turning BASS fully anti-clockwise.
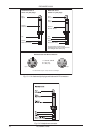
4.4 Output
Channel level is controlled by a precision stereo 100-mm fader .
+ The faders used are high-quality true-log faders. These give ultra-smooth operation even at
low levels, on a par with those used in the most expensive studio consoles.
You wont hear anything in the main mix unless the channel is switched on by depressing the CROSSFADER
switch . This sends the channel signal to either of two stereo submixes, which we call X and Y. The
ASSIGN button selects between these two submixes, and a pair of LEDs clearly show you which of
X or Y is currently selected per channel. The X and Y mixes are then routed to opposite ends of the main
crossfader .
+ You can immediately tell if any channel is switched on (CROSSFADER switch depressed) by
looking at the master ASSIGN X and ASSIGN Y indicators situated under the crossfader.
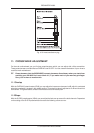
5. TALK OVER
Let’s say you are talking over a music intro. You would almost certainly want to attenuate the music while you
speak. The DX1000 talk over system does this for you—automatically. Depressing the TALK OVER button
on a mic channel engages the talk over system. You can leave this button down all the time—it will not
affect the music unless you speak into the mic, provided you set the system up correctly. How do you do this?
If you look to the left of the main bargraph meters you will see three rotary controls and two LEDs. These are
the master talk over adjustments you will want to make. Once you have set them up for your system you will
probably not have to alter them unless something else is changed.
SENSITIVITY sets the speech level threshold at which attenuation (also called gain reduction) kicks in
once talk over is activated by a mic channel signal.
TIME controls the rate at which music volume recovers after a mic channel signal has activated the
automatic music level reduction process.
DAMPING allows you to adjust the depth of music attenuation triggered by the mic channel signal.
To set up these controls properly, first turn DAMPING full on (MAX). Set up the gain on your mic channel using
PFL. Now adjust SENSITIVITY until the music is always attenuated by a voice signal. (Attenuation is at MAX
to enable you to hear this adjustment as clearly as possible.)
5. TALK OVER