


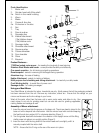
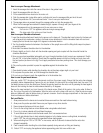
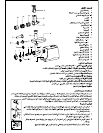

Parts Identification
1. Motor unit
2. Grinder head with filling shaft
2a. Notch in the metal housing
3. Worm
4. Blade
5. Coarse & fine disc
5a. Protrusion in the disc
6. Nut
7. Tray
8. Round pusher
9. Sausage disc
10. Kebbe attachment
(10a) Kebbe shaper
(10b) Kebbe cone
11. Sausage stuffer
12. Shredder attachment
13. Square pusher
14. Coarse shredder
15. Fine shredder
16. Slicer
17. Bayonet
Product Features :-
1700W as locked motor power - for meeting the toughest of meat mincing.
Stainless Steel Blades and feeder - screw provides durability and efficiency
One speed operation - for all mincing and grating operations
Reverse speed - assists in removing all blockages during operation.
Aluminium tray - for ease of feeding
Kebbe Attachment - assists in making of kebbes
Multi purpose food shredding and slicing attachment - to meet all your daily needs
Cord Winding facility - to avoid litter of power cord.
Sausage stuffer - for making sausages.
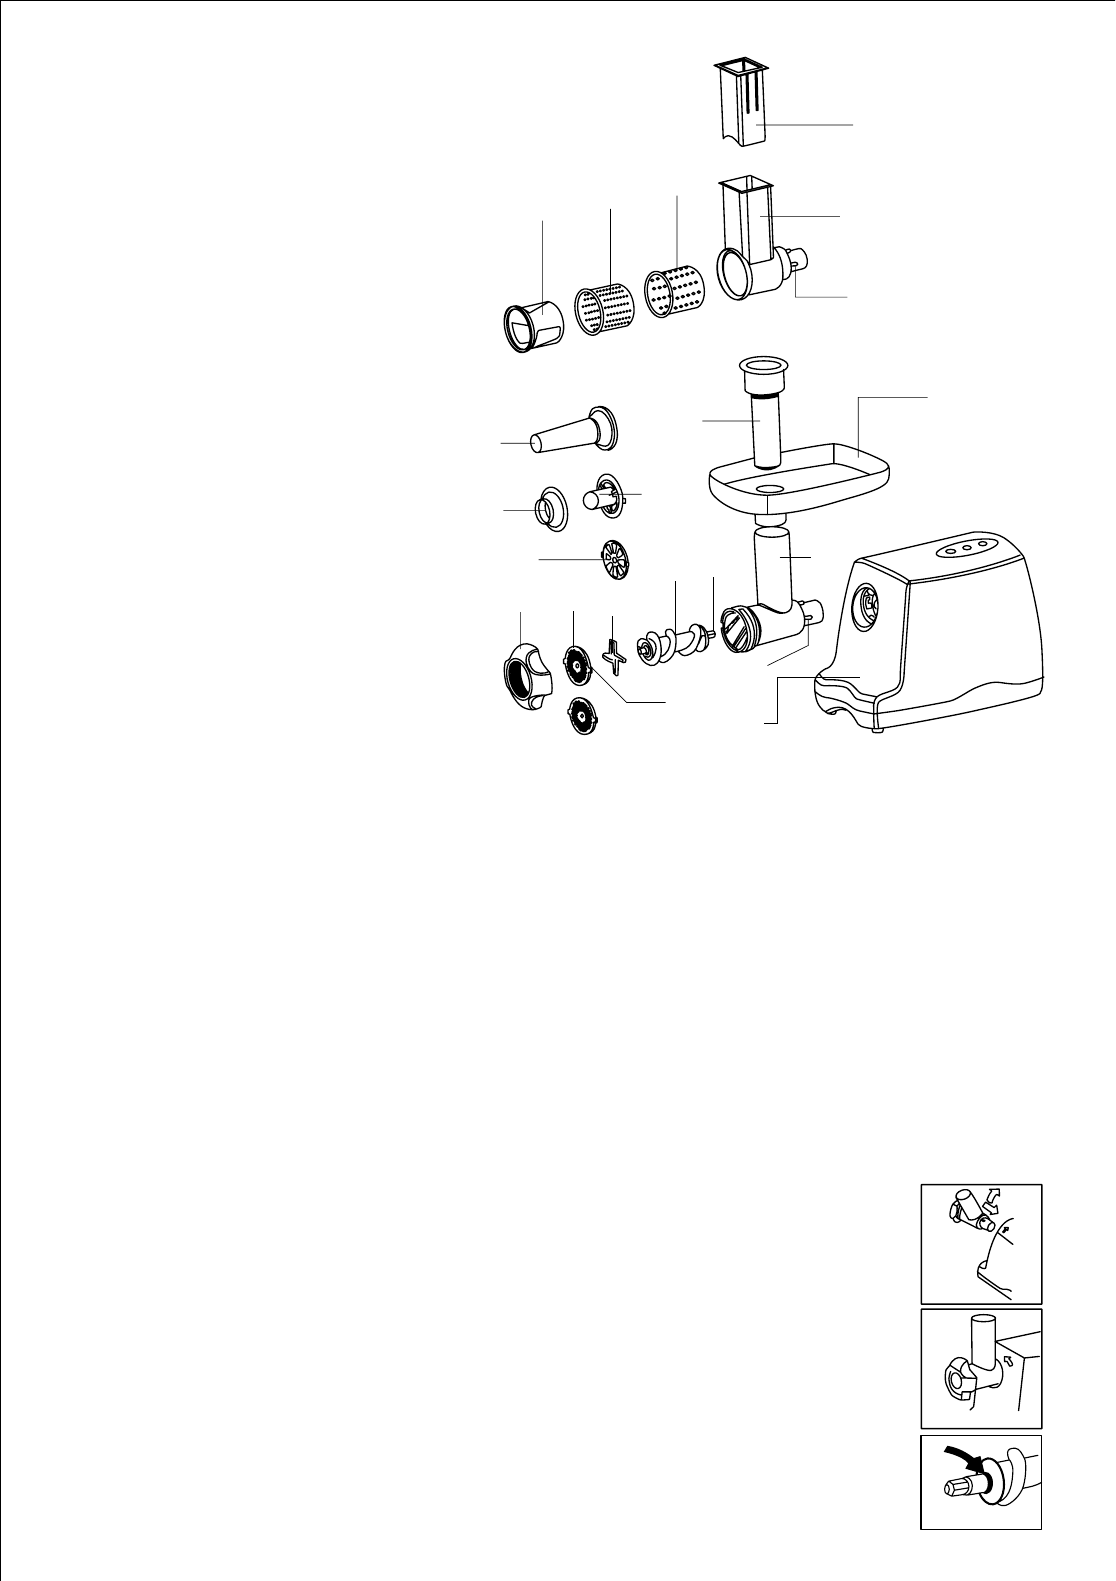
1
2
7
8
9
10a
10b
17
11
16
15
14
12
17
13
2a
3
4
5
5a
6
Fig. 1
Fig. 2
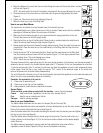
Using your Meat Mincer
Your Meat Mincer is intended for indoor household use only. Kindly ensure that all the packaging material
has been removed from the unit. Remove any instruction, sticker etc. Ensure that the ratings on your
mincer are the same as the line voltage in your home.
Wash all the parts other than the base unit in warm sudsy water and allow to dry. Your
meat mincer is not only for grinding meat but can also be used for grinding vegetables,
making Kebbe and sausage as well.
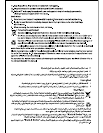
Assembly of Mincer attachment:
1. Insert the mincer head into the groove on the base unit. The mincer head is joined to the
base unit with a bayonet lock mechanism. Hold the mincer head with one hand keeping
the food funnel at an angle of 45º in clockwise direction (Figure 1).
2. Turn the grinder head anti-clockwise in the direction of the upright arrow until the filling
shafts snaps into place in an upright position (Figure 2).
3. Insert the worm with the long end into the mincer head and turn slightly until it is
securely coupled with the motor shaft.
NOTE :- Ensure that the O-ring on the rear of the worm is in place.
O-ring