


Fig. 5
Fig. 6
Fig. 3
Fig. 4
Fig. 7
Fig. 8
Fig. 9
Fig. 10
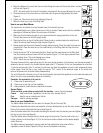
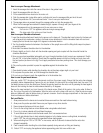
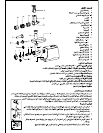
4. Mount the blade on the worm with the round side facing the worm and the smooth side in contact
with the disc (Figure 3).
NOTE : the meat will not be minced if the blade is mounted with the wrong side facing the screw.
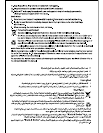
5. Choose and mount the mincer disc on to the blade with the groove fitting perfectly into place
(Figure 4).
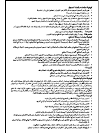
6. Tighten nut. Take care to avoid over-tightening (Figure 5).
7. Mount the food tray on top of the filling shaft.
How to use your Meat Mincer:
The meat mincer is intended to mince boneless meat for household use only.
1. After assembling the unit, place the mincer on a flat dry surface. Please ensure that the ventilation
openings on the base and side of the motor are not blocked.
2. Make sure that the electrical supply at your home matches the supply prescribed on the unit.
Connect the power cord into the supply socket.
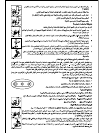
3. Place the food tray on top of the filling shaft. Place a bowl or container below the metal head to
collect the minced meat flowing through the plate (Figure 6).
4. Please ensure that the meat is thawed thoroughly before mincing. Check the meat for bones and
unwanted fat. Clean the meat and cut into small cubes to fit the filling shaft and drop them into
the food tray.
5. Switch the mincer 'ON' in the forward direction. Slowly feed the meat pieces into the filling shaft
from the food tray and push down with the food pusher (Figure 7). Do not apply excessive force
when pushing down. This could damage your mincer.
NOTE : Never use your finger to push the food.
There are chances that the meat will get stuck in the worm during operation. In these times, use the reverse speed to
release the jam and revert to the forward direction again after 6~10 seconds. Do not run the appliance for more than
15 minutes continuously. After 15 minutes of continuous use, allow the appliance to cool to room temperature before
further usage. Once the task is over, switch the mincer 'OFF', switch off the electrical supply at the socket and
remove the power from the socket before disassembling.
The unit is fitted with a thermal-cut-out. If this should operate, disconnect the appliance from the electrical supply and
allow it to cool to room temperature before re-connecting.
Controls:- An explanation of all controls
1 - Press once to operate the unit.
O - Press once to stop the unit from operation
R - Keep pressed in small intervals to reactivate from jams.
Screen Plates:-
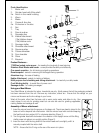
There are three screen plates provided with this machine - coarse, fine and sausage.
Coarse - ideal for raw meat, vegetables, nuts and dry fruits, cheese, fish etc.
Fine - Ideal for raw or cooked meat, fish etc.
Sausage - Ideal for making sausages.
How to use your Kebbe Maker:
The Kebbe maker attachment has two parts, the shaper(10a) and the cone(10b).
Following the assembly instructions (see assembly of mincer attachement) up until the worm screw is
fitted onto the motor shaft inside the mincer head (figure 8).
Insert the kebbe maker with the rounded side facing the outside. Insert the securing cone and tighten
the ring nut on to the head (figure 9).
Feed the Kebbe mixture through the food funnel using the food pusher. The mince will roll out as a
hollow cylinder into the bowl (figure 10). Cut the continuous hollow cylinder into the desired lengths
while it flows out.
The Kebbe mixture is prepared by mincing meat and then passing the mince meat with the
ingredients, wheat & onions. Repeat this till you accure the required consistency.
RO1