


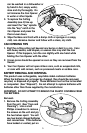

1. Unplug the Charging Base and remove the Can Opener before clean-
ing any part.
2. To remove the Cutting Assembly for easy cleaning, push the Pierce -
Lever up as far as it will go and pull it out away from the unit (C). It
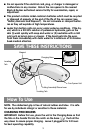
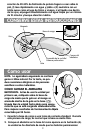
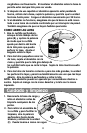
1. Plug the Charging Base into a standard outlet.
While charging, it is normal for the Charging
Base to feel warm.
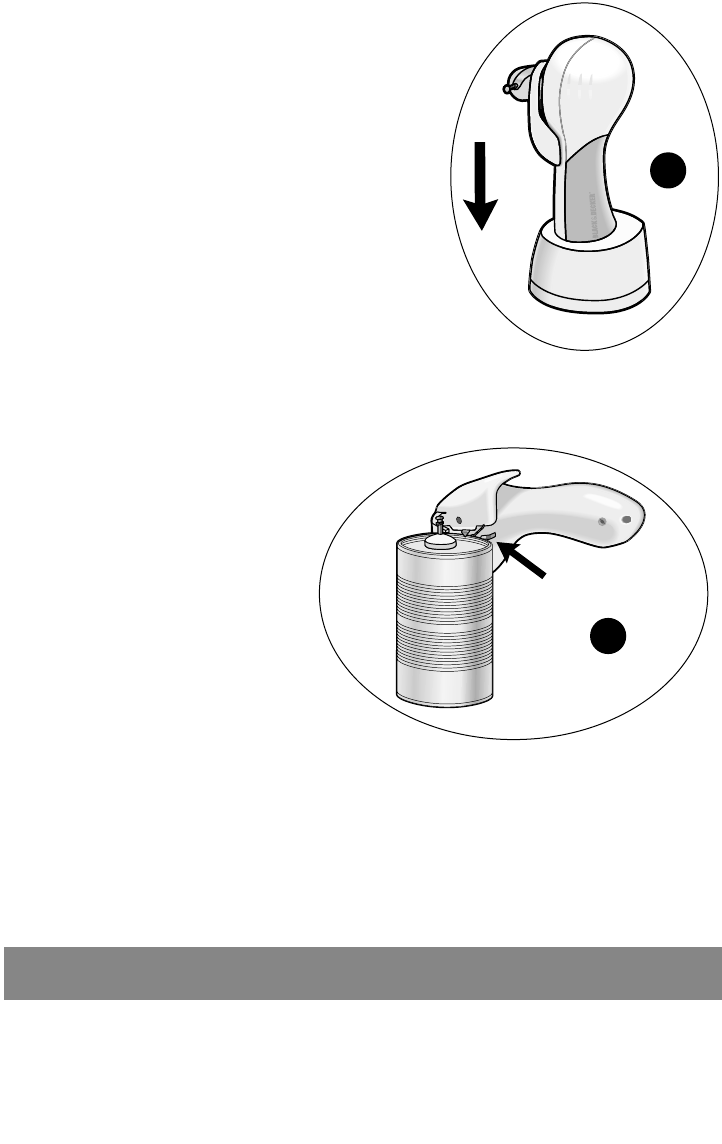
2. Stand the Can Opener in the Charging
Base as shown (A). The unit is designed
so the batteries may be on continuous
charge. Storing it in the Base keeps it
always ready for use.
3. If after repeated use the running time
seems shorter and the Can Opener has
less power, remove it from the Charging
Base, hold the Lever and let the unit run until
it stops. Then recharge the unit for 24 hours.
4. If the Can Opener doesn’t function, be sure the
Charging Base is plugged in and the outlet is not controlled by a wall
switch. Also check for a blown house fuse.
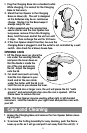
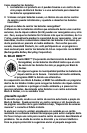
OPENING CANS
1. Lift the Pierce Lever up, place the
can under the Locating Tabs (B),
and press the Lever down so
that the blade is inside the
rim of the can and pierces
the lid. Adjust the magnet
onto the lid.
2. For small cans (such as tuna),
hold the Can Opener in your
hand and let the can rotate
under the Cutter until the lid is cut.
Hold the can as you release the lever.
3. For standard size or larger cans, the unit will pierce the lid, “walk
around,” and automatically stop once the can is opened. Lift the
Pierce Lever to remove the can.
NOTE: This Can Opener may be used by either right or left-handed
consumers. Hold the handle in your right hand and position cans with
your left.
Care and Cleaning
B
4
A