


SERVICING INSTRUCTIONS (continued)
16
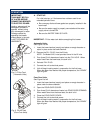
IMPORTANT:
When replacing water faucet
coil, also replace seal gaskets.
NOTE: Any abrasion or
roughness on the flat end of the
seat cup will require replacing
the seat cup:
Work the seat cup out of the
bonnet and off of the end of the
stem.
Install a new seat cup, making
sure the knob on the stem is
fully inserted into the pocket of
the seat cup, and the skirt of the
seat cup is fully inserted into the
bonnet.
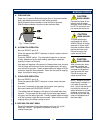
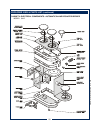
REPLACE TIMER ASSEMBLY
Disconnect brewer from electric power.
Remove front panel. Remove three screws holding timer to
bracket. Disconnect wiring to timer.
Reassemble in reverse order.
Adjust timer as described on page 14.
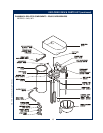
REPLACE HOT WATER FAUCET COIL
Symptom: Brewer drips continuously from brew head, except
when faucet valve is turned OFF.
Remove tank lid assembly per above.
Remove two hex nuts hot water coil to cover. Pull coil from
mounting holes.
Reassemble in reverse order.
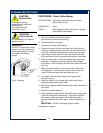
REPAIR HOT WATER FAUCET
Open top panel. Turn faucet valve OFF.
Unscrew aerator cap from faucet and remove handle retaining
clip. Do not let faucet body turn.
Pull bonnet assembly from faucet body.
Examine the interior of the faucet body and the surface of the
seat cup. Clean out any debris in the faucet body, using a stiff
bristle brush if necessary.
Examine the aerator. Clean any debris from the screen or flow
straightener, using a stiff bristle brush if necessary.
Reassemble in reverse order.
NOTE: This faucet body is not interchangeable with the faucets
in other families of Bloomfield brewers. If the entire faucet is to
be changed, use p/n 87123. Internal components may be
interchanged, however.
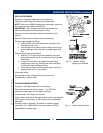
REPLACE BREW READY LIGHT or BREW BUTTON
Unplug power cord or turn circuit breaker OFF. Disconnect
electric leads.
Using Switch Removal Tool (p/n 83209) or a thin screwdriver,
compress mounting tabs then pry light or switch from mounting
hole.
Reassemble in reverse order.
685 77110 Owners Manual Horizon™ Brewers