H
33
Dispenser Removal
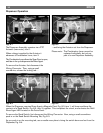
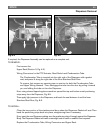
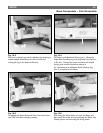
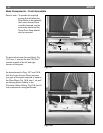
Fig. 8-5 Fig. 8-6
If required, the Dispenser Assembly can be replaced as a complete unit.
TO REMOVE:
First remove the:
Upper Rack (Section 3, Fig. 4-3).
Wiring Connectors for the PTC Actuator, Reed Switch and Condensation Tube.
The Condensation Tube is inserted into the right side of the Dispenser with a gasket
seal, and press fit along the right side of the Inner Stainless Steel Door.
To remove, first remove any securing tape or wire ties for both the Condensation Tube
and Upper Wiring Harness. Then, disengage the tube from the door by pulling it toward
you, and sliding the tube out from the Dispenser.
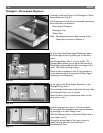
Now, using a broad tipped regular screwdriver spread the top and bottom metal positioning
strips away from the Dispenser, Fig. 8-5.
Then apply light pressure to the Dispenser, and break the seal between it and the Inner
Stainless Steel Door, Fig. 8-6.
TO INSTALL:
Clean the inner portion of the stainless steel door where the Dispenser Gasket will seat. Then
bend the positioning strips back into place, straightening them if necessary.
Now, insert the new Dispenser making sure the positioning strips fit snugly against the Dispenser
Body. The Dispenser Gasket will make a watertight seal so caulk or sealant is not required.
Replace the Condensation Tube, Wiring Connectors and Upper Rack.


