


2 • English
Safety InstructionsPreparationInstallationFinal Steps
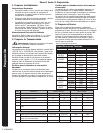
1. Prepare Cabinets
General Instructions:
• The single oven can be installed under a counter or
in a wall or cabinet. The double oven can be
installed in a wall or cabinet.
• Choose a location away from strong drafts and
where electrical power can be provided.
• The oven support surface must be a minimum 3/4”
thick plywood platform. For single ovens, it must
support 150 pounds. For double ovens, it must
support 290 pounds. The platform must be solid,
level and flush with the bottom of the cabinet cut
out.
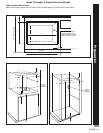
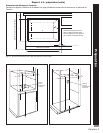
Cabinet Cutout Dimensions
See Table 1, below and Figures 1, 2 and 3 on following
page for cutout dimensions.
Steps 1 through 3: Preparation
2. Prepare Electrical Outlet
Warning: Turn power off at service panel and
lock service panel before beginning.
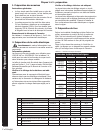
General Information
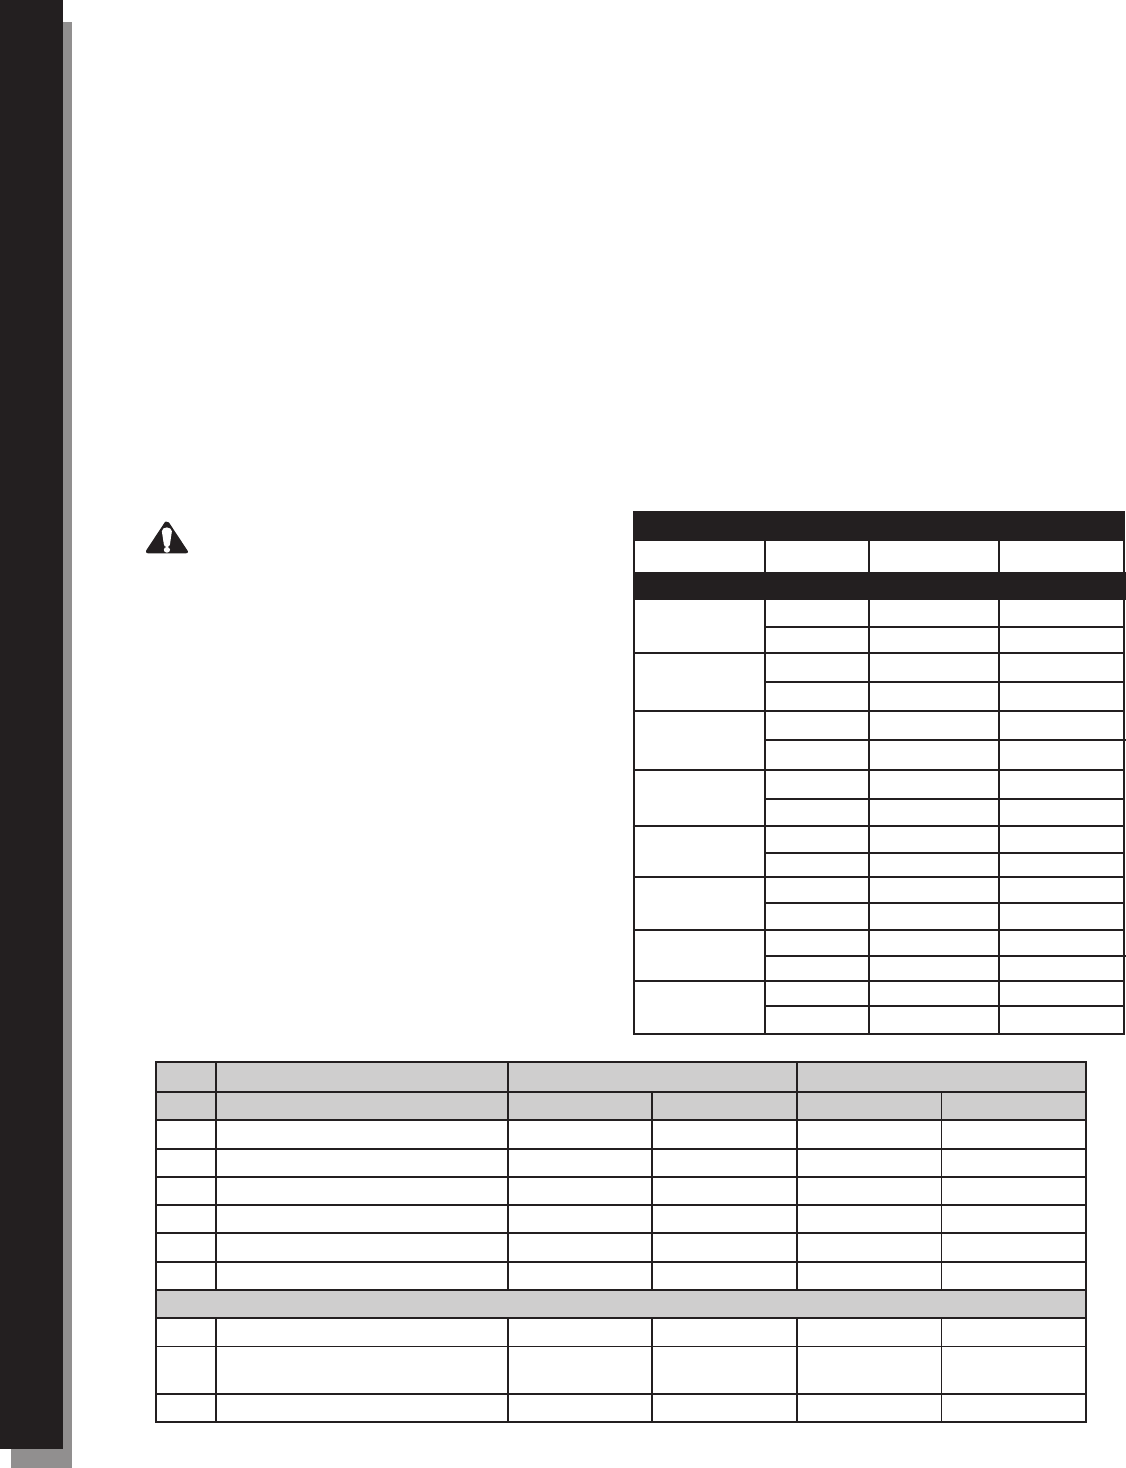
Ovens are dual rated for use on either 120/240 VAC
or 120/208 VAC. See Table 2 at right for power ratings
and circuit breaker sizes based upon the supply volt-
age for each model.
The junction box must be located in the indicated
space in Figures 1,2 and 3, next page. It should be
easily reached through the front of the cabinet where
the oven will be located.
Verify that wiring to house is adequate.
Contact your local utility company to verify that the
present electric service to your home is adequate. In
some instances, the size of the wiring to the house
and service switch must be increased to handle the
electrical load demanded by the oven.
Verify that wiring inside house is adequate.
Most wiring codes require a separate circuit with sepa-
rate disconnect switch and fuses either in the main
entrance panel or in a separate switch and fuse box.
Most local building regulations and codes require that
electrical wiring be done by licensed electricians. Be
sure to install your oven according to the electric codes
in place in your region.
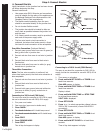
3. Prepare Oven
Remove any remaining packaging and discard. Remove
racks, accessories and oven door(s) and set aside. See
instructions in Use and Care Manual for proper removal
of oven doors. DO NOT lift oven by door handles!
Place oven in front of cabinets where it is to be in
-
stalled. Rest it on a jack or other sturdy support so that
it is in line with the cabinet cutout.
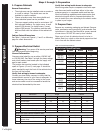
Volts
Watts
Amps
Model
Electrical Specifications
Table 2: Electrical Specifications
120/240
120/208
3,350
2,925
14.1
14
HBL503,
HBL504
120/240
120/208
6,350
5,300
25.25
26.25
HBL505,
HBL506
HBN504 120/240
120/208
3,250
2,820
13.5
13.6
HBN505
120/240
120/208
6,250
5,400
26
26
HBL73
HBL74,
HBN74
HBL75,
HBN75
HBL76,
HBN76
120/240
120/208
120/240
120/208
120/240
120/208
120/240
120/208
3,600
2,500
17.2
15.4
3,650
3,550
17.6
15.8
7,250
7,050
34.8
31.2
7,300
7,100
35.2
31.6
Ltr. Dimension Single Double
27” 30” 27” 30”
A Cutout Width 25 3/8” 28” 25 3/8” 28”
B Cutout Depth 24” 24” 24” 24”
C Cutout Height 23” 23” 47 13/16” 47 13/16”
D Floor to Bottom of Cutout 34” 34” N/A N/A
E Top of Cutout to Opening Above 1” min 1” min 1” min 1” min
F Bottom of Cutout to Opening Below 1/4” min 1/4” min 1/4” min 1/4” min
Single Oven Under Cabinet Installation Only:
G Top of Cutout to Top of Counter 4 1/2” min 4 1/2” min N/A N/A
H Side of Cutout to Adjacent Door or
Drawer Front
1/4” min 1/4” min N/A N/A
I Oven Door Frame Width 26 5/8” 29 1/2” N/A N/A