


4 • English
Safety InstructionsPreparationInstallationFinal Steps
Step 4: Connect Electric
4. Connect Electric
Verify that electric to the junction box has been turned
off before beginning this step.
General Instructions:
• Use copper wire ONLY. Wire size and connections
must be suitable for the rating of the appliance per
the National Electrical Code requirements or the
Canadian Electric Code requirements.
• The flexible conduit extending from the oven
should be connected directly to the junction box.
• Do not shorten flexible conduit.
• The junction box should be located to allow as
much slack as possible between the junction box
and the oven.
• A UL listed conduit connector must be provided at
each end of the power supply cable.
• The four wire branch circuit connection is
preferred, but where local codes permit, a three
wire branch circuit connection is also acceptable.
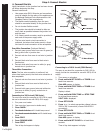
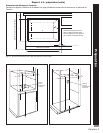
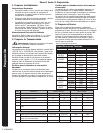
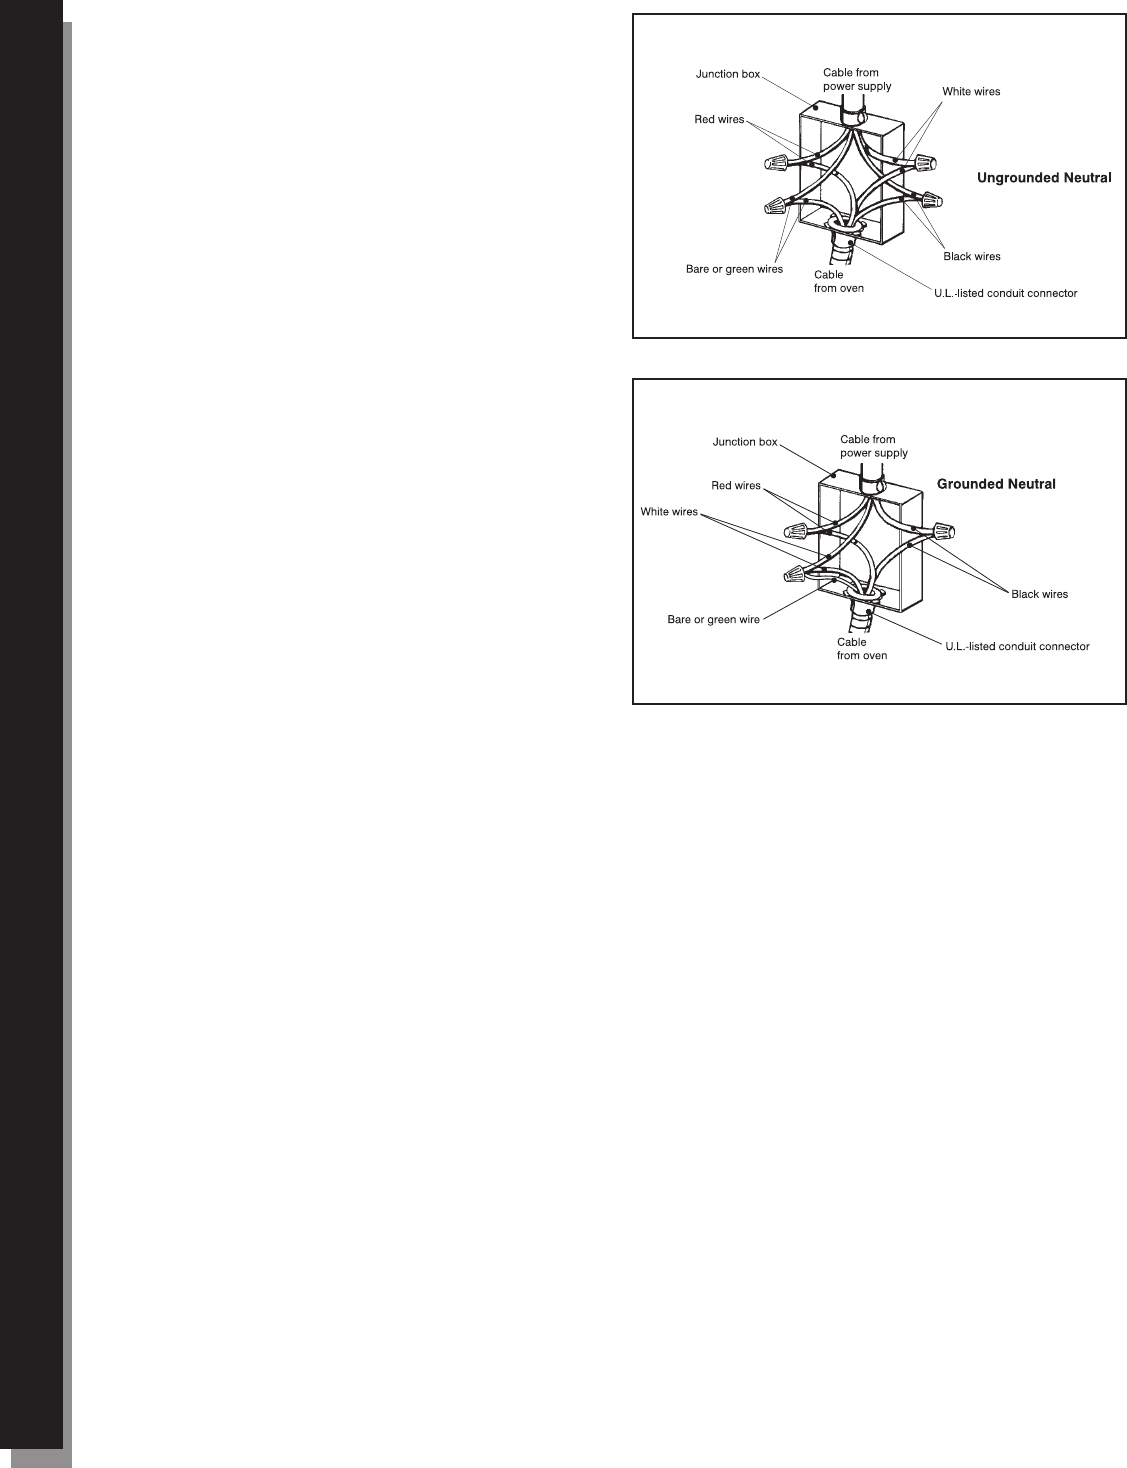
Four Wire Connection (Preferred Method):
1. Connect green ground wire from oven to green (or
bare) ground wire in junction box.
2. Connect red wire from oven to red wire in junction
box.
3. Connect black wire from oven to black wire in
junction box.
4. Connect white wire from oven to white (or gray)
neutral wire in junction box.
Three Wire Connection :
Note: The four wire connection is preferred, but
where local codes permit, the three wire connection is
also acceptable.
1. Connect red wire from oven to red wire in junction
box.
2. Connect black wire from oven to black wire in
junction box.
3. Connect both green ground wire and white wire
from oven to white (or gray) neutral wire in
junction box.
Connecting to a 208 V circuit (700 Series):
The oven is pre-wired for connection to 240 V, 60 Hz supply,
but can be converted for use with 208 V, 60 Hz supply.
1. Turn power on a breaker.
2. Open oven door (upper oven in double ovens)
3. Press CANCEL.
4. Turn knob clockwise until 6 double beeps sound.
4. Turn knob couonterclockwise until 9 double beeps
sound.
5. Press START.
6. Press COOKING MODE.
7. Press START.
Time of day clock appears in display.
Figure 4: Four Wire Connection
Figure 5: Three Wire Connection
Connecting to a 208 V circuit (5000 Series):
The oven is pre-wired for connection to 240 V, 60 Hz
supply, but can be converted for use with 208 V, 60 Hz
supply.
1. Turn power on a breaker.
2. Press and hold SET CLOCK and TIMER for at
least three seconds.
Sele dEG appears in display.
3. Press and hold STOP TIME and TIMER for at
least three seconds.
Display is blank.
4. Press and hold COOK TIME and STOP TIME
for at least three seconds.
VOLT 240 is displayed.
5. Press SET CLOCK.
6. Press + or - to select appropriate voltage (choose
208 for 208 V connection; choose 240 to 240 V
connection).
7. Press SET CLOCK.
8. Press and hold STOP TIME and TIMER for at
least three seconds.
Sele dEG appears in display
8. Press and hold SET CLOCK for at least three
seconds.
Time of day clock appears in display.