Oven Programmer
The oven programmer can be used to electroni-
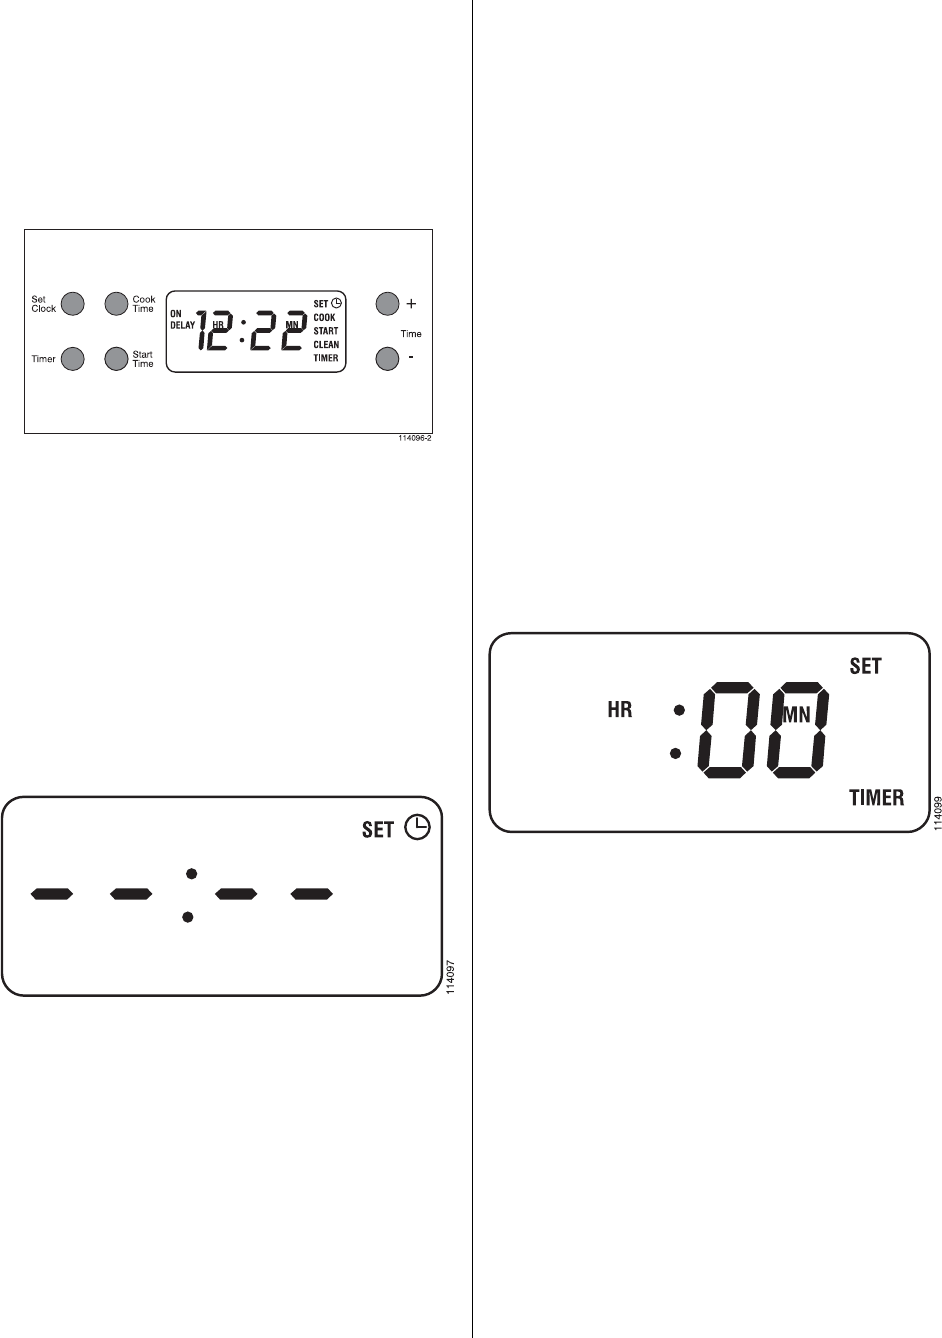
cally control the cooking in your oven. Figure 4
shows all the call-outs that are available on the
display and their locations. The buttons directly
adjacent to the display are the programming but-
tons. These are used to program the oven, includ-
ing setting the clock.
Figure 4.
Setting the Electronic Clock
When you first turn on the power to your oven, or
if the power to the oven has been off for a while
the display will come on showing all the call-outs,
as shown in Figure 4, and then will become blank,
with dashes in the display area and the set clock
symbol in the upper right of the programmer dis-
play, as shown in Figure 5.
Figure 5.
To set time of day
Press in Set Clock button. A “beep” will be
heard. Then press either the plus (+) or minus (-)
button, to the right of the display, to set the cor-
rect time. If the plus (+) or minus (-) button is
pressed it will advance or decrease the time in 1
minute increments, if the plus (+) or minus (-)
button is held in the minutes will increase or de-
crease in 10 minute increments. Once the time is
properly set depress the Set Clock button again to
enter the time. A “beep” will sound and the Set
Clock symbol, in the upper right, will disappear.
To change the time of day simply repeat the steps
described above. To check the time of day when
the timer is in use depress the Set Clock button.
The time of day will be displayed briefly and then
will return to the timer function.
Timer
The timer acts as a kitchen timer, counting down
from the set time.
To Set Timer
• Press Timer button. A “beep” will be heard
and the display will change from showing the
time of day to read zero (.00) and say SET
TIMER, to the right, as shown in Figure 6.
• Then press either the plus (+) or minus (-) but-
ton, to the right of the display, to set the timer
to the time interval desired.
Figure 6.
Notes: 1. Each time the plus (+) or minus (-)
button is depressed the display will in-
crease or decrease in 1 minute incre-
ments. If the plus (+) or minus (-) but-
ton is held in the display will increase
or decrease in 10 minute increments.
2. If the plus (+) or minus (-) button is
not depressed within 5 seconds of de-
pressing the Timer button the Timer
button will have to be depressed again
to again call up the timer mode.
• Once the desired time interval is set release the
buttons.
• The timing interval will start after approxi-
mately 4 seconds.
9


