


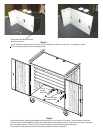
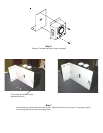
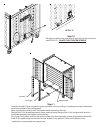
Step 6
Remove 2 screws that secure timer to bracket.
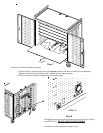
Step 7
Install bracket to replacement timer with 2 nuts. Adjust timer dial to current time. If necessary, adjust
timer charging times to match the original timer.
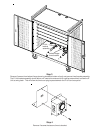
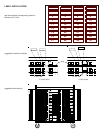
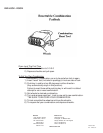
Timer vents & bracket must be
attached as shown.