32
33
NOTE:
Your customized PIZZA
temperature and time settings will
remain in the memory of the oven
until you change them or unplug
the oven from the wall outlet. When
the oven is plugged back into the
wall outlet, the PIZZA function will
automatically return to the preset
temperature of ‘450°F’, preset time
of ':15 MINS' and preset FROZEN
FOODS setting.
Press the START/CANCEL button to 5.
activate this setting. The button surround
will illuminate red, the oven alert will
sound, and the LCD screen will
illuminate orange.
The LCD screen will indicate a blinking 6.
‘PREHEATING’. Once the oven has
reached the set temperature, the
temperature alert will sound.
Place the pizza pan or pizza on the 7.
wire rack so air flows around the sides
of the food.
NOTE:
Pizza pan color, size, and thickness
can affect browning/crispiness of
the pizza base.
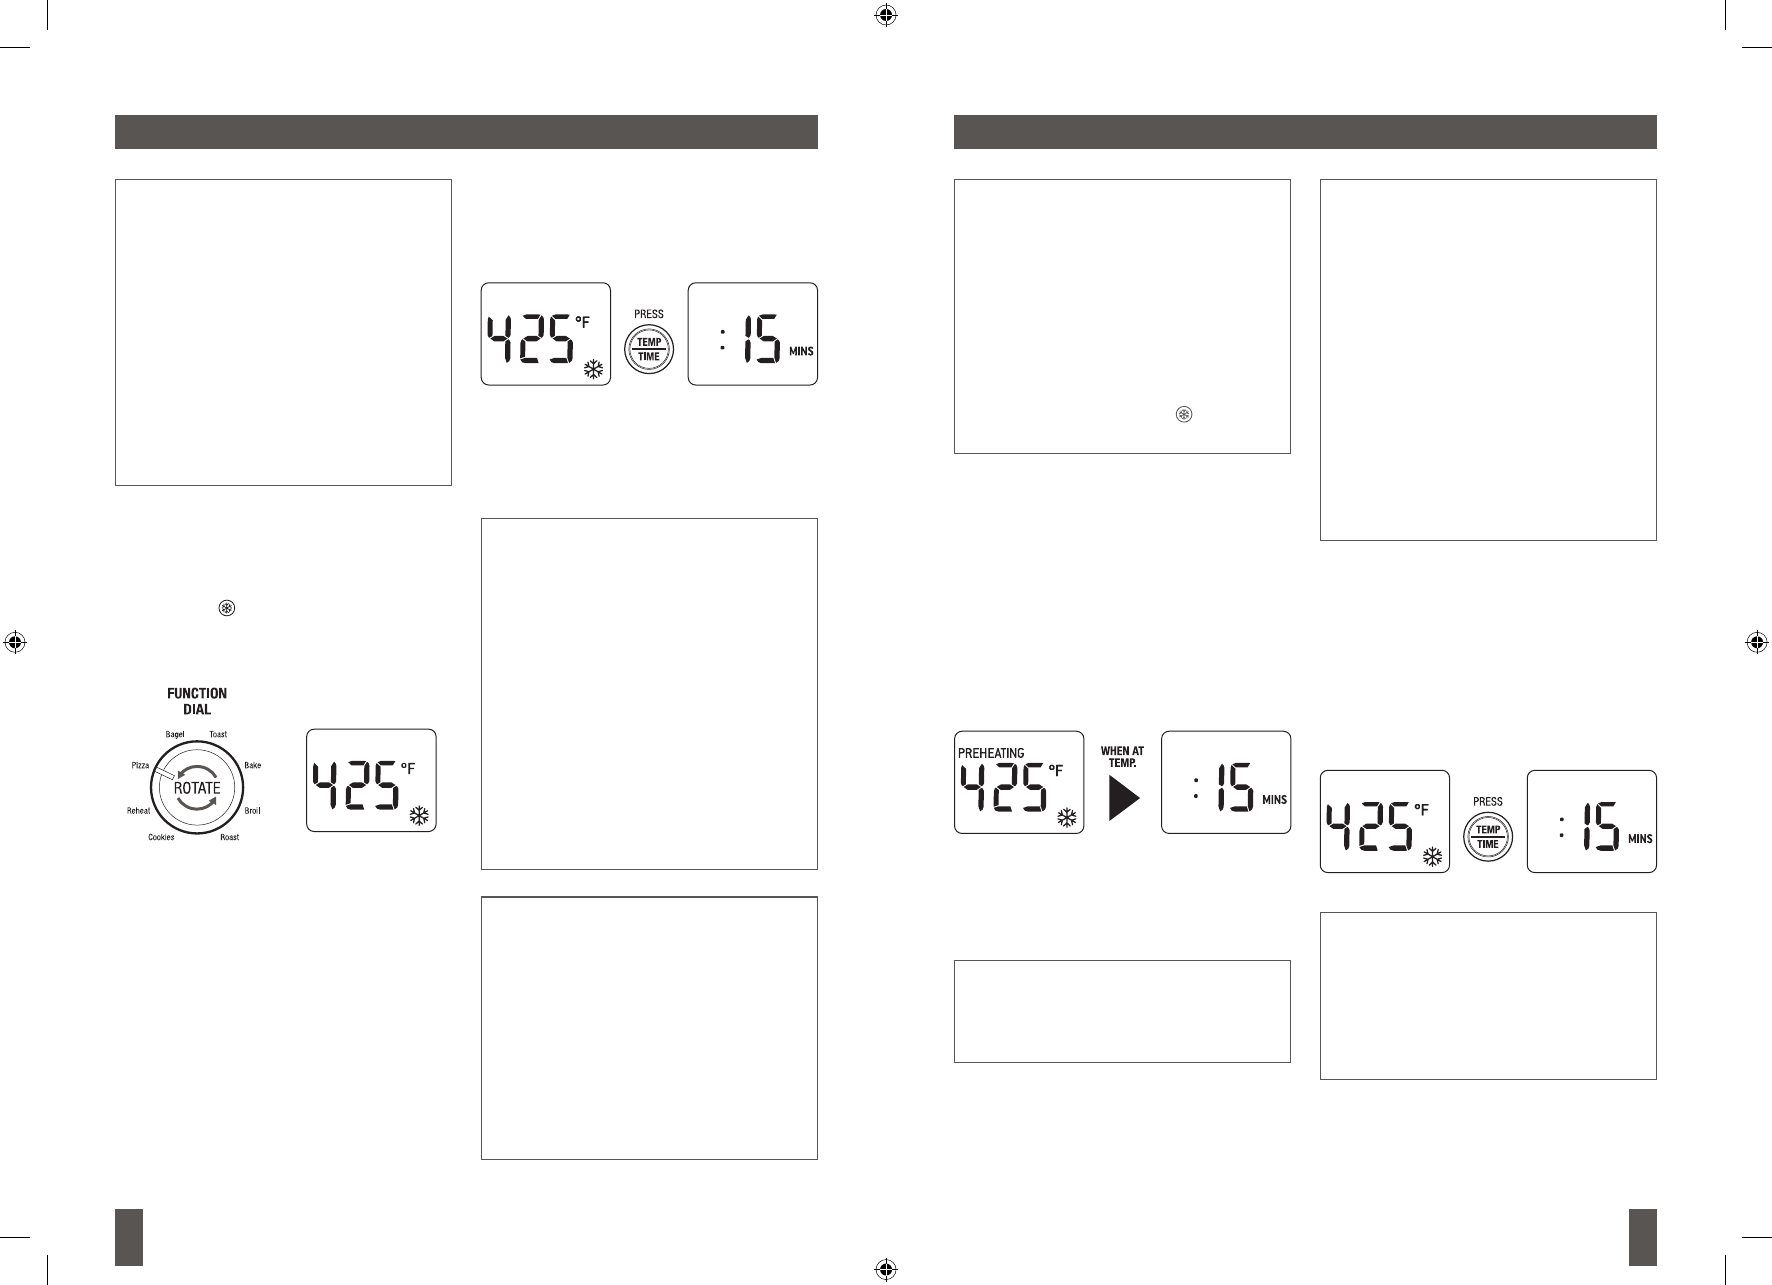
b) To select the cooking time, press
the center of the TEMP/TIME dial until
the LCD screen displays the preset
cooking time of ':15 MINS'.
Turn the dial to adjust the cooking time
in one minute increments up to 1 hour,
and in 5 minute increments between 1
and 2 hours.
NOTE:
The cooking technology in The
Compact Smart Oven(TM) allows
foods to cook more evenly and
quickly, significantly reducing
cooking times. The oven’s preset
cooking temperatures and times,
as well as the cooking temperature
and time directions on pre-packaged
foods, may need to be changed
depending on the recipe, the amount
of food and your personal taste.
We recommend experimenting with
the temperature and time settings to
produce the desired results.
NOTE:
Due to the wide variety of pizzas
available, you will need to consider
whether you are cooking a fresh or
frozen pizza or a thin crust or deep
dish, and adjust the cooking time to
produce the ideal result.
For example, frozen pizzas may
need additional cooking time.
Thick crust pizzas may also require
slightly more cooking time.
OPERATING YOUR BREVILLE SMART OVEN™ — PIZZAOPERATING YOUR BREVILLE COMPACT SMART OVEN™ — PIZZA
NOTE:
We recommend using the middle
rack height position during the
PIZZA function. However this is a
guide only. The position of the rack
may vary depending on the type and
size of the pizza. Some fresh pizza's
may be more suited to the bottom
rack height position.
We recommend experimenting with
the rack height position, as well as
the temperature and time settings to
produce the desired results.
Turn the FUNCTION dial until the 3.
indicator reaches the PIZZA function.
The LCD screen indicates the preset
PIZZA temperature of ‘450°F’.
The preset FROZEN FOODS setting
will also be displayed (see Page 34 if
cooking fresh pizza).
The pizza cooking temperature and time 4.
can be adjusted before or during the
cooking cycle.
a) The preset cooking temperature of
425°F is displayed as the default on
the LCD screen. Turn the TEMP/TIME
dial to adjust the cooking temperature
in 10°F increments, from 120°F to a
maximum of 450°F (or in the Celsius
mode, 5°C increments, from 50°C to
a maximum 230°C).
NOTE:
If cooking a frozen pizza, ensure
to remove all packaging, including
cardboard, plastic, paper, or other
flammable materials before placing
the pizza in the oven.
Use a pizza pan when cooking a
pizza. It is not recommended to
cook pizzas directly onto the wire
rack as melted cheese and other
ingredients may come into contact
with elements and create a potential
fire risk.
Oven accessories available at
breville.com.
After the PREHEATING alert has 8.
sounded, the timer will automatically
begin to count down in one minute
increments. The temperature and time
can be adjusted during the cooking cycle
by turning the TEMP/TIME dial. Toggle
between Temperature and Time by
pressing the TEMP/TIME button.
NOTE:
Some large pizzas may brown
unevenly in compact ovens. Open
the oven door half way through the
cooking time and carefully rotate
the pizza 90 degrees for more
even browning.


