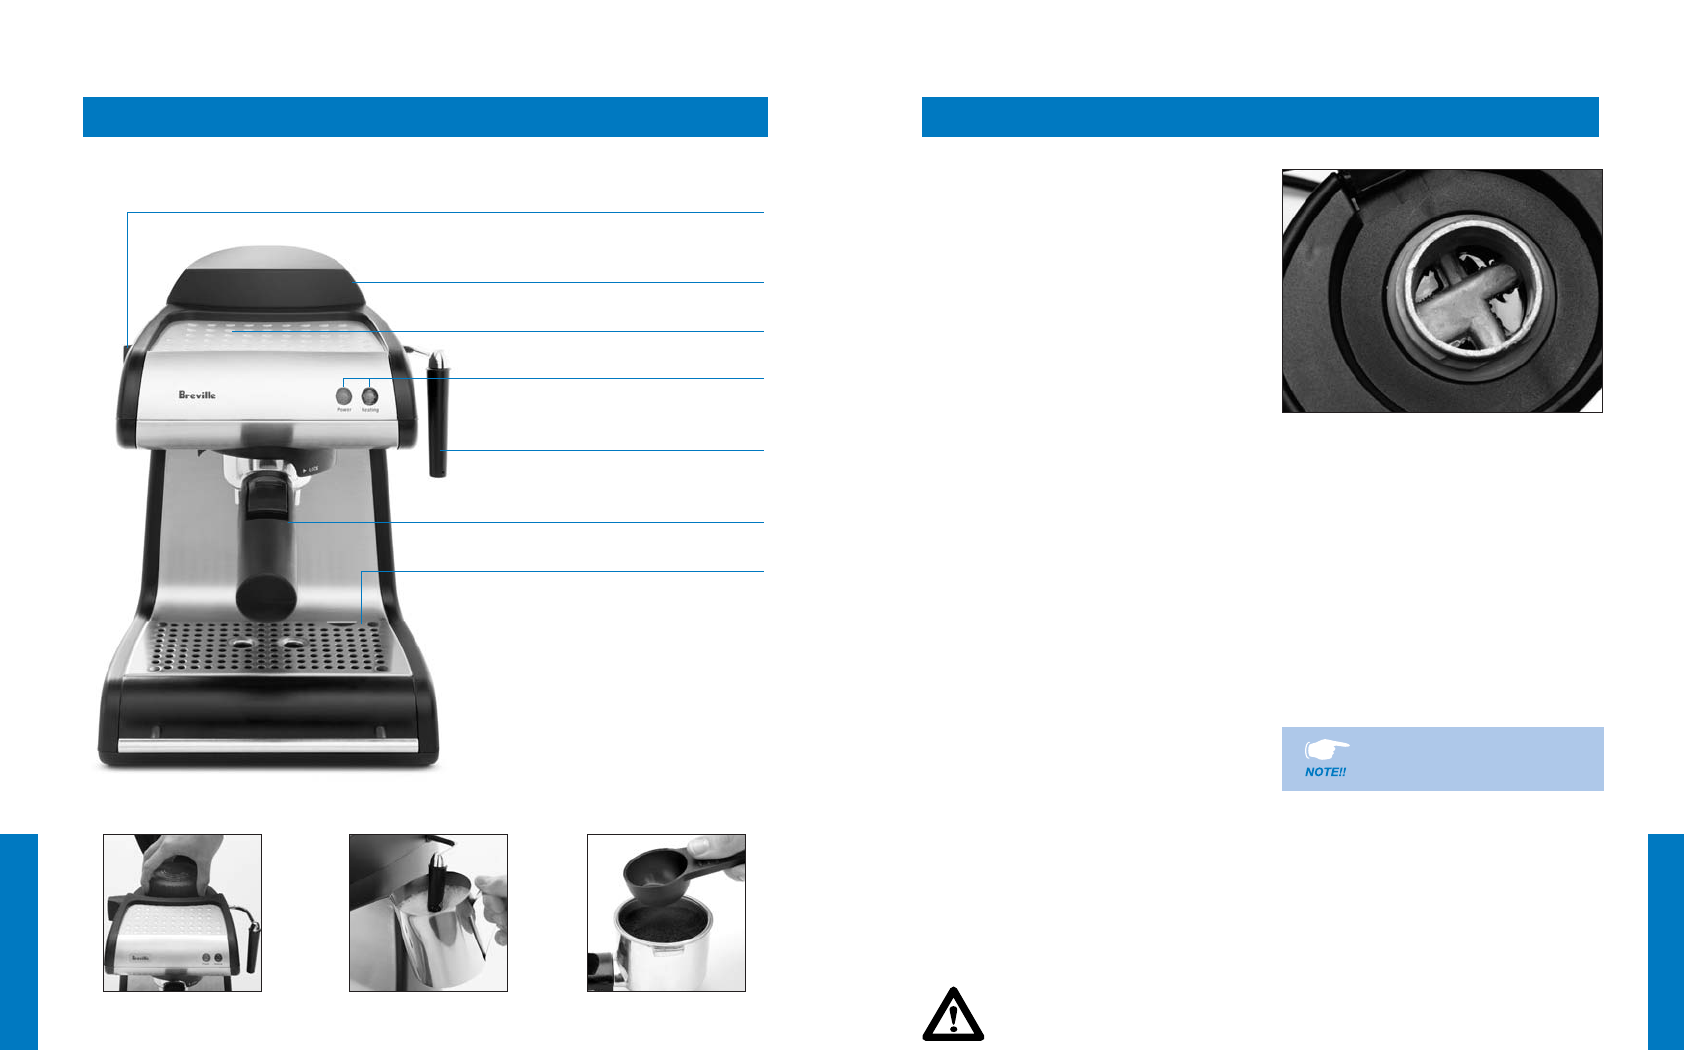
OPERATING YOUR BREVILLE ESPRESSO/CAPPUCCINO MAKER
Do not use warm or hot
water to fill the water tank.
3 position brew/steam selector control
Water tank cap with pressure
indicator button
Cup warming plate
Power ‘on’ and ‘heating’ lights
Steam tube and nozzle with removable
cappuccino froth enhancer
Filter holder and 2 stainless steel
filters (1-2 cup filter and 2-4 cup filter)
Removable drip tray
Bonus espresso cup set (not shown)
Cleaning tool (not shown)
Water tank with hinged cover Stainless steel frothing jug Coffee measuring spoon
fig 1
DO NOT POUR WATER INTO THE WATER TANK WHILE THE SELECTOR
CONTROL IS IN THE BREW OR STEAM POSITION.
KNOW YOUR BREVILLE ESPRESSO/CAPPUCCINO MAKER
6
BEFORE USING YOUR
ESPRESSO/CAPPUCCINO
MAKER
Wash the filter holder, stainless filters
and frothing jug in mild detergent and water.
Rinse and dry thoroughly.
It is recommended to carry out a
complete brewing operation with cold water
but without any coffee before making your
first espresso or cappuccino (see Brewing
Coffee). By doing so, any residual dust left
inside the Espresso/Cappuccino Maker will
be removed.
PRE-WARMING CUPS
For optimal coffee temperature, use the cup
warming plate on top of the appliance to
pre-warm the cups. The cup-warming plate
will be heating whenever the appliance is
switched on at power outlet.
HOW TO MAKE AN ESPRESSO
Filling the water tank
• Switch the power off at the power outlet
and remove the plug.
• Ensure the Brew/Steam selector control
is in the ‘STANDBY’ position. The
‘STANDBY’ position is located on the
centre of the selector control.
• Ensure the Pressure Indicator Button on
the Water Tank Cap has dropped down
and is flush with the top of the cap.
• Unscrew the water tank cap and pour cold
water into the tank. Fill to 5mm below the
visible water pipes (Fig 1). Do not fill to
the top of the tank or there will not be
enough area to generate steam.
• Screw the water tank cap back on top of
the water tank, making sure it is secured
firmly before operating the appliance.
7


