


3
BUNN Espress® Model ES•1AF
2
26601.0000
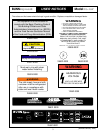
WARNING
• DO NOT OVERLOAD CIRCUIT.
• ALWAYS ELECTRICALLY GROUND
THE CHASSIS OR ADAPTOR PLUG.
• DO NOT DEFORM PLUG OR CORD.
• FOLLOW NATIONAL AND LOCAL
ELECTRICAL CODES.
• KEEP COMBUSTIBLES AWAY.
FAILURE TO COMPLY RISKS EQUIPMENT
DAMAGE, FIRE OR SHOCK HAZARD.
READ THE ENTIRE OPERATING
MANUAL INCLUDING THE LIMIT
OF WARRANTY AND LIABILITY
BEFORE BUYING OR USING
THIS PRODUCT
00986.0000C 3/94 © 1994 Bunn-O-Matic Corporation
WARNING
HAZARDOUS
VOLTAGE
UNPLUG BREWER
BEFORE REMOVING!
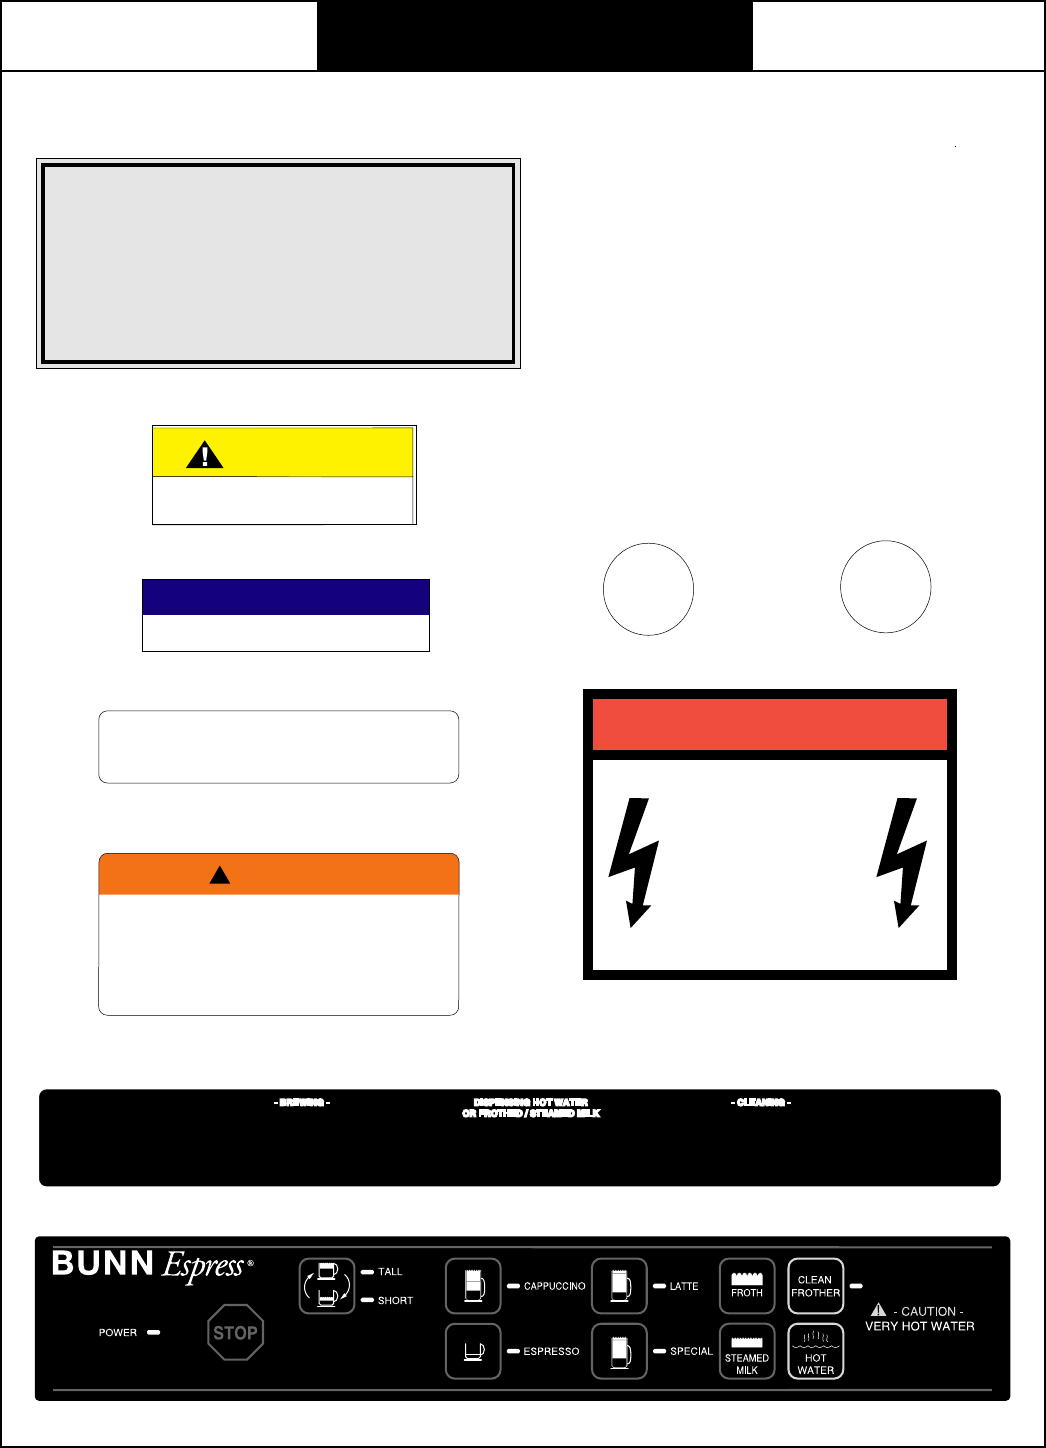
USER NOTICES
The notices on this brewer should be kept in good condition. Replace unreadable or damaged labels.
00656.0000
CAUTION
HOT
Liquid-Steam-Surfaces
NOTICE
160 psig max operating pressure
24246.0000
24247.0000
12652.0000
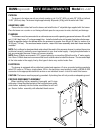
1. Place an empty cup below the dispensing nozzle.1. Place an empty cup below the dispensing nozzle.
2. Press the button indicating your selection.2. Press the button indicating your selection.
3. Press any button to stop the cycle.3. Press any button to stop the cycle.
1. For complete instructions, see the operators manual.1. For complete instructions, see the operators manual.
When CLEAN FROTHER light flashes, rinse the frother as follows:When CLEAN FROTHER light flashes, rinse the frother as follows:
2. Place the end of the milk supply tube in a container of clean hot water.2. Place the end of the milk supply tube in a container of clean hot water.
3. Press the "CLEAN FROTHER" button.3. Press the "CLEAN FROTHER" button.
4. Carefully remove the cup & discard contents after flow has stopped.4. Carefully remove the cup & discard contents after flow has stopped.
5. Disassemble and thoroughly clean the milk frother according to local5. Disassemble and thoroughly clean the milk frother according to local
sanitation codes, at least every four (4) hours.sanitation codes, at least every four (4) hours.
1. Place a pod in the filter holder.1. Place a pod in the filter holder.
2. Lock the filter holder into the group head.2. Lock the filter holder into the group head.
3. Place an empty cup below the dispensing nozzles.3. Place an empty cup below the dispensing nozzles.
4. Press your drink selection.4. Press your drink selection.
5. Carefully remove the cup after the flow has stopped.5. Carefully remove the cup after the flow has stopped.
25551.0001
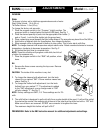
Must wet o-ring with clean
water before installing.
26625.0000
SM
F
26602.0000
26602.0001
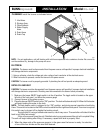
This equipment is to be installed to
comply with the Basic Plumbing Code of
the Building Officials and Code
Administrators International, Inc. (BOCA)
and the Food Service Sanitation Manual
of the Food and Drug Administration (FDA).
00986.0002
(Revised January 1996)
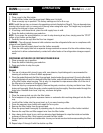
The milk supply hose and milk
container must be refrigerated
after use in compliance with
state and local health codes.
!
WARNING
26868.0000