7
BUNN Espress® Model ES•1AF
ADJUSTMENTS
INFUSION
Water
The brewer is factory set to yield these approximate amounts of water:
Short Coffee Volume - 1.5 oz (44 cc)
Tall Coffee Volume - 1.8 oz (53 cc)
To change the factory set amounts:
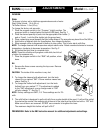
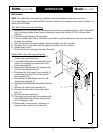
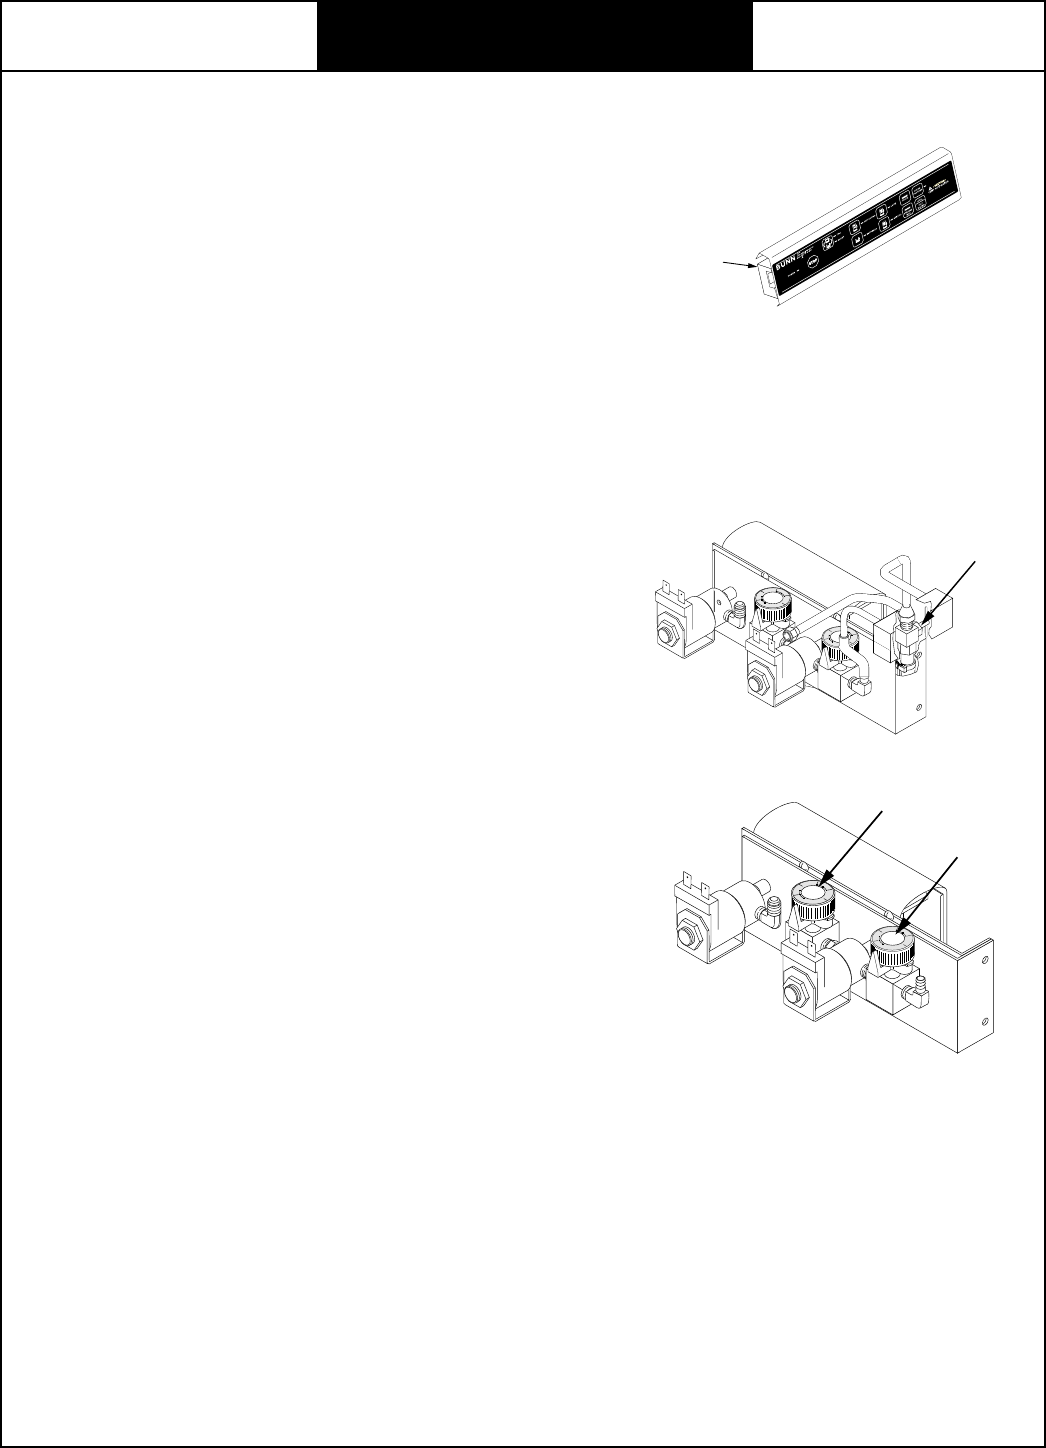
1. Place the program switch in the “Program” (right) position. The
program switch is located behind the switch/LED panel. See Fig. 1
2. Place the desired quantity of pods into the appropriate filter holder (1
pod or 2 pod). Lock the filter holder into the group head.
3. Place a measuring vessel beneath the filter holder dripout. The amounts may be set from 0 to 500 cc.
4. Hold button of desired drink for three flashes, then release the button.
5. When enough coffee is dispensed hit button to stop coffee. This hit also starts milk flow.
NOTE- To change steamed milk temperature adjust needle valve. Rotate counterclockwise to increase
temperature, clockwise to decrease temperature. See Fig. 2
6. Hit button the third time to complete drink.
NOTE- Three hits of button will program a milk drink, two hits of
a button for espresso only.
7. Place the program switch in the “RUN” left position, when
done.
Air
1. Remove the three screws securing the top cover. Remove
the top cover.
CAUTION- The inside of this machine is very hot.
2. To change the steamed milk adjustment, turn the knob
closest to you marked “SM”. A lower number means less
steam. See Fig. 3
3. To change the frothed milk adjustment, turn the knob
farthest from you marked “F”. The adjustment is added
to the “SM” adjustment, so any change made to “SM”
will also change “F”. See Fig. 3
NOTE- Factory settings are SM-1; F-5. These settings are for 2%
milk.
3. The milk frother is designed to pull cold milk from counter height at the most. If milk will be pulled
from below the counter, the metering jet at the end of the tube must be drilled out with a .125” drill.
Make sure all burrs are removed. DO NOT use connector to lengthen the hose.
The maximum height this frother will pull is 24.0”
PREINFUSION- Refer to the DBC instruction manual for additional adjustments and settings.
L
2
4
C
8
10
L
2
4
C
8
10
F
SM
P913
P909
P912
FIG. 1
FIG. 2
FIG. 3
L
2
4
C
8
1
0
L
2
4
C
8
1
0
F
SM


