


SERVICE (cont.)
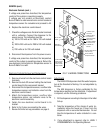
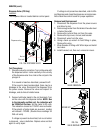
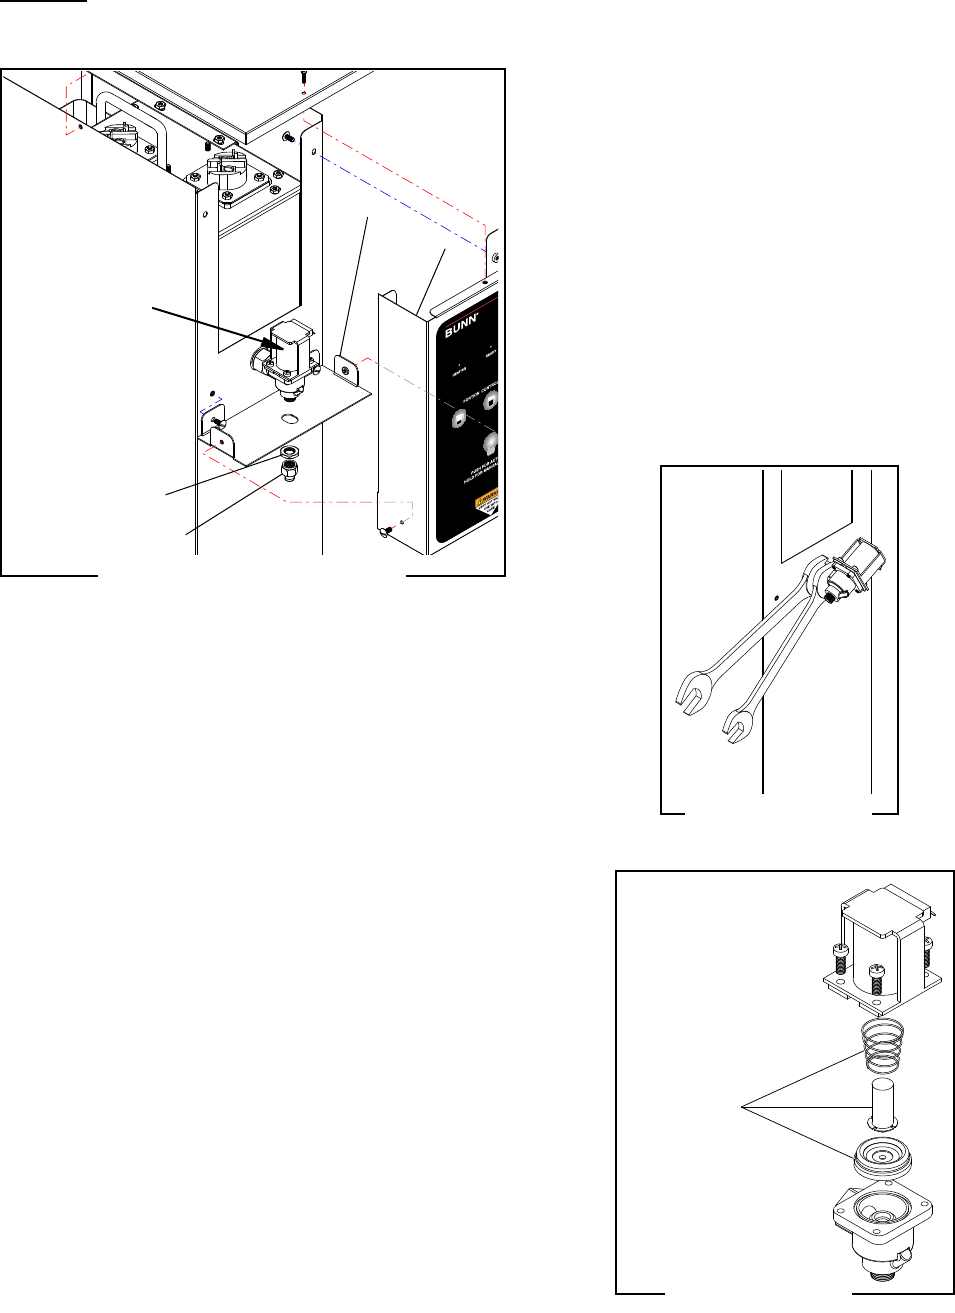
Dispense Valve (PC Only)
Location:
The Dispense Valve is located behind control panel.
Test Procedures:
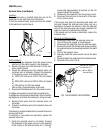
1. Check the valve for coil action. Turn on the valve with
the dispense button. Listen carefully in the vicinity
of the dispense valve for a click as the coil pulls the
plunger in.
If no sound is heard as described, proceed to #2.
If the sound is heard as described, there may be a
blockage in the valve. Disconnect the dispenser from
the power source. Remove the valve and inspect for
blockage, and de-lime all related areas.
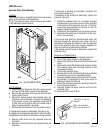
2. Connect voltmeter leads to the coil terminals. Turn
on the valve with the dispense button. NOTE: Due
to the internally rectified coil, the indication will
be 120VAC all the time. Set the meter to DC volts.
The indication should be 170VDC when activated.
If the polarity of meter leads are reversed, reading
will indicate -170VDC. (Double these readings for
240 volt coils)
If voltage is present as described, but no coil action
is observed, valve is defective. Replace valve and test
again to verify repair.
FIG. 18a DISPENSE VALVE
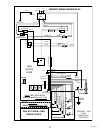
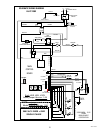
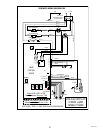
If voltage is not present as described, refer to Wir-
ing Diagrams and check the dispenser wiring harness.
Also check the control board for proper operation.
Removal and Replacement:
1. Disconnect the dispenser from the power source
and allow to cool.
2. Drain enough water from the tank so the water level
is below the outlet.
3. Remove the nut and flare nut from the valve.
4. Remove the top cover, shroud, and bracket.
5. Disconnect wires from the valve.
6. Using a back up wrench to hold fitting in place,
Remove the valve.
7. Wrap threads of fitting with Teflon tape and install
new valve.
8. Install bracket, nut, flare nut, wires and covers.
42311 071310
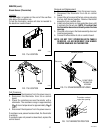
REPAIR KIT
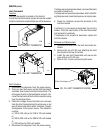
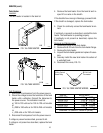
FIG. 18b
VALVE REMOVAL
Flare nut
Nut
Dispense valve
Bracket
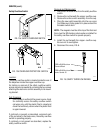
Shroud
FIG. 18c
VALVE REPAIR KIT
18