


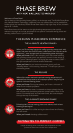

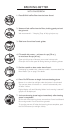

Brews at an inconsistent temperature.
If water’s too cold, flavor can get left behind.
If water’s too hot, coffee can taste bitter.
Heats water during the brew cycle,
dripping it slowly onto grounds.
The longer brew cycle makes coffee
taste bitter.
Drips water slowly over the grounds, so
there’s not enough turbulence to wet all
the grounds evenly. Some grounds are
over-extracted making coffee taste bitter.
6-minute heating phase heats
water to about 200˚F, the right temperature
for hot, flavorful coffee that’s never bitter.
Water in the top tank is released through
our unique sprayhead – creating the
turbulence needed to wet the grounds
evenly and extract perfect flavor.
4-minute brewing phase,
the right time for rich, smooth coffee
that’s never bitter.
53
WHY BUNN BREWS BETTER
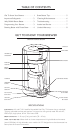
PROGRAMMING YOUR BREWER
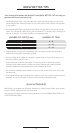
BUNN Phase Brew is different from any brewer you’ve used before. Unlike ordinary coffee
makers, BUNN Phase Brew doesn’t ‘drip’ right away. In fact, it doesn’t drip at all. That’s
because BUNN Heat & Release Technology heats all the water to the right temperature,
then quickly releases it through our unique sprayhead for an optimal 4-minute brewing
phase and amazing coffee flavor in just 10 minutes!
note: You must set the clock to use the brewer and the optional Auto-Start function. Remember to
reset the clock for time changes and power outages.
PHASE BREW VS. TYPICAL DRIP
BUNN PHASE BREW VS. TYPICAL DRIP
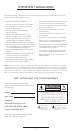
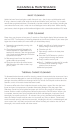
set clock
auto-start
(
optional
)
1. Plug 3-prong power cord into standard
electrical outlet.
2. Display will flash until clock is set.
3. Press Clock button.
4. Set time using Hour and Minute buttons.
Numbers scroll forward only. Take care
to select correct AM/PM time.
5. Press Clock button again to lock in time.
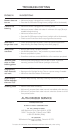
1. Place BUNN coffee filter and coffee
grounds into the brew funnel and slide into
the funnel guides.
2. Fill brewer with 20 – 40 oz. of water and
place carafe on base of brewer (failure to
follow steps 1 and 2 may result in property
damage).
3. Press Auto-Start button. Hour and Minute
buttons will light up, time will flash on
digital display.
4. Set time using Hour and Minute buttons.
Numbers scroll forward only. Stop at
desired Auto-Start time. Take care to
select correct AM/PM time.
5. When desired brewing time is on the
digital display, it will be set and Auto-Start
will activate in 10 seconds. Once activated,
Auto-Start button will illuminate red.
Do not press the button again as it will
cancel your selected Auto-Start time.
6. To check your Auto-Start setting at any
time, press the Auto-Start button and the
digital display will flash the programmed
time. The flashing time will remain the set
time unless you change it. After 10 seconds
with no buttons pushed, the Auto-Start
button will illuminate and Auto-Start is set.
7. The Auto-Start function must be
activated each time you want to pre-
schedule a brew. If the Auto-Start button
is not illuminated, the Auto-Start function
is not activated.
8. To cancel a programmed Auto-Start, press
the Auto-Start button twice.