Page 7
MODELS OT & RT
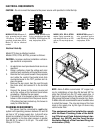
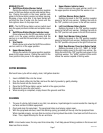
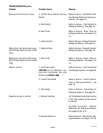
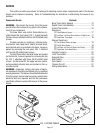
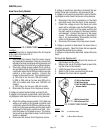
A. On/Off Brew Station Warmer Switch
Placing the switch in the upper position supplies
power to the brew station warmer and enables brew-
ing. Placing the switch in the lower position cuts
power to the brew station warmer and stops brewing.
Stopping a brew cycle after it has been started will
not stop the flow of water into the funnel until the
tank syphons down to its proper level.
NOTE - The On/Off brew station warmer switch must
be in the upper position to initiate and complete a brew
cycle.
B. On/Off Brew Station Warmer Indicator Lamp
Glows whenever the On/Off brew station warmer
switch is in the upper position showing that the
warmer is on and that the automatic brew cycle can
be started.
C. Start Switch
Starts a brew cycle when the On/Off brew station
warmer switch is in the upper position.
D. Upper Warmer Switch
Placing the switch in the upper position supplies
power to the upper warmer. Placing the switch in the
lower position cuts power to the upper warmer.
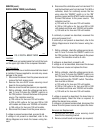
COFFEE BREWING
Start each brew cycle with an empty, clean, half-gallon decanter.
1. Insert a BUNN® filter into the funnel.
2. Pour the fresh coffee into the filter and level the bed of grounds by gently shaking.
3. Slide the funnel into the funnel rails.
4. Place the On/Off brew station warmer switch in the upper position.
5. Momentarily press the start switch.
6. When brewing is completed, simply discard the grounds and filter.
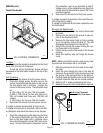
CLEANING
1. The use of a damp cloth rinsed in any mild, non-abrasive, liquid detergent is recommended for cleaning all
surfaces on Bunn-O-Matic equipment.
2. Check and clean the sprayhead. The sprayhead holes must always remain open.
3. With the sprayhead removed, insert the deliming spring (provided) all the way into the sprayhead tube.
When inserted properly, no more than two inches of spring should be visible. Saw back and forth five or six
times. Then, repeat this step for the air vent tube.
NOTE - In hard water areas, this may need to be done daily. It will help prevent liming problems in the brewer and
takes less than a minute.
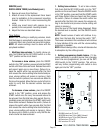
E. Upper Warmer Indicator Lamp
Glows whenever the upper warmer switch is in
the upper position showing that the warmer is on.
F. Left Rear Warmer Rotary Switch
Rotating the knob to the "ON" position supplies
power to the left rear warmer. Rotating the knob to
the "OFF" position cuts power to the left rear warmer.
G. Left Front Warmer Rotary Switch
Rotating the knob to the "ON" position supplies
power to the left front warmer. Rotating the knob to
the "OFF" position cuts power to the left front warmer.
H. Right Front Warmer Rotary Switch
Rotating the knob to the "ON" position supplies
power to the right front warmer. Rotating the knob to
the "OFF" position cuts power to the right front warmer.
I. Right Rear Warmer Three Heat Rotary Switch
Rotating the knob to the "LO", "MED", or "HIGH"
positions supply power to the right rear warmer. Ro-
tating the knob to the "OFF" position cuts power to the
right rear warmer. The “HIGH” position of this switch
makes the warmer capable of boiling water.
10021 071700


