


-6- -15-
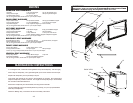
1. Make sure the Dehydrator is turned off and unplugged.
2. Remove the Racks and any other loose items from the interior and close
the Door.
3. Gently lay the Dehydrator onto its left side (when facing the Door) on a
rug, folded blanket or other similar article to prevent scratching. DO NOT
lay the Dehydrator onto its right side because the glass Door may fall
open and break! DO NOT lay the Dehydrator onto its front or back to avoid
damaging the Door, Control Panel and/or Circuit Breaker.
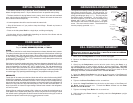
4. Screw a Caster Nut (attached to Caster for shipping) onto the threaded
stem of each Caster until it stops.
5. Screw the Swivel Casters into the Rear Bottom Corner Brackets until
they stop.
HINT: Hold the Caster frame with one hand and rotate the swivel with
your other hand.
6. Screw the Swivel Casters with Breaks into the Front Foot Brackets
until they stop.
7. Tighten each Caster Nut with a 12-mm (1/2”) open-end wrench. Turn the
Caster Nuts clockwise. You want to tighten them to the Dehydrator, not the
Casters. DO NOT over-tighten.
8. Visually inspect the gap between the Door and Front Left Foot Bracket
to make sure the stem of the Caster does not contact the bottom of the
Door. If there is contact, loosen the Caster Nut and move the Caster down.
Screw the Caster Nut onto the stem of the Caster. This time, however, do
not screw it all the way down. Leave a small gap (this will shorten the length
of stem that protrudes through the Foot Bracket). Reinstall the Caster as
described above. Inspect and repeat if necessary. Increase the size of the
gap each time.
9. While holding the Door closed, carefully stand the Dehydrator upright
onto the Caters.
160-L DEHYDRATOR ASSEMBLY
WARNING! Before cleaning, assembling or disassembling the
Dehydrator, make sure the Dehydrator is OFF and the PLUG IS REMOVED
FROM THE OUTLET/POWER SOURCE!
PRE-OPERATING INSTRUCTIONS
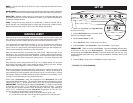
• DO NOT operate the Dehydrator without the Feet / Casters installed.
• Locate the Dehydrator on a clean, level, dry, non-ammable, surface at least 6”
(15 cm) away from any wall. Avoid carpeted surfaces.
• Set the brakes on the two front-mounted Swivel Casters (160-L model) .
Wrap jerky/snack sticks in aluminum foil and store in a thick plastic food storage
bag, or place jerky/snack sticks in a jar with a tight lid. Avoid storage in plastic
containers or bags without wrapping in aluminum foil or wax paper rst. Jerky/snack
sticks should be stored in a dark, dry, place between 50-60°F (10-15.6°C). You can
store properly dried jerky/snack sticks at room temperature for 1 to 2 months. To
extend the shelf life to up to 6 months, store jerky/snack sticks in the freezer. Be sure
to label and date all packages.
STORING JERKY
RECONSTITUTION
• While it is not necessary to reconstitute dried foods, it can be done with ease.
Vegetables can be used as a side dish or in recipes very effectively after being
reconstituted in the following way.
• Soak vegetables in cold, unsalted water for 3-7 minutes before cooking. If planning
to soak the food any longer, it should be placed in the refrigerator while soaking. After
soaking, it is best to cook the vegetables in the same water in which they soaked.
Simply bring the water to a boil and cook the vegetables until tender.
• Generally 1 cup of dried vegetables will result in about 2 cups after reconstitution.
Fruits reconstitute at a ratio of approximately 1:1-1/2 cups.
• Reconstitution time will vary depending on the thickness of the dried food and the
temperature of the water used. Soaking the food in warmer water will speed up the
process, however, it may result in loss of avor.
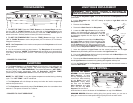
If you are using a marinade, shake off excess liquid from the meat before spacing it
evenly in single layers, approximately 1/4”-1/2” (0.6-1.5 cm) apart, on the Dehydrator
Racks.
IMPORTANT NOTE: DO NOT place jerky over the center hole of the Racks.
This will impede airow to the center of the Cabinet and could result in uneven
drying.
Dry meat at 145-150°F (62.7-65.6°F) for 4-7 hours. You may need to blot fat droplets
from the surface of the meat occasionally, using a paper towel. Drying times may
vary based on many circumstances including but not limited to: the relative humidity
of the room, the temperature of the meat at beginning of drying process, the amount
of meat in the dehydrator, leanness of meat, etc. Always allow jerky to cool before
taste testing.