CONTENTS
Page
SAFETY CONSIDERATIONS ................ 1
INTRODUCTION .......................... 2
General .................................. 2
Job Data .................................. 2
RECEIVING THE MACHINE AND BURNER ..2
Identify Machine and Burner .............. 2
Inspect Shipment .......................... 2
Check Shipping Vacuum .................. 2
Check Shipping Pressure .................. 2
Provide Machine Protection ................ 2
RIGGING AND POSITIONING .............. 3-6
Rigging One-Piece Units .................. 3
Rigging 2-Piece Units ...................... 3
• PREPARATION
• RIGGING
Position and Level The Equipment ........6
MACHINE ASSEMBLY .................... 7,8
Assemble 2-Piece Units .................... 7
Machine Leak Test ........................ 7
Machine Evacuation ...................... 7
MOUNTING THE BURNER ................ 8,9
Rigging .................................. 8
Frontplate an Burner Installation ..........8
Fuel System Installation .................. 9
• GAS TRAIN
• OIL SUPPLY SYSTEM
FIELD PIPING ............................ 9-12
Connect Water Piping ...................... 9
Fusible Plug Drain Piping .................. 11
Connect Rupture Disc Piping .............. 12
Connect Fuel Piping ...................... 12
Connect Exhaust Duct .................... 12
INSULATION AND PAINT .................. 12
Insulation (If Required) .................... 12
Final Paint Coat (If Required) .............. 12
ELECTRICAL CONNECTIONS .............. 12
Check Available Power Supply and Safety
Interlocks ................................ 12
Machine Control Panel External Wiring ... . 12
Burner Control Panel Wiring .............. 12
INITIAL SOLUTION AND REFRIGERANT
CHARGING .............................. 12
INTRODUCTION
General —
The 16DF machine is factory assembled, wired,
and leak tested. Installation (not by Carrier) consists prima-
rily of establishing water, fuel, exhaust, and electrical ser-
vices to the machine as well as mounting and connecting the
burner. Rigging, installation, insulation, painting, field wir-
ing, and field piping are the responsibility of the contractor
and/or customer. Carrier has no installation responsibilities
for the equipment.
Job Data — Necessary information consists of: ma-
chine location drawings, piping drawings, field wiring dia-
grams, and rigging guide.
RECEIVING THE MACHINE AND BURNER
NOTE: The chiller/heater machine and the burner are shipped
separately from different sources.
Identify Machine and Burner — The machine and
burner model numbers and serial numbers are stamped on
machine identification plates. Check this information against
shipping papers and job data.
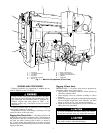
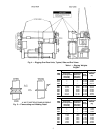
Inspect Shipment — (Fig. 1). Single-piece machines
are at a deep vacuum when shipped. Do not open any valves
until the vacuum has been noted. Refer to Check Shipping
Vacuum section, below. Machines shipped in 2 pieces are
under nitrogen pressure.
Inspect for shipping damage while machine and burner
are still on shipping conveyance. If either appears to be dam-
aged or has been torn loose from its anchorage, have it ex-
amined by transportation inspectors before removal. Forward
claim papers directly to transportation company. Manufac-
turer is not responsible for any damage incurred in transit.
Check all items against shipping list. Immediately notify
your Carrier office if any item is missing.
To prevent loss or damage, leave all parts in original pack-
ages until installation.
Check Shipping Vacuum — To check for leaks that
have occurred during shipment on single-piece machines:
1. Connect an absolute pressure gage to a service valve.
2. Record the absolute pressure of the assembly. If vessel
pressure is greater than 0.28 in. (7 mm) of mercury, the
machine has acquired a leak in shipping, and must be leak
tested. Refer to the Machine Leak Test procedure for in-
structions.
Check Shipping Pressure — To check for leaks that
have occurred during shipment on 2-piece machines:
1. Connect a pressure gage (30 psig [200 k Pa]) to a service
valve on each piece.
2. If the vessel has lost its pressure, it has acquired a leak
during shipping and must be leak tested after positioning
and assembly. Refer to the Machine Leak Test section for
instructions.
Provide Machine Protection — If the machine will
not be installed immediately, it is very important to use a
drop cloth or plastic covering to protect the machine from
construction dirt and moisture before installation. Also, do
not remove protective shipping cover on control panel until
ready to use.
2


