


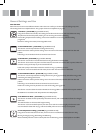
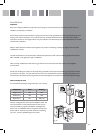

Changing the Oven Lamp
Before any maintenance is started involving electrical
parts, the oven must be disconnected from the power
supply.
If the oven has been in use, let the oven cavity and the
heating elements cool down before attempting any
maintenance.
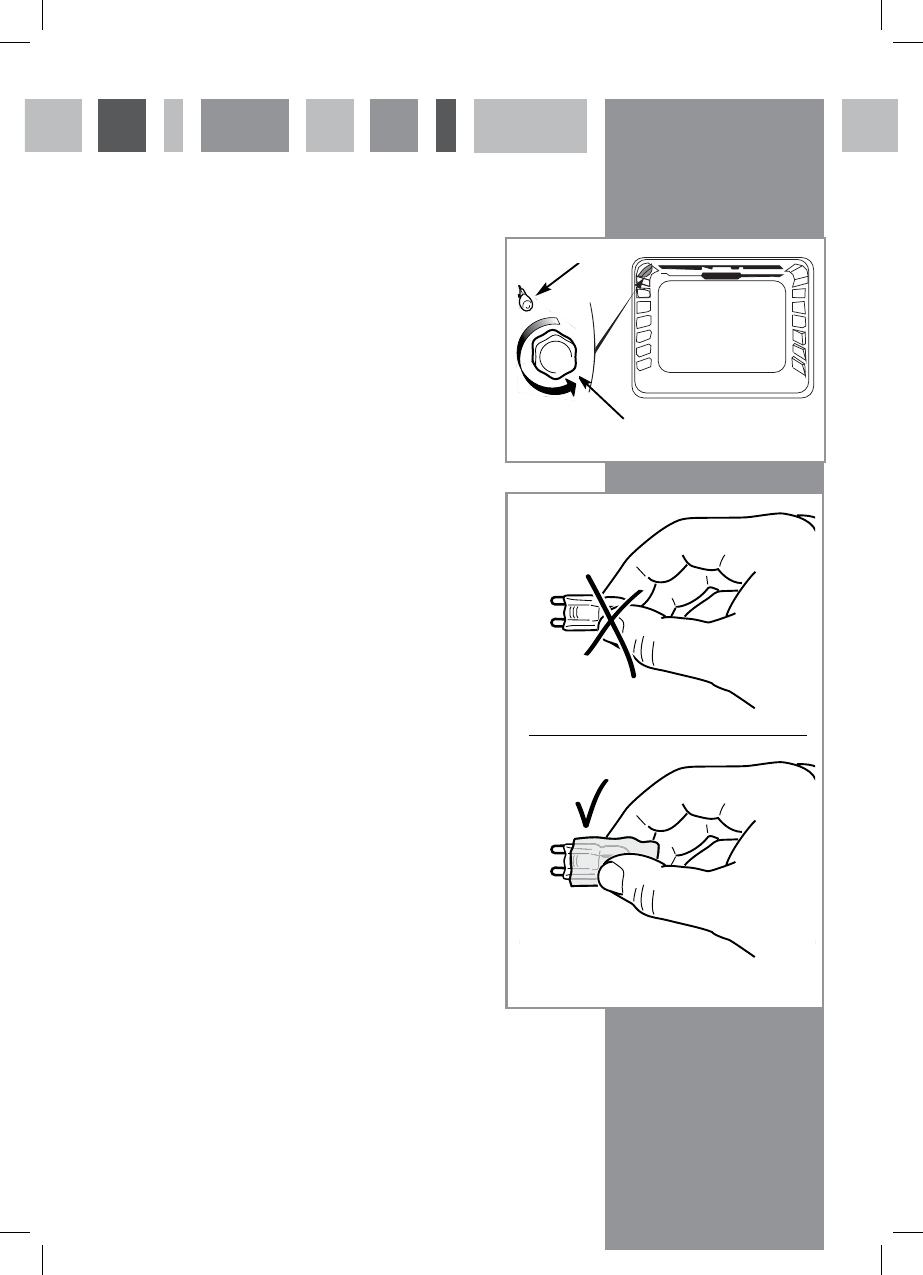
Never replace the bulb with bare hands as contamination
from your fingers can cause premature failure. Always
use a clean cloth or gloves.
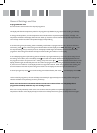
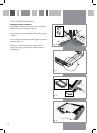
Changing the bulb
Unscrew the protective cover.
Carefully remove the bulb and replace with a new one suitable
for high temperatures with the same specification as the
original bulb.
Refit the protective cover.
Fig. 8
Fig. 9
26
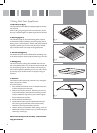
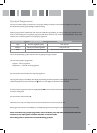
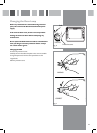
Replacing the Halogen Oven Light
WARNING: Ensure the appliance is sw itched o before replacing the lamp to avoid the
possibility of electric shock .
– Let the oven cavity and the heating elements to cool down;
– Switc
To p Right Lamp:
– Remove the protective co ver C (fig. 8);
– Replace the halogen lamp B with a new one suitable for high temperatures
having the following specifications: 230V and same power (ch eck watt
pow er as stamped in the lamp itself) of the replaced lamp.
IMPORTANT WARNING: Neve r replace the bulb with bare hands;
co ntamination from your fingers can cause premature failure.
Always use a clean cloth or gloves.
– Refit the protective co ver;
Left Lamp:
– Remove the left wire rack by unscrewing the fixing screw s.
– Press down from the top the protective cover A (fig. 8) and remove it by
rotating on the lower side. IMPORTANT : neve r use screwdrivers or other
utensils to remove the cover A. This could damage the enamel of the oven
or the lampholder. Operate only by hands.
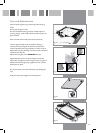
– Replace the halogen lamp B with a new one suitable for high temperatures
having the following specifications: 230V and same power (ch eck watt
power as stamped in the lamp itself) of the replaced lamp.
IMPORTANT WARNING: Neve r replace the bulb with bare hands;
co ntamination from your fingers can cause premature failure.
Always use a clean cloth or gloves.
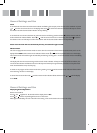
– Refit the protective
co ver A operating in reverse order.
ATTENTION: the notch in the inner edge of the co ver must be oriented
tow ard the lamp.
– Assemble the left wire rack.
Note: Oven bulb replacement is not covered by your guarantee.
A
B
B
C
1
2
A
A
Fig. 8
WRONG
CORREC T
CORRECT
WRONG
26
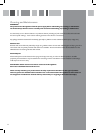
Replacing the Halogen Oven Light
WARNING: Ensure the appliance is sw itched o before replacing the lamp to avoid the
possibility of electric shock .
– Let the oven cavity and the heating elements to cool down;
– Switc
To p Right Lamp:
– Remove the protective co ver C (fig. 8);
– Replace the halogen lamp B with a new one suitable for high temperatures
having the following specifications: 230V and same power (ch eck watt
power as stamped in the lamp itself) of the replaced lamp.
IMPORTANT WARNING: Neve r replace the bulb with bare hands;
co ntamination from your fingers can cause premature failure.
Always use a clean cloth or gloves.
– Refit the protective co ver;
Left Lamp:
– Remove the left wire rack by unscrewing the fixing screw s.
– Press down from the top the protective cover A (fig. 8) and remove it by
rotating on the lower side. IMPORTANT : neve r use screwdrivers or other
utensils to remove the cover A. This could damage the enamel of the oven
or the lampholder. Operate only by hands.
– Replace the halogen lamp B with a new one suitable for high temperatures
having the following specifications: 230V and same power (ch eck watt
power as stamped in the lamp itself) of the replaced lamp.
IMPORTANT WARNING: Neve r replace the bulb with bare hands;
co ntamination from your fingers can cause premature failure.
Always use a clean cloth or gloves.
– Refit the protective
co ver A operating in reverse order.
ATTENTION: the notch in the inner edge of the cove r must be oriented
tow ard the lamp.
– Assemble the left wire rack.
Note: Oven bulb replacement is not covered by your guarantee.
A
B
B
C
1
2
A
A
Fig. 8
WRONG
CORRECT
Protective cover
Bulb
Unscrew
12